How to install the Hyper-V role in Windows Server

Before you are able to build a virtualized environment you will need to install and configure the Hyper-V role on your Windows 2008, Windows 2008 R2, Windows 2012 or Windows 2012 R2 server. The procedure is pretty much the same for all the above operating systems. You can install the role either through PowerShell or with the graphical Server Manager. I will demonstrate both methods.
Option 1 – PowerShell.
Launch PowerShell
- From Taskbar icon
- From Aps tiles menu
- Type PowerShell while on the tiles screen
Type Get-WindowsFeature to retrieve installed roles and features and to determine the name of the role you want to install.

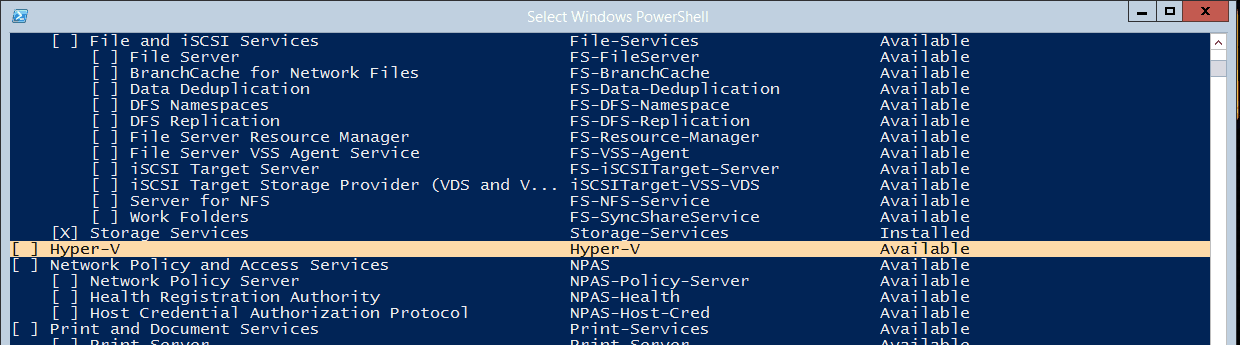
Note the name of the role we want to install is Hyper-V
Type Install-WindowsFeature Hyper-v –IncludeManagementTools
Note: Adding the –IncludeManagementTools switch will add the Hyper-V graphical management tools, otherwise you will have to install the tools separately. You could also install the feature RSAT-Hyper-V-Tools to add the graphical management tools.

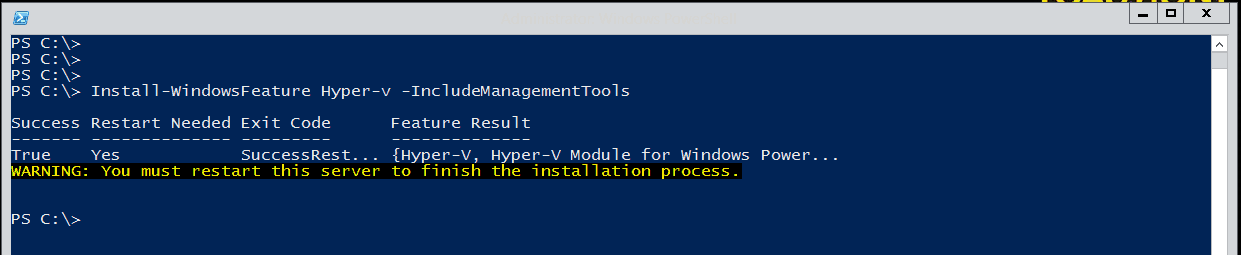
Ensure all windows are closed and work is saved. Type Restart-Computer.
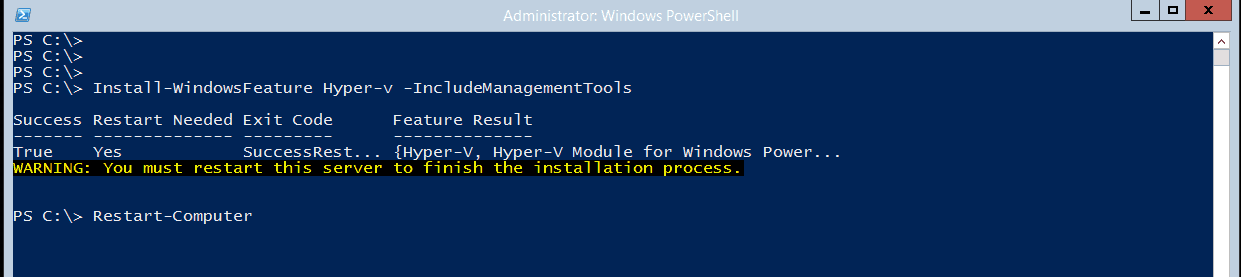
Hyper-V is now ready to be configured.
Option 2 – Server Manager.
Open Server Manager.
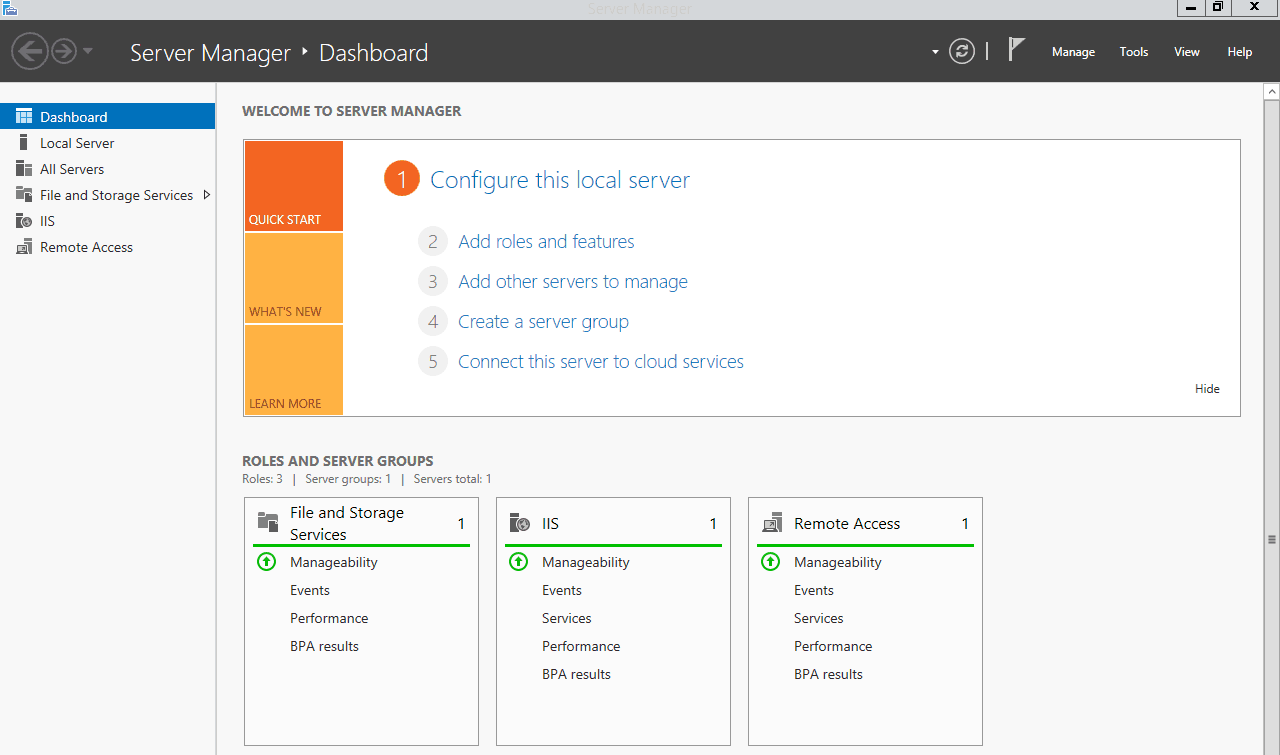
There are 2 ways to add roles and features on Server Manger.
- Clicking on Add roles and features on the Dashboard.
- Selecting Add Roles and Features in the Manage drop down menu.
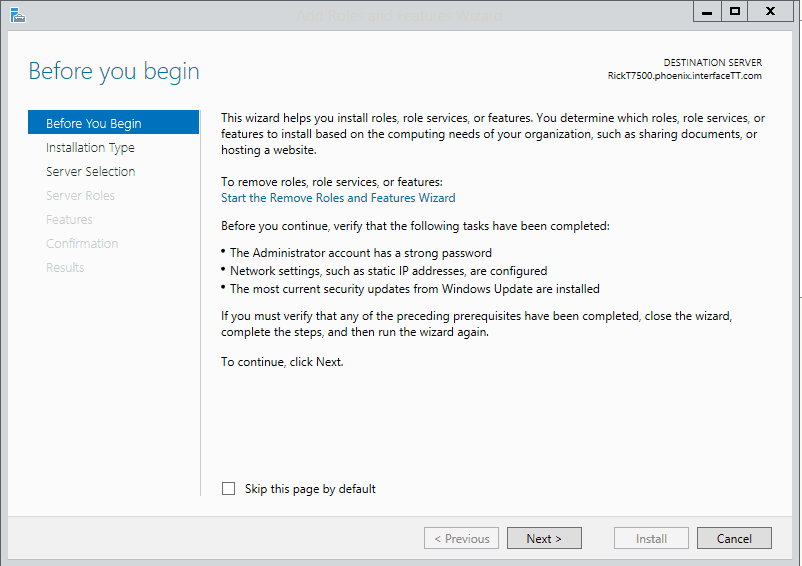
On the Before you begin, click Next.
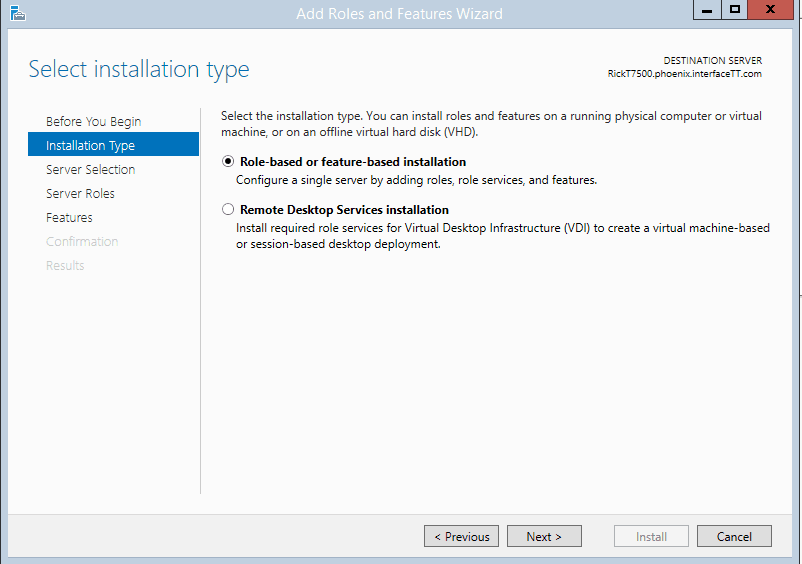
On the Select installation type, click Next
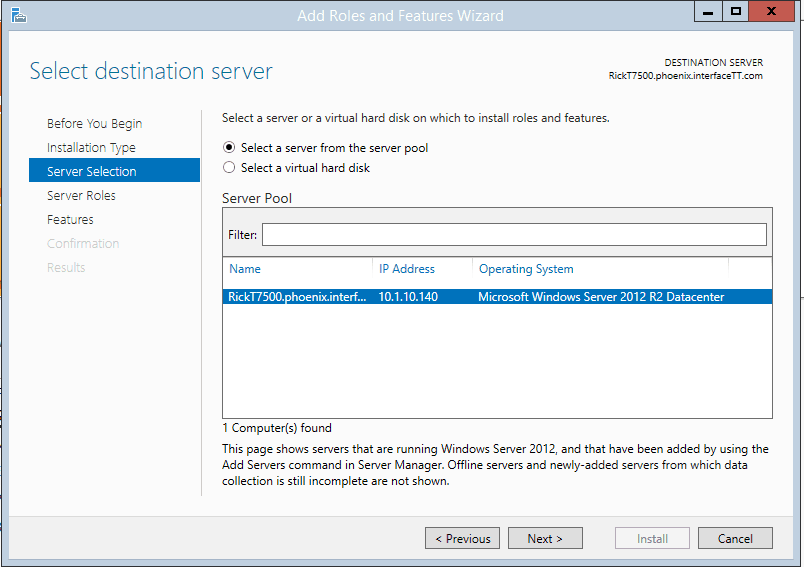
On the Select destination server, select the desired server, click Next.
Note: If you have connected your Server Manager to another server you could install Hyper-V remotely to that server is you are running Windows Server 2012 or Windows Server 2012 R2.
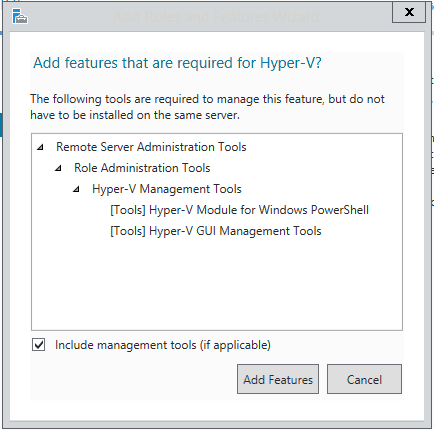
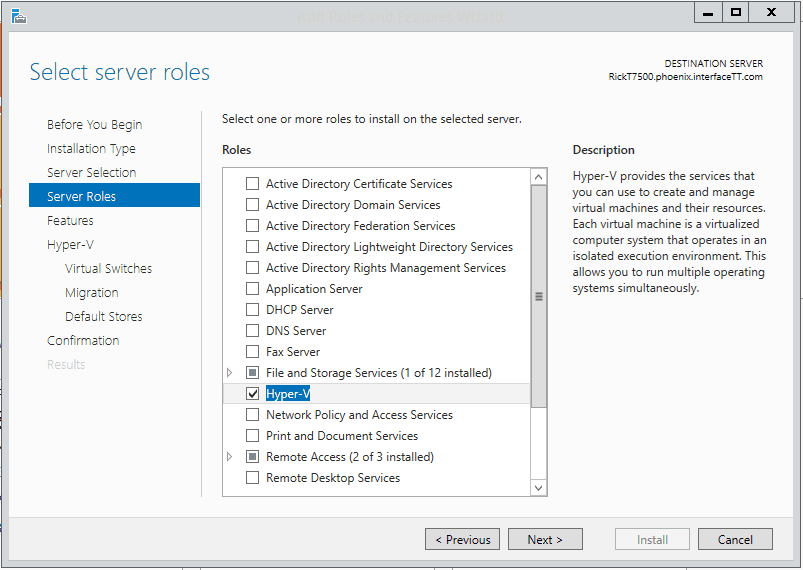
On the Select server roles, select Hyper-V, when the Add features that are required for Hyper-V appears, click Add Features.
On the Select server roles, click Next.
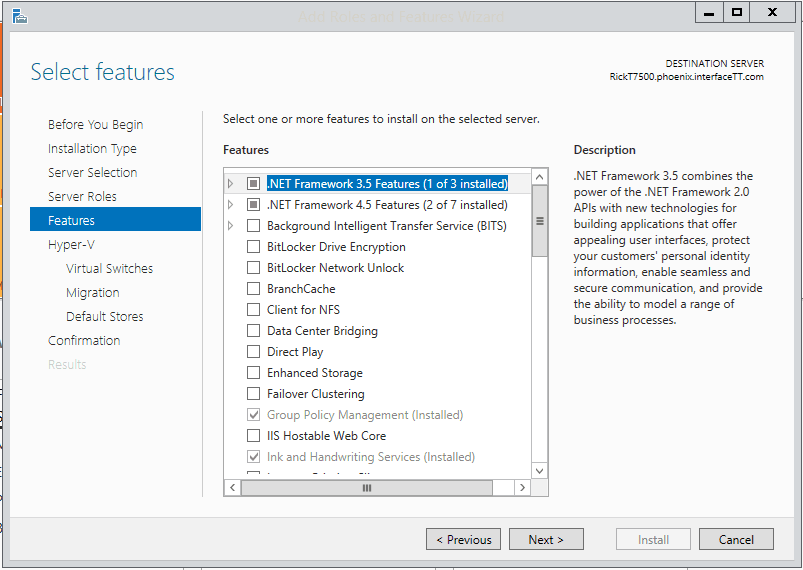
On the Select features, click Next
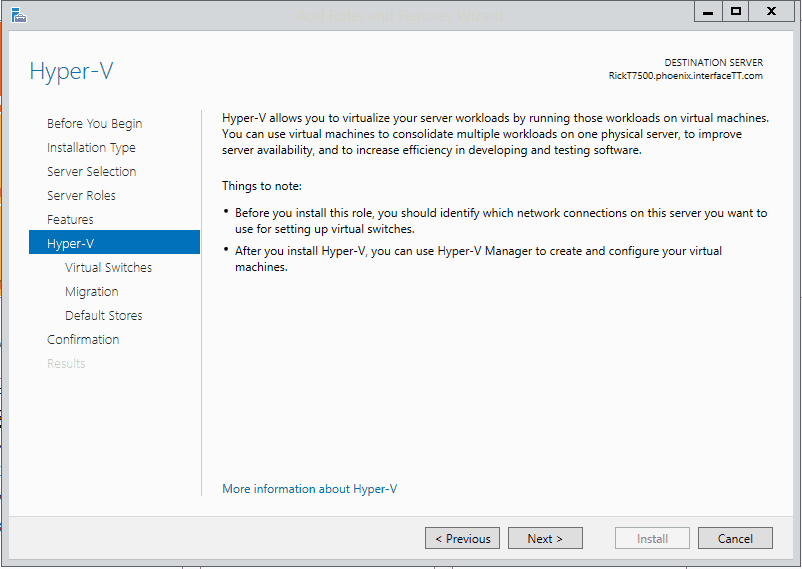
Read the Hyper-V screen, click Next
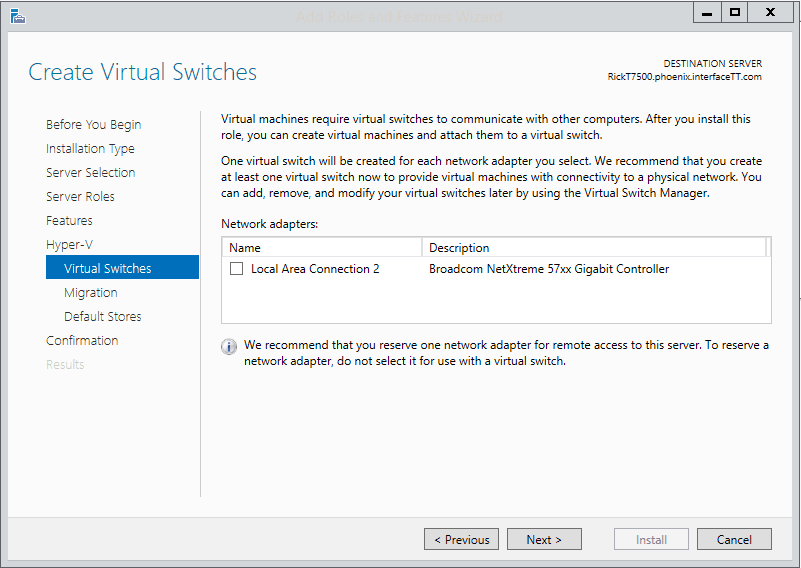
Create Virtual Switches, if you are going to be connecting the virtual machines to the host machines external interface, you would select the Local Area Connection, click Next.
Note: At this time I am not going to connect to the external interface.
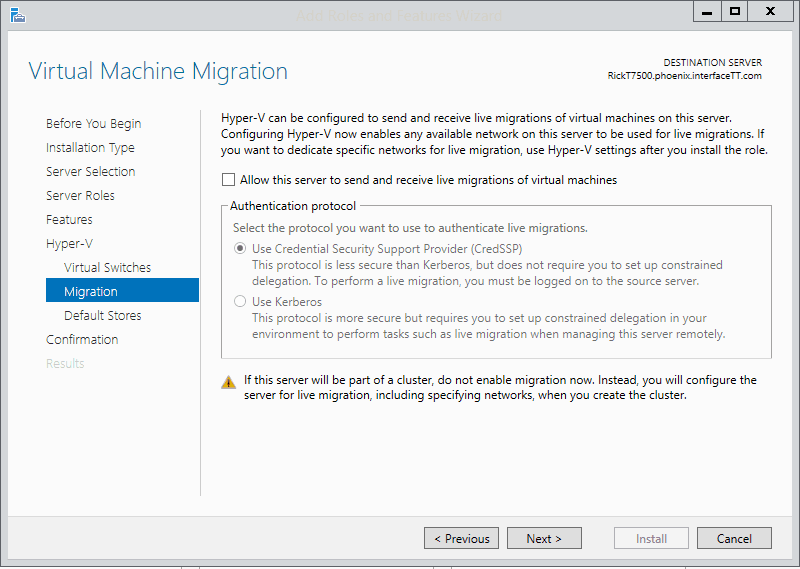
On the Virtual Machine Migration, click Next.
Note: If you need to support Live Migrations from the get go you can select Allow this server to send and receive live migrations of virtual machines. This setting can be configured post installation of Hyper-V.
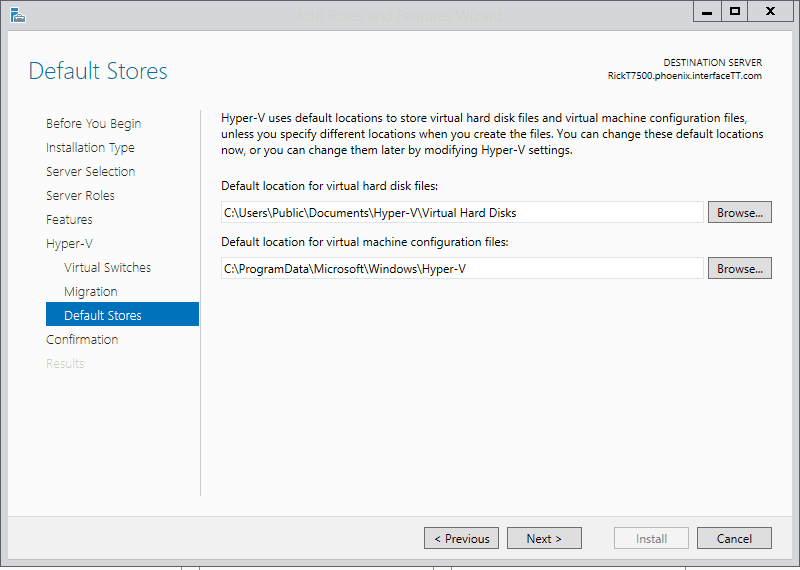
On the Default Stores, modify the default locations as needed, click Next.
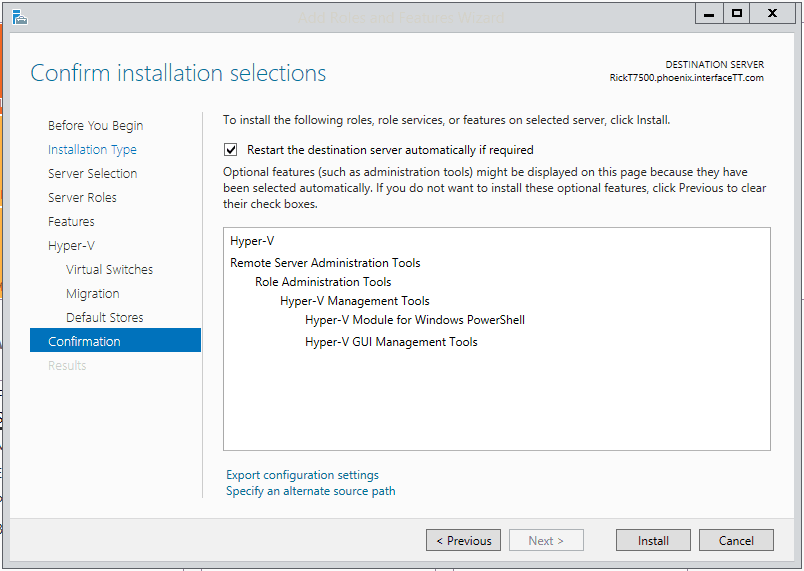
On the Confirm installation selections, select Restart the destination server automatically if required. Select Yes on the warning screen.
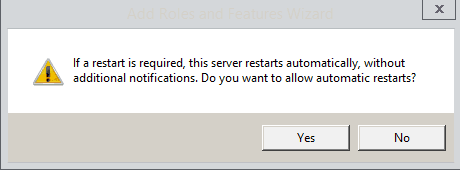
Note: Hyper-V does require a restart when installing. Before clicking on Install, ensure you save all your work and close applications. The server will restart without prompting the user to save their work.
After the server restarts logon and if needed launch Server Manager. A Installation progress screen will appear, click Close when the installation has completed.
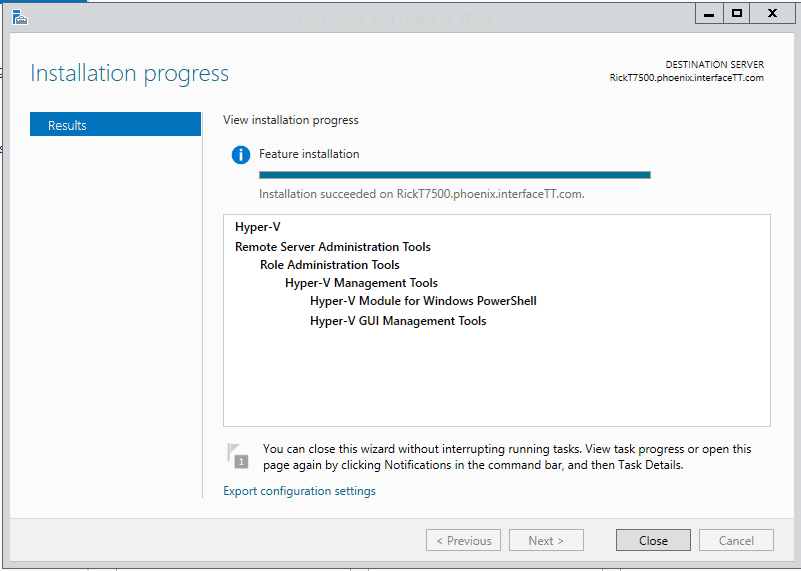

Hyper-V is now installed and ready for configuration.
Until next time, RIDE SAFE!
Rick Trader
Windows Server Instructor – Interface Technical Training
Phoenix, AZ


 and (WINS)")

A Simple Introduction to Cisco CML2
Mark Jacob, Cisco Instructor, presents an introduction to Cisco Modeling Labs 2.0 or CML2.0, an upgrade to Cisco’s VIRL Personal Edition. Mark demonstrates Terminal Emulator access to console, as well as console access from within the CML2.0 product. Hello, I’m Mark Jacob, a Cisco Instructor and Network Instructor at Interface Technical Training. I’ve been using … Continue reading A Simple Introduction to Cisco CML2
Creating Dynamic DNS in Network Environments
This content is from our CompTIA Network + Video Certification Training Course. Start training today! In this video, CompTIA Network + instructor Rick Trader teaches how to create Dynamic DNS zones in Network Environments. Video Transcription: Now that we’ve installed DNS, we’ve created our DNS zones, the next step is now, how do we produce those … Continue reading Creating Dynamic DNS in Network Environments
Cable Testers and How to Use them in Network Environments
This content is from our CompTIA Network + Video Certification Training Course. Start training today! In this video, CompTIA Network + instructor Rick Trader demonstrates how to use cable testers in network environments. Let’s look at some tools that we can use to test our different cables in our environment. Cable Testers Properly Wired Connectivity … Continue reading Cable Testers and How to Use them in Network Environments