Windows Server 2008 and 2012 Network Load Balancing (NLB) Cluster using PowerShell

One of the major improvements to NLB in Windows Server 2008R2 and Windows Server 2012 is the addition of a NetworkLoadBalancingClusters module to PowerShell. When the NLB-RSAT are installed 35 new NLB related CMDlets are available. In this blog we will be exploring some of the new CMDlets.
Installing Network Load Balancing Cluster.
To install the NLB feature and NLB-RSAT tool set type the following, Install-windowsfeature NLB,RSAT-NLB
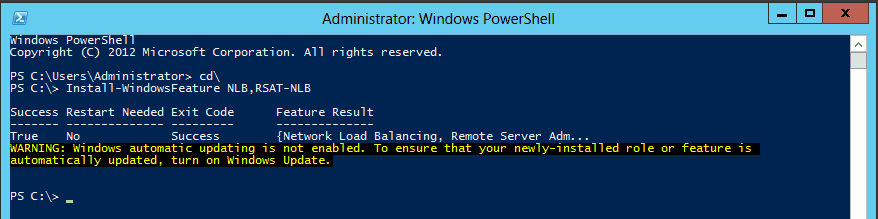
Note: In Windows Server 2008R2 the CMDlet to install a windows feature is add-windowsfeature.
To view a complete list of NLB CMDlets type the following CMDlet, Get-command -module NetworkLoadBalancingClusters
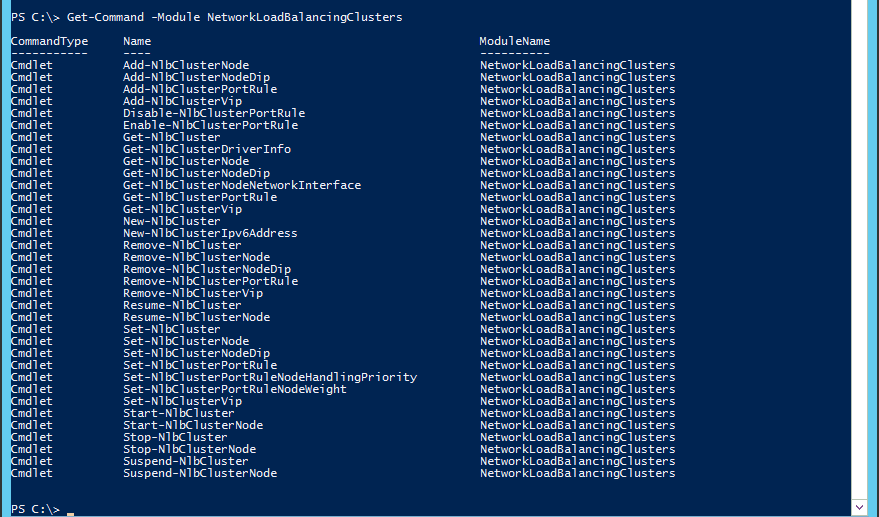
Note: On Windows Server 2008R2 the NLB Manifest must be imported first before viewing a list of CMDlets. To import the Manifest type Import-Module NetworkLoadBalancingClusters.
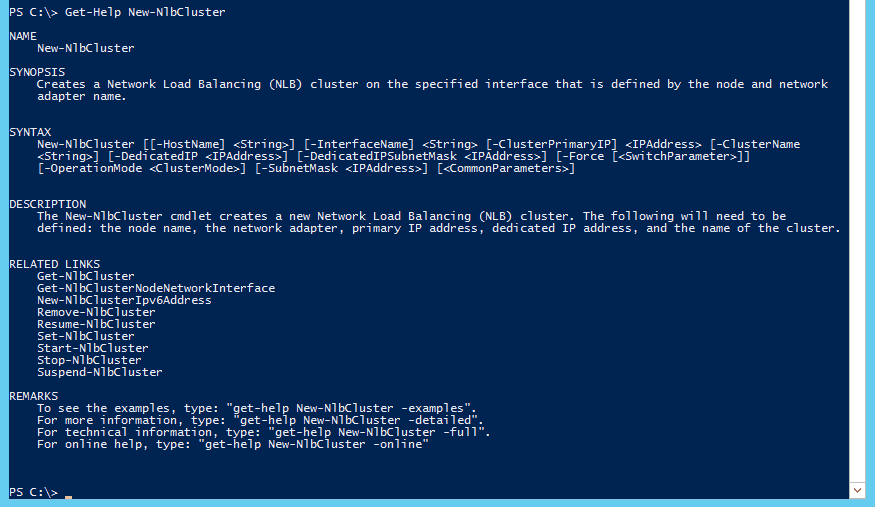
To get help on and individual CMDlet use the built in help system of PowerShell, ie Get-help New-NLBCluster Use the -Full, -Detailed, -Online or -Examples for more information.
Scenario:
A network load balancing cluster needs to be configured using USSHQSVR1 and USSHQSVR2. The cluster name will be USSHQNLB.
Creating the NLB Cluster, use the following steps to configure:
- To create a new NLB cluster the New-NLBCluster CMDlet will be used. On Server1 launch PowerShell to configure NLB on the first server, type the following CMDlet, New-NLBCluster -Interface “Ethernet” -OperationMode Multicast -ClusterPrimaryIP 172.16.10.101 -ClusterName USSHQNLB

- Interface – is the user friendly name displayed for the desired interface in the Network and Sharing Center. In my example my interface name was Ethernet. The default name may be Local Area Connection.
- OperationMode
- Unicast – All cluster hosts use the same unicast MAC address. Suitable for NLB Clusters with a single network card.
- Multicast – Each cluster host keeps it original MAC address, but is assigned an additional NLB Cluster MAC address. Suitable for NLB Clusters with multiple network card.
- Igmpmulticast – Special mode to prevent the switch from being flooded.
- ClusterPrimaryIP – Configures the primary IP address of the NLB Cluster.
- ClusterName – [Optional] Specifies the name of the NLB Cluster.
2. Port Rules are used to control how traffic is routed to the NLB Cluster nodes depending on port. If desired after creating the NLB cluster you may want to modify the NLB Port Rules. PowerShell provides a set of CMDlets to manage the NLB Port Rules. This should be accomplished prior to adding additional nodes to the NLB environment. The primary CMDlet for accomplishing this task is Set-NLBClusterPortRule.
- Set-NLBClusterPortRule
- NewStartPort – Specifies the new start port for the cluster port rule. The acceptable range is between 0 and 65535.
- NewEndPort – Specifies the new end port for the cluster port rule. The acceptable range is between 0 and 65535.
- NewAffinity – Specifies the new affinity for the cluster port rule. There are three possible values for port rule affinity: none, single, and network.
- Add- NLBClusterPortRule.
- Used to add a new port rule.
- Disable- NLBClusterPortRule.
- Used to disable a new port rule.
- Enable- NLBClusterPortRule.
- Used to enable a new port rule.
- Remove- NLBClusterPortRule.
- Used to remove a new port rule.
Adding Nodes to the NLB Cluster.
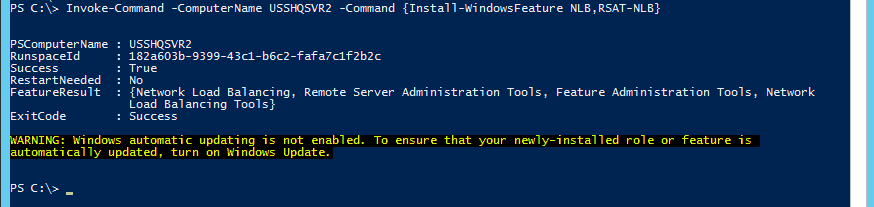
1. The additional node can be configured either locally or remotely. In this demo I will be configuring it remotely. Using PowerShell type Invoke-Command -Computername USSHQSVR2 -Command {Install-Windowsfeature NLB,RSAT-NLB} to install the NLB feature on USSHQSVR2.
2. To add the USSHQSVR2 to the NLB Cluster type the following, Add-NlbClusterNode -InterfaceName “Ethernet” -NewNodeName “USSHQSVR2” -NewNodeInterface “Ethernet”

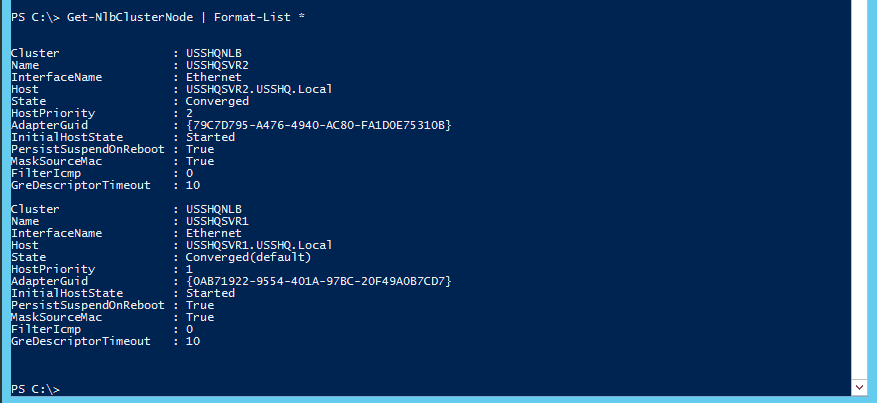
3. A 2 node NLB Cluster is now configured, to view the NLB Cluster type Get-NLBClusterNode | Format-List * (See figure 7). To verify the NLB Cluster IIS could be installed, using the default website make an obvious change to the landing page on one server. Create and entry in DNS for the NLB Cluster IP Address and connect to the Website for a client. Disconnect or disable the NIC on the sever you connected to and refresh the screen. You should see the landing page on the other server.
Your Network Load Balancing Cluster is now all configured and tested. Until next time Ride Safe!
Rick Trader
Windows Server Instructor – Interface Technical Training
Phoenix, AZ


A Simple Introduction to Cisco CML2
Mark Jacob, Cisco Instructor, presents an introduction to Cisco Modeling Labs 2.0 or CML2.0, an upgrade to Cisco’s VIRL Personal Edition. Mark demonstrates Terminal Emulator access to console, as well as console access from within the CML2.0 product. Hello, I’m Mark Jacob, a Cisco Instructor and Network Instructor at Interface Technical Training. I’ve been using … Continue reading A Simple Introduction to Cisco CML2
Creating Dynamic DNS in Network Environments
This content is from our CompTIA Network + Video Certification Training Course. Start training today! In this video, CompTIA Network + instructor Rick Trader teaches how to create Dynamic DNS zones in Network Environments. Video Transcription: Now that we’ve installed DNS, we’ve created our DNS zones, the next step is now, how do we produce those … Continue reading Creating Dynamic DNS in Network Environments
Cable Testers and How to Use them in Network Environments
This content is from our CompTIA Network + Video Certification Training Course. Start training today! In this video, CompTIA Network + instructor Rick Trader demonstrates how to use cable testers in network environments. Let’s look at some tools that we can use to test our different cables in our environment. Cable Testers Properly Wired Connectivity … Continue reading Cable Testers and How to Use them in Network Environments
See what people are saying...