Configuring a Windows 8 Dev Environment with Hyper-V and Visual Studio 11

Here is how I set up my Dev environment for Windows 8 using Hyper-V. I am running Server 2008 R2 fully patched with the Hyper-V Role.
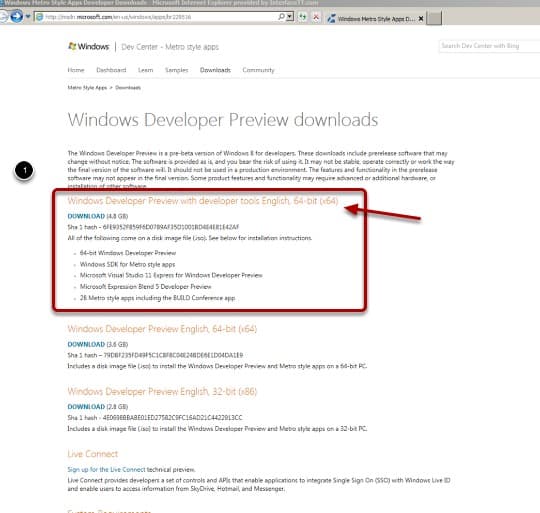
I went to Windows Developer Preview Downloads to download the ISO.
Make sure to use the Windows Developer Preview with developer tools English, 64-bit (x64)
Download the ISO
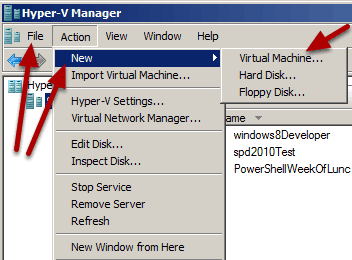
Now I’ll create a new Virtual Machine in Hyper-V
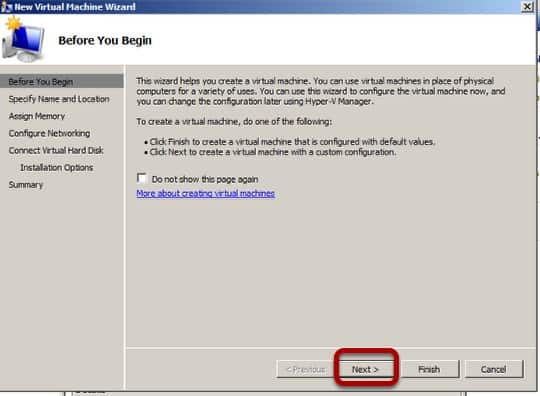
This starts the wizard, on the first screen I just click next.
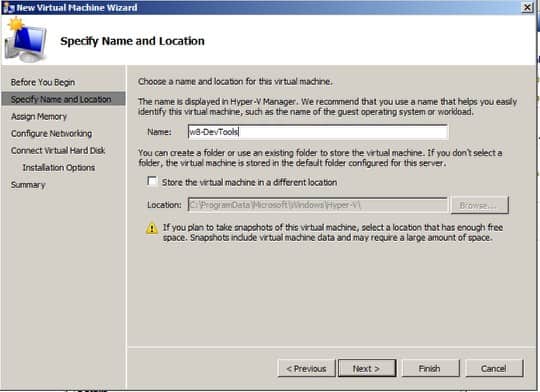
On the next window I give my virtual machine a name. I’m calling this one w8-DevTools
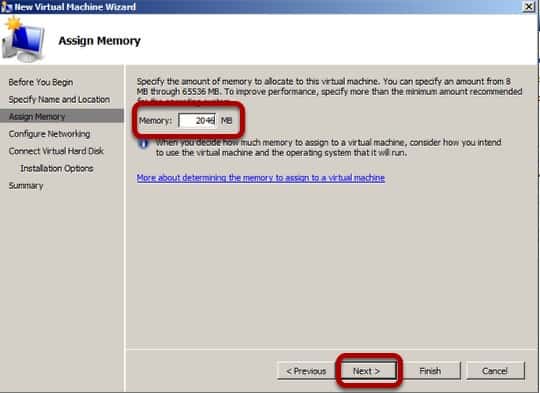
I’m going to assign this VM 2046MB of memory.
I’m choosing a network i have set up in my virtual environment so of course others will be different here.
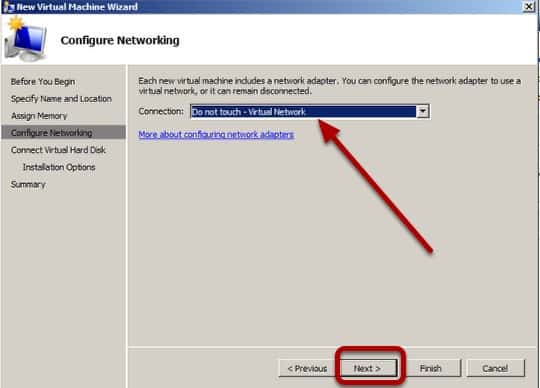
After selecting the virutal network i want to use, I click Next.
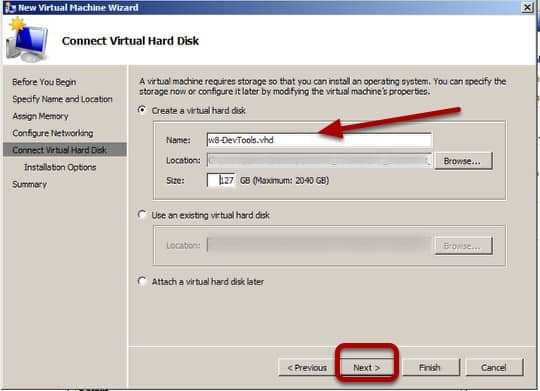
This takes me to Create a virtual hard disk which I leave as is. (The path is blurred out in this image.)
Here’s where I browse to my dowloaded ISO after selecting the Install an operating system from a boot CD/DVD-Rom radio button.

I always take a look at the Completing the New Virtual Machine Wizard just to make sure everything looks right, then if it does I click Finish.

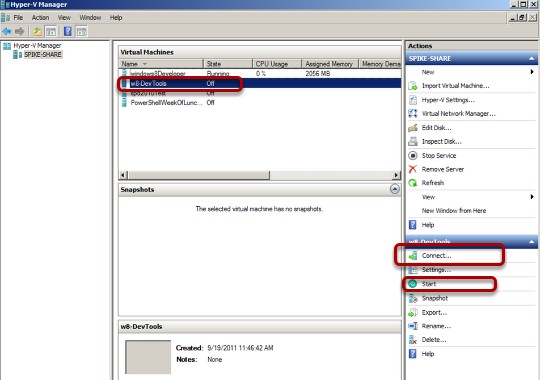
With the new w8-DevTools Virtual Machine highlighted in Hyper-V Manager I click on the Start button and then Connect.
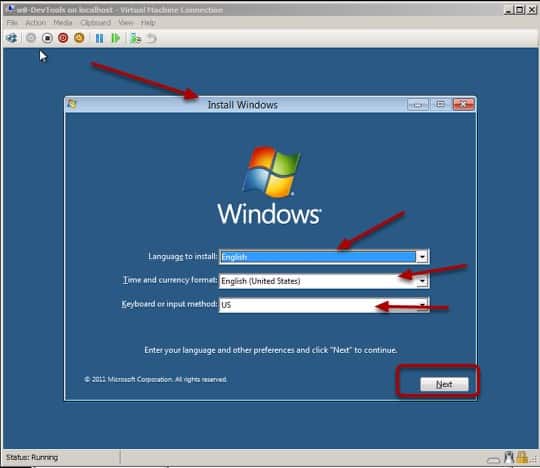
The machine boots up and soon I am presented with the Install Windows wizard. I’ll keep the defaults here and click Next.
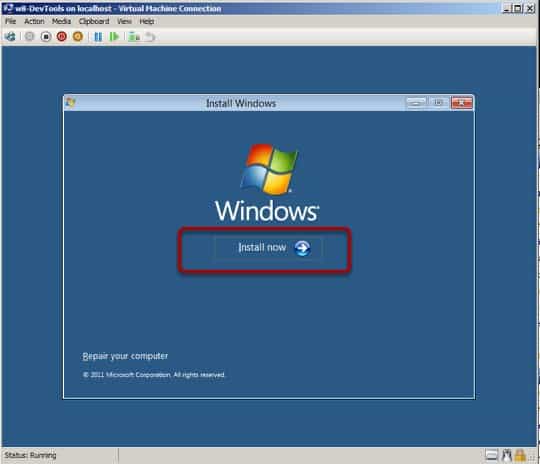
I click Install now!
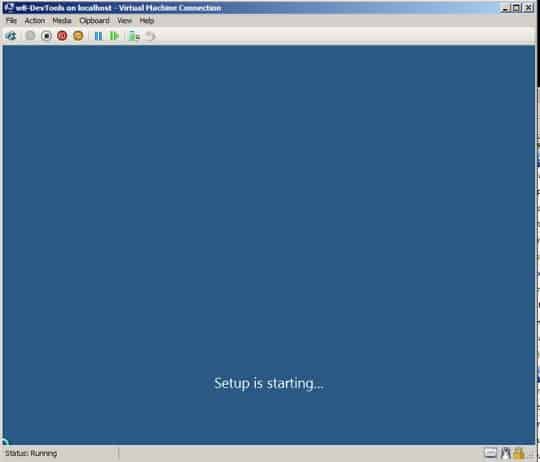
This will cause the Setup is Starting Screen to appear.
Setup is Starting.
Soon the liscence terms screen appears.
I accept! and click Next.
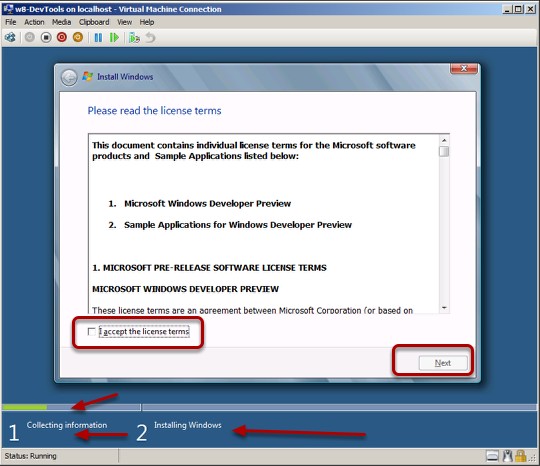
Notice the cool UI at the bottom.
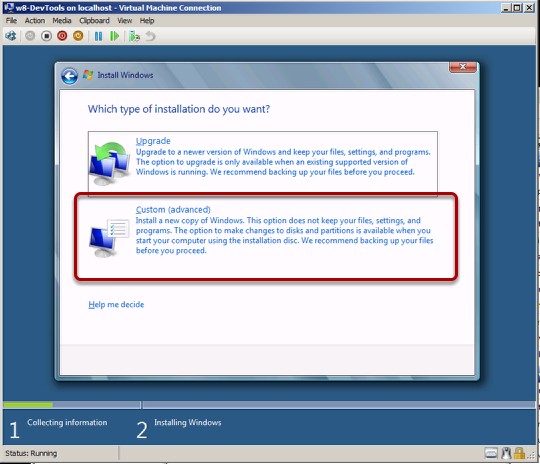
I’ll choose Custom (advanced) because this is a brand new virtual machine.
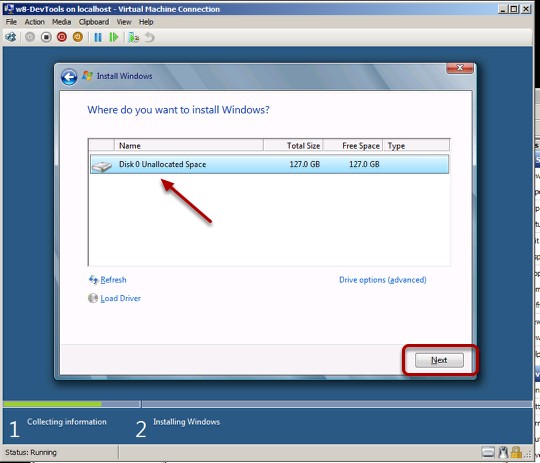
I’ll choose the default here on the Install Windows screen, then click Next.
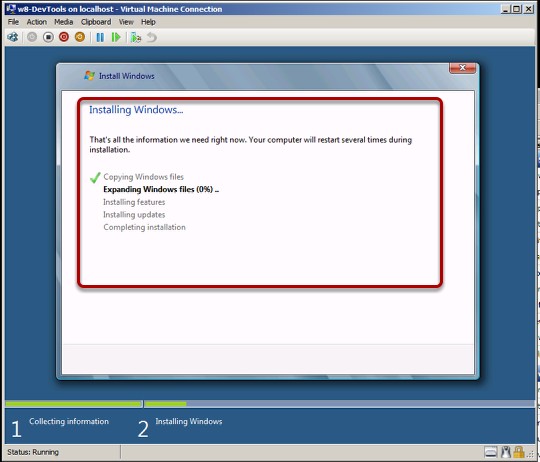
Installing Windows now…I wait until all the steps are completed. It’s a good time for a break!
When it’s done I am taken to the Liscence terms page for the Dev stuff. How awesome is the first line!

I accept and click the Accept button.
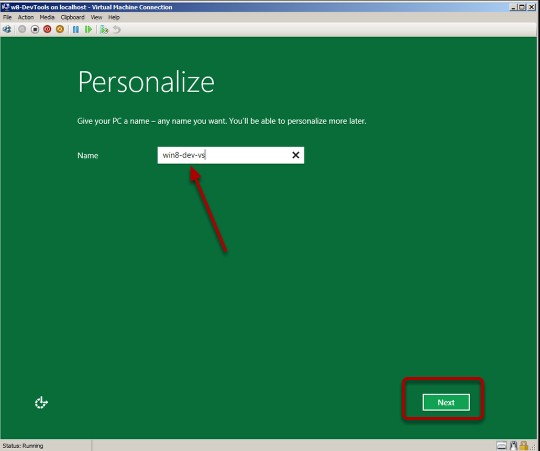
Personalize the install. A screen will flash quickly indicating that you will be personalizing the settings and then I ended up here. I called this machine: win8-dev-vs and clicked next.
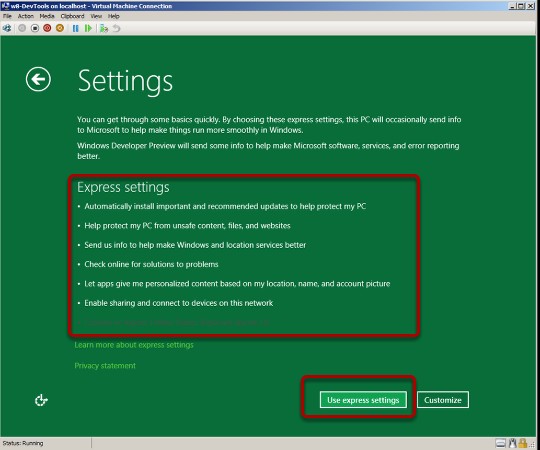
I’m choosing Use express settings.
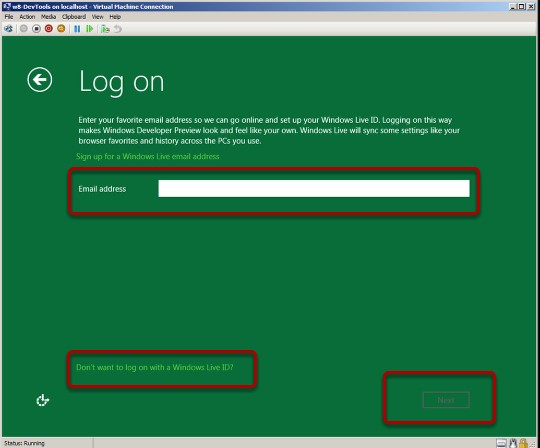
if you don’t want to use a windows live id you can click the link below. I’m using mine. Then I clicked Next.
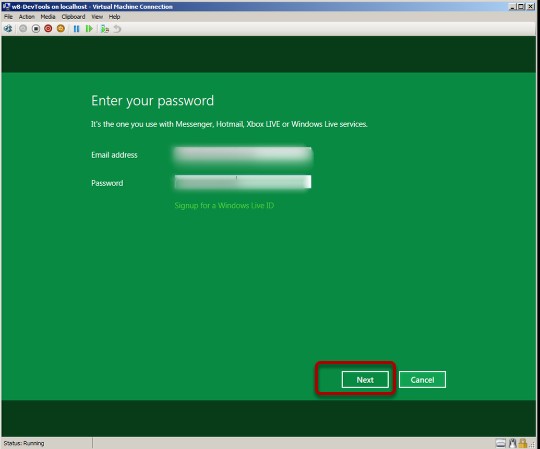
Next is the enter password screen that I filled out and hit next.
This caused me to log on and then it prepared the PC.
The Preparing your PC screen lasts for a few moments then it sends you to

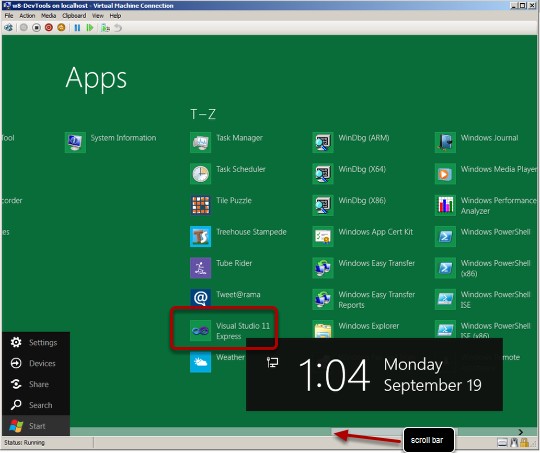
I got a blank green screen when it was all over. I have found in Windows 8, when in doubt type something. As soon as I typed something it lit up to this.
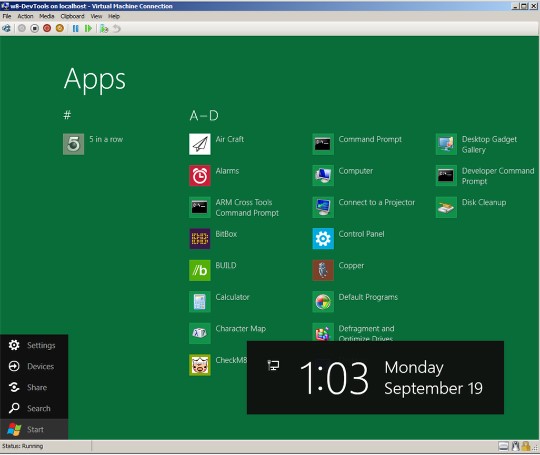
When I click on the screen a scroll bar appears at the bottom. I use that to scroll to the right until I see Visual Studio 11 Express!!!! and I click that.
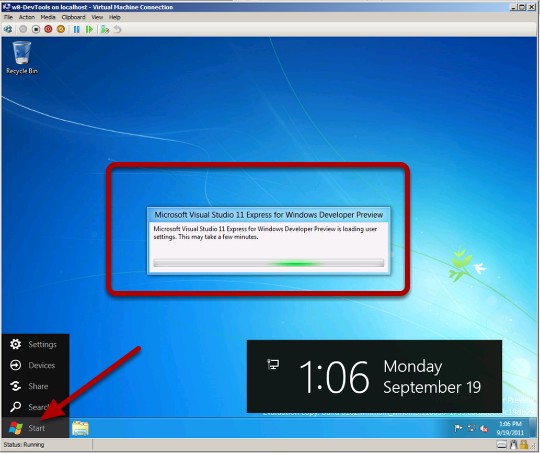
When I click this it takes me to a traditional looking Windows 7 like interface. The Start menu is NOT the same though, and starts to install Visual Studio 11 Express.
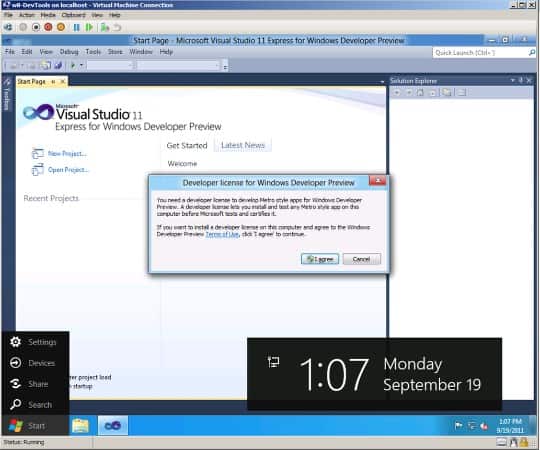
When it’s done you’ll be asked to install a develper license.
Developer license for Windows Developer Preview.
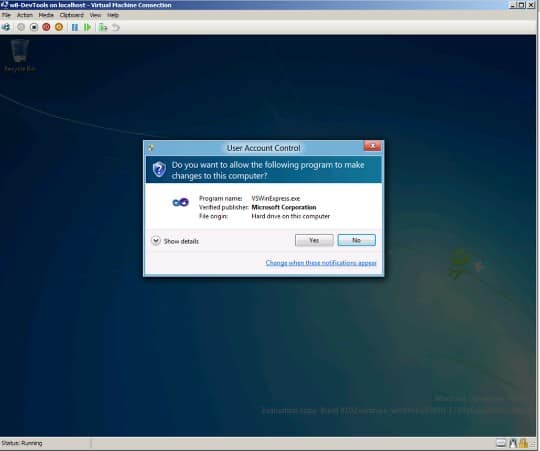
User Account Control comes up and I click Yes.
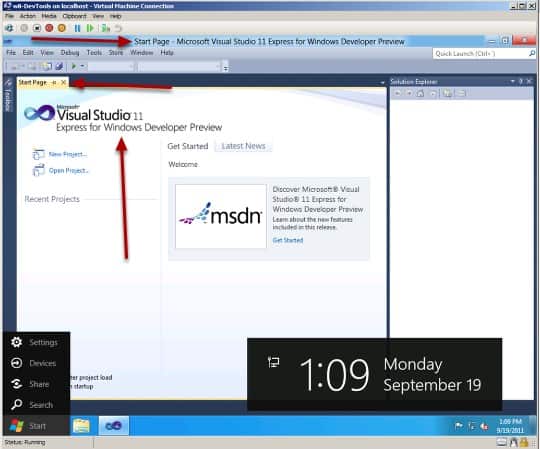
Success the Visual Studio 11 Express for Windows Developer Preview Start Page! That’s it I’m ready to start coding!
It’s ready to go. In this blog entry I went step by step in setting up a virtual development machine using Hyper-V, Windows-8, and Visual Studio 11! Enjoy. Soon to come step by step of some applications!


A Simple Introduction to Cisco CML2
Mark Jacob, Cisco Instructor, presents an introduction to Cisco Modeling Labs 2.0 or CML2.0, an upgrade to Cisco’s VIRL Personal Edition. Mark demonstrates Terminal Emulator access to console, as well as console access from within the CML2.0 product. Hello, I’m Mark Jacob, a Cisco Instructor and Network Instructor at Interface Technical Training. I’ve been using … Continue reading A Simple Introduction to Cisco CML2
Creating Dynamic DNS in Network Environments
This content is from our CompTIA Network + Video Certification Training Course. Start training today! In this video, CompTIA Network + instructor Rick Trader teaches how to create Dynamic DNS zones in Network Environments. Video Transcription: Now that we’ve installed DNS, we’ve created our DNS zones, the next step is now, how do we produce those … Continue reading Creating Dynamic DNS in Network Environments
Cable Testers and How to Use them in Network Environments
This content is from our CompTIA Network + Video Certification Training Course. Start training today! In this video, CompTIA Network + instructor Rick Trader demonstrates how to use cable testers in network environments. Let’s look at some tools that we can use to test our different cables in our environment. Cable Testers Properly Wired Connectivity … Continue reading Cable Testers and How to Use them in Network Environments
See what people are saying...