Creating a New Web Application using Central Administration in SharePoint 2010

I’m going to create a new SPWebApplication called which answers to the url sharepoint.local on my dev box / lab environment. I will have the SPWeb Application answer to http://sharepoint.local in my lab environment. I have already performed the necessary loopback registry settings changed for my Lab environment. I learned how to do that via the excellent Technet articles on that topic.
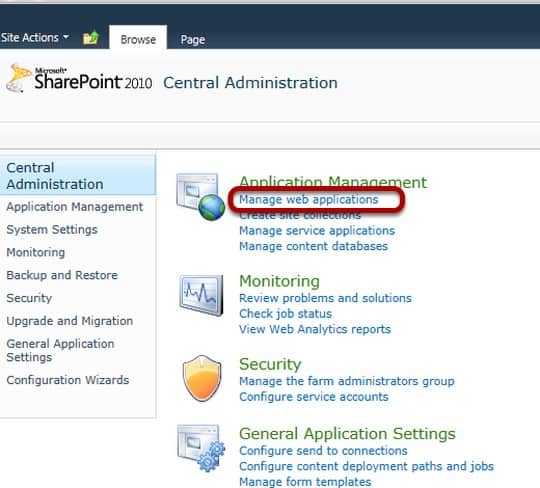
I am using Central Administration in this case but the SharePoint Management Shell is also an option (PowerShell). I will click on Manage Web Applications.
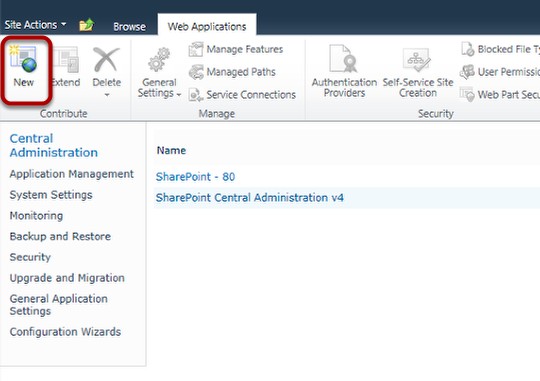
To create a new SPWebApplication I will click the New Button in the Ribbon.
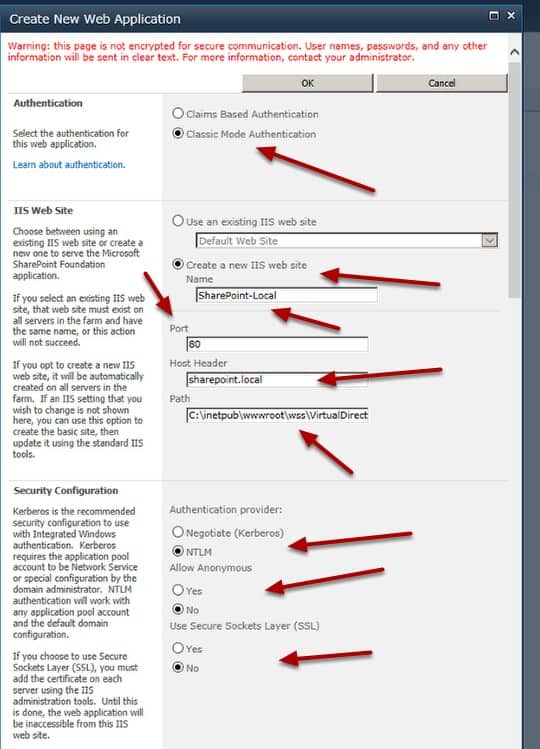
In this case since this is in a Development / Lab environment, I will keep the default classic mode authentication settings. I change the name of the IIS web site to something I will recognize when looking in the IIS Administrative tools. I change the Port to 80 since I will be using Host Headers and I add the Host Header sharepoint.local. I will need to add an A record to my DNS settings (not shown) in order for this to resolve. I leave the path at the default which is fine for my Lab environment. I leave the Authentication provider, Allow Anonymous and Use Secure Sockets Layer(SSL) at their defaults.
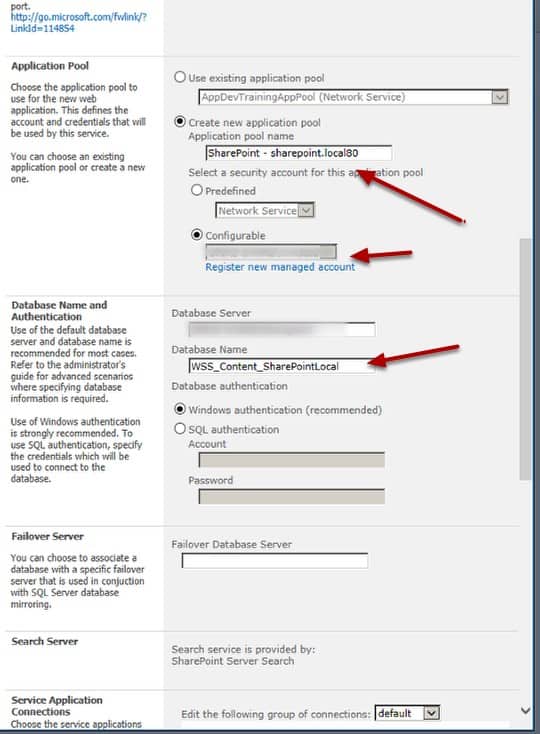
I will create a new Application pool and choose an existing managed account. I don’t always choose a new application pool, in fact, I normally don’t but in this case I wanted to have a separate one in case I do anything with this Web Application that I don’t want to affect the others running on this Lab machine. I change the Database Name (getting rid of the GUID) so that it is : WSS_Content_SharePointLocal I leave the defaults on the Database Authentication section.
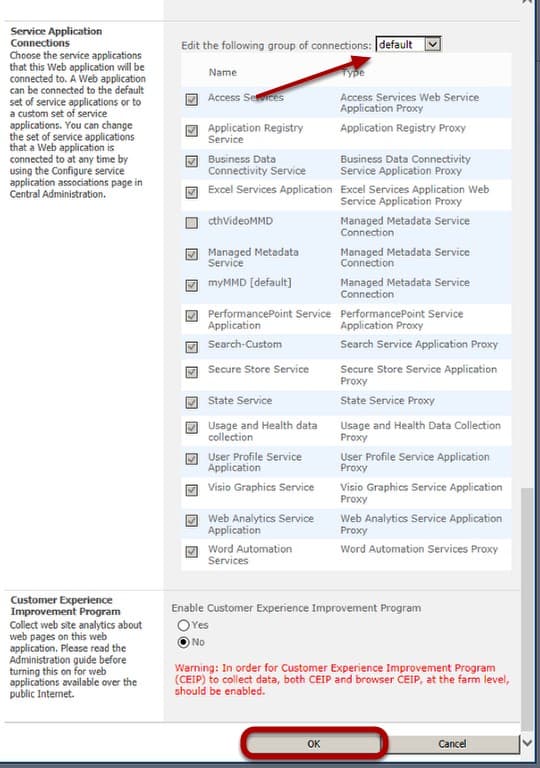
I use the default Service Application Proxy group. I have created a few Custom Service Application groups on this Lab Machine, but even if I was on a different Lab Machine, I would use that machines default group. I choose No for the Customer Experience Improvement Program (since this is a Lab Environment) and then click OK.
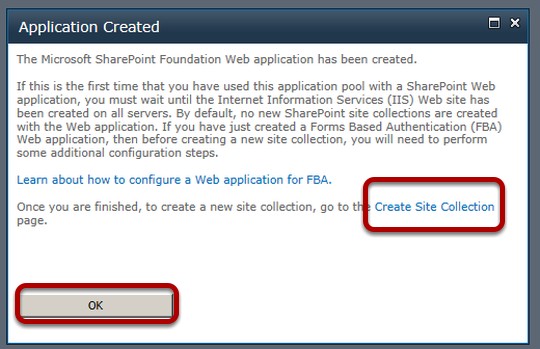
I click the Create Site Collection Link and then click OK
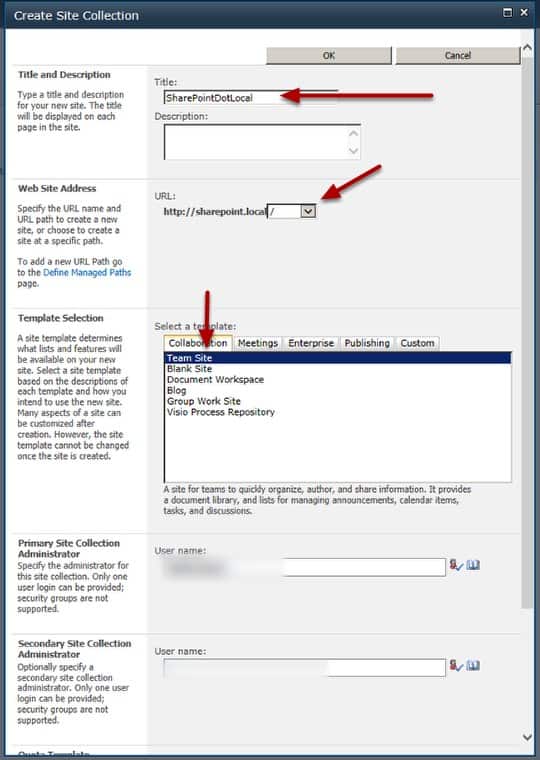
I create a Site Collection choosing a Team Site as the top level site template. I use the explicit managed path / and add the appropriate Site Collection Administrator(s)
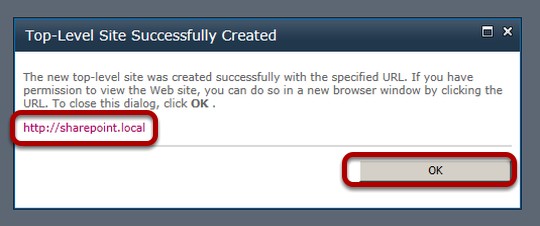
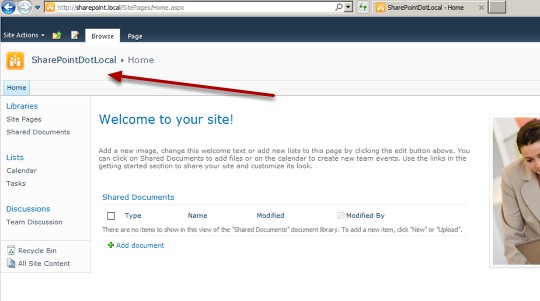
I click the link and if my DNS settings are correct I will be taken to the home page of the top level site of my new site collection.
Once I validated that, I can get to my new SPWeb site and will go to the browser settings and add it as part of the intranet. This normally prevents me from having a bunch of issues when adding new documents etc…


A Simple Introduction to Cisco CML2
Mark Jacob, Cisco Instructor, presents an introduction to Cisco Modeling Labs 2.0 or CML2.0, an upgrade to Cisco’s VIRL Personal Edition. Mark demonstrates Terminal Emulator access to console, as well as console access from within the CML2.0 product. Hello, I’m Mark Jacob, a Cisco Instructor and Network Instructor at Interface Technical Training. I’ve been using … Continue reading A Simple Introduction to Cisco CML2
Creating Dynamic DNS in Network Environments
This content is from our CompTIA Network + Video Certification Training Course. Start training today! In this video, CompTIA Network + instructor Rick Trader teaches how to create Dynamic DNS zones in Network Environments. Video Transcription: Now that we’ve installed DNS, we’ve created our DNS zones, the next step is now, how do we produce those … Continue reading Creating Dynamic DNS in Network Environments
Cable Testers and How to Use them in Network Environments
This content is from our CompTIA Network + Video Certification Training Course. Start training today! In this video, CompTIA Network + instructor Rick Trader demonstrates how to use cable testers in network environments. Let’s look at some tools that we can use to test our different cables in our environment. Cable Testers Properly Wired Connectivity … Continue reading Cable Testers and How to Use them in Network Environments