How Cisco network gurus can fine-tune Wireshark output
How Cisco network gurus can fine-tune Wireshark output
If you are a fan of Wireshark, you will enjoy the little tidbits I am going to share today. I have a sample network constructed inside GNS3, which I’m sure many of you already use. If not, may I take this moment to suggest you add it to your study materials! It is a free download, and if you have access to the actual Cisco IOS, you can build an entire network environment virtually – without having to purchase nuts and bolts equipment.
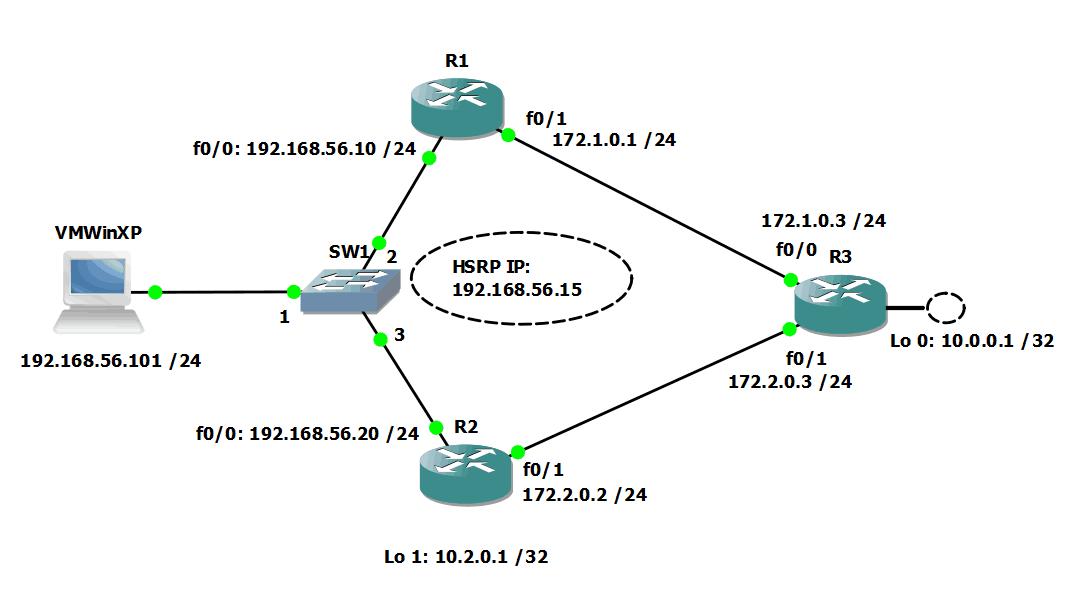
Anyway, here is my little network:
I built this to play with HSRP failover performance, but I wanted to use it for this blog just to show how you can fine-tune your Wireshark captures, or at least be more certain you are capturing the data you seek.
Once this was up and running, I got on my VMWinXP Virtual Box and generated some traffic to port 80 on R1. I have enabled ip http server on R1 to be able to respond to the requests.
It looked like this:
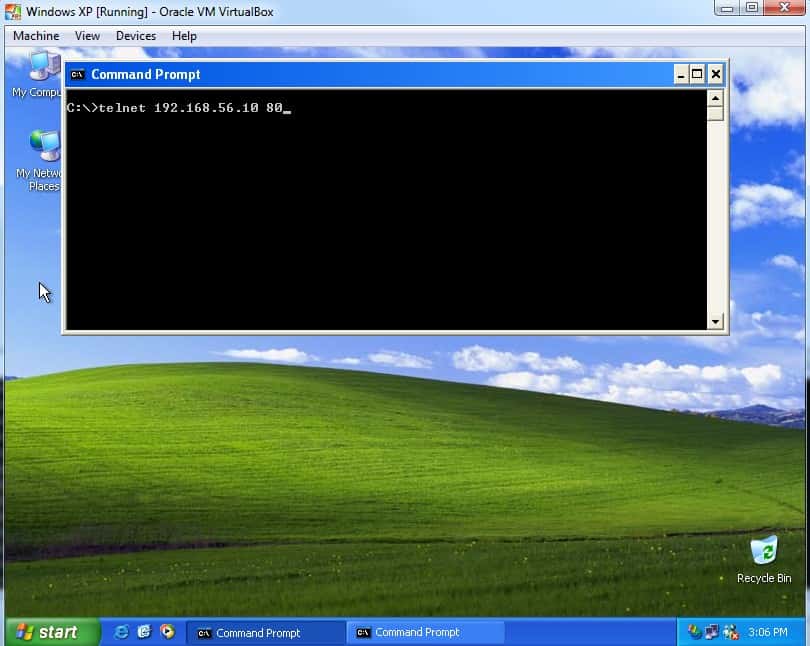
On the VM host, my commands looked like this:
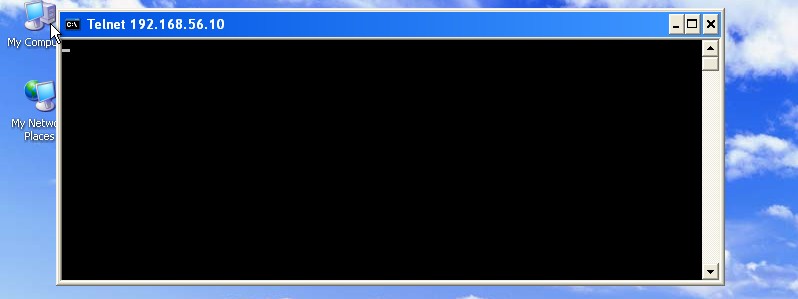
Once I hit [ENTER], I see this:
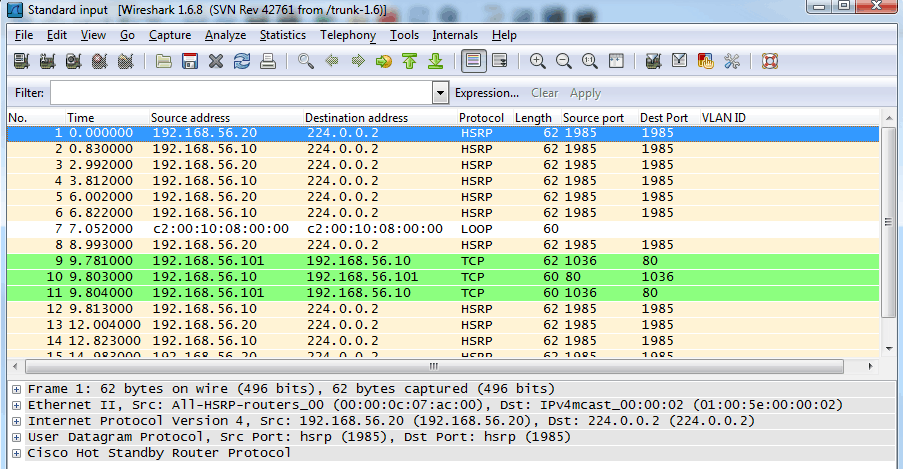
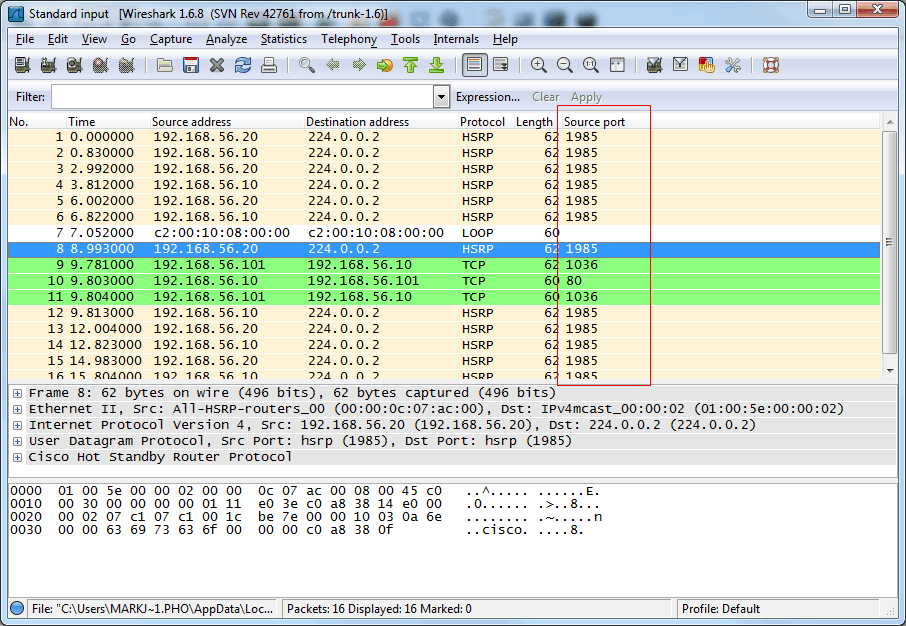
The blank window indicates that I have succeeded in reaching my target on the associated port. Let’s see that in Wireshark, with the extra tweak I used to monitor that I was capturing what I wanted. The actual Wireshark window looks like this:
Notice the lines highlighted in green. The column headings on the far right that interest us are Source port and Dest(ination) Port. You do not normally find those in Wireshark with the default install. So how do we add them?
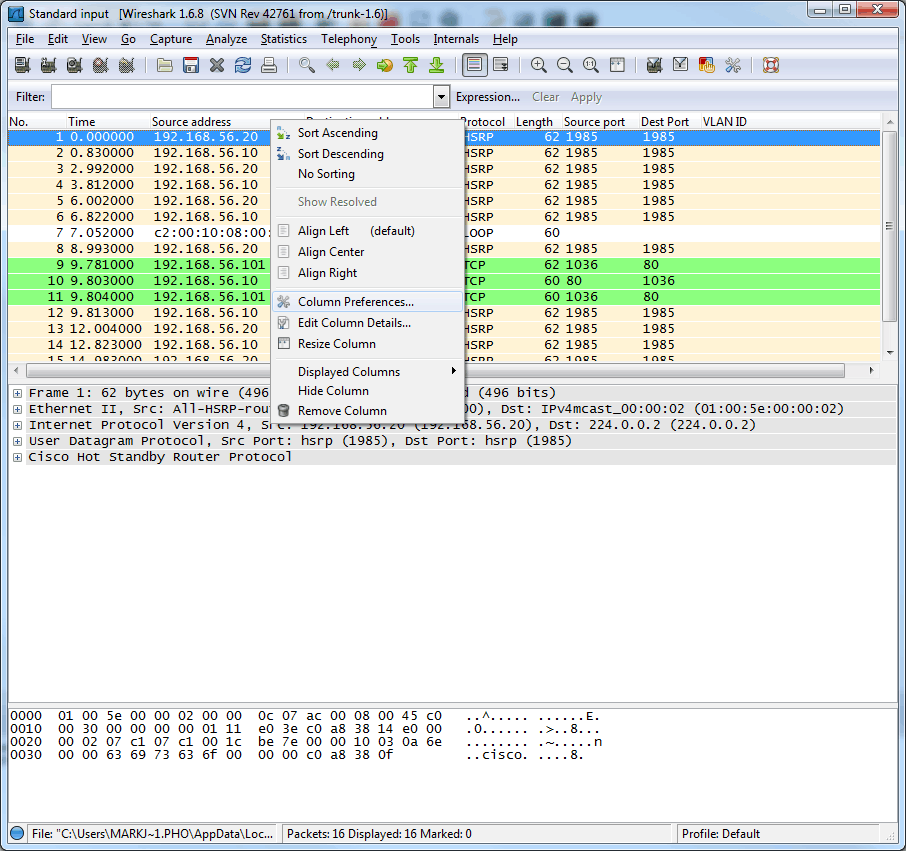
If I right-click anywhere on the column headings bar, I get these choices:
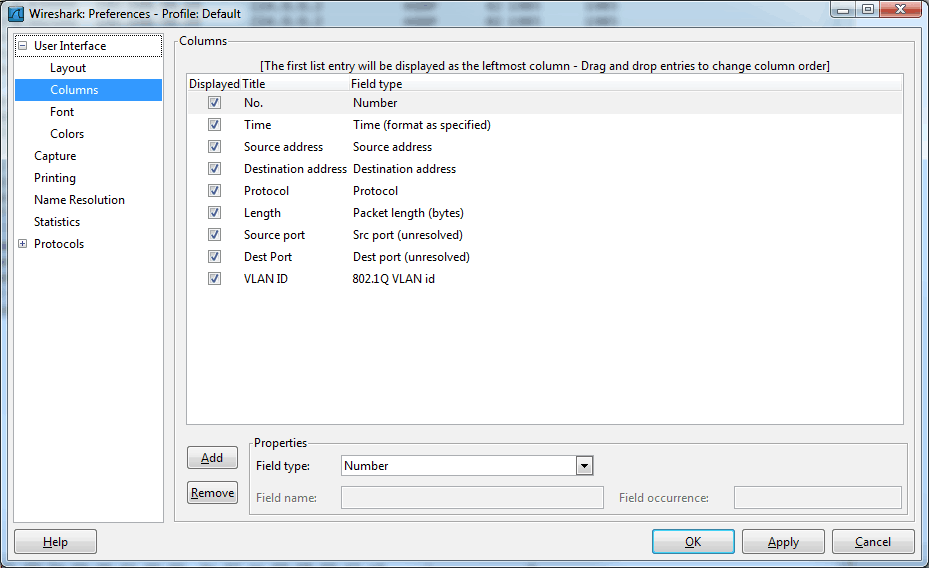
From that menu box, select Column Preferences to see this:
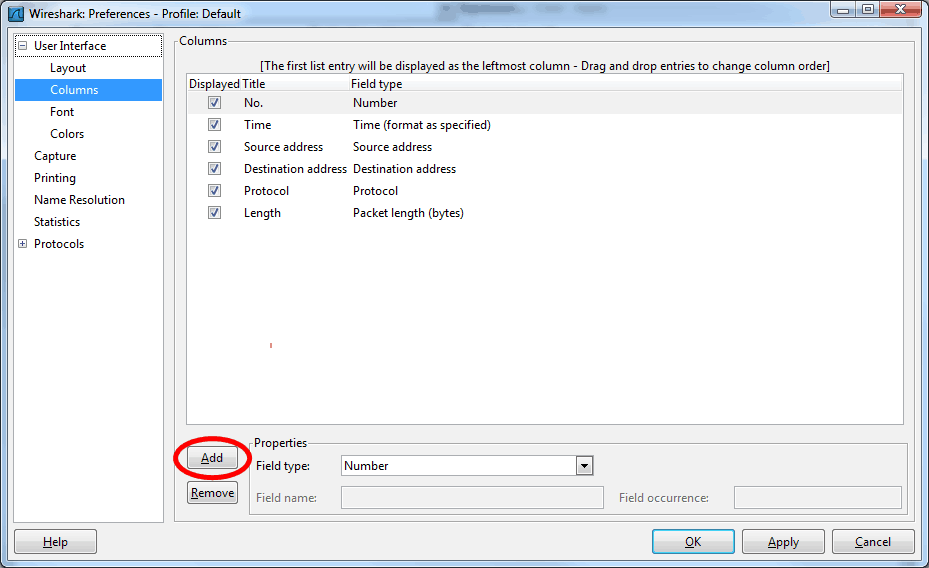
You will note that I have already created the bottom three in this list. The source and destination ports I added have the word ‘unresolved’ in parentheses. I chose this so I would see the port numbers, not the resolved names. Let me remove what I added and show you how to put those columns into Wireshark. Here is what it looks like in the default state (with my added columns removed):
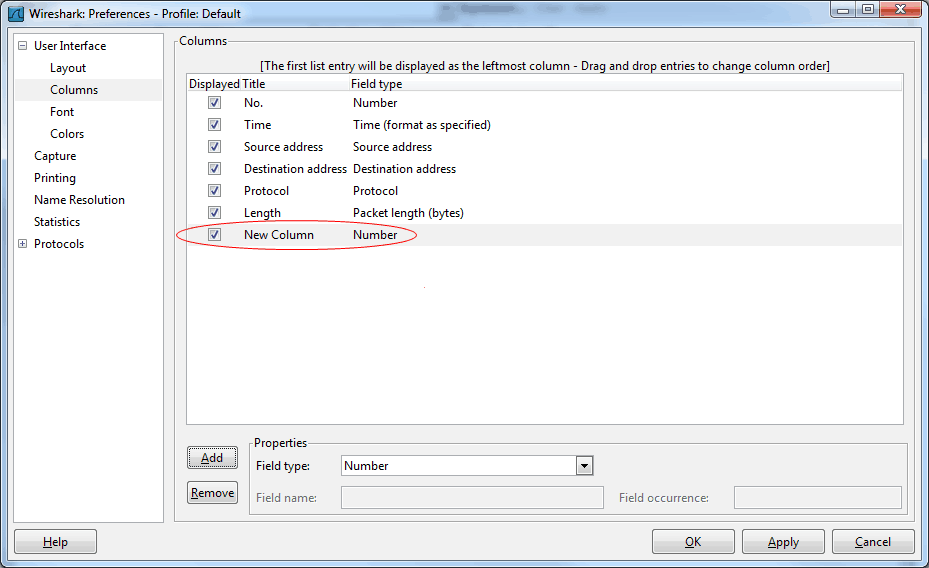
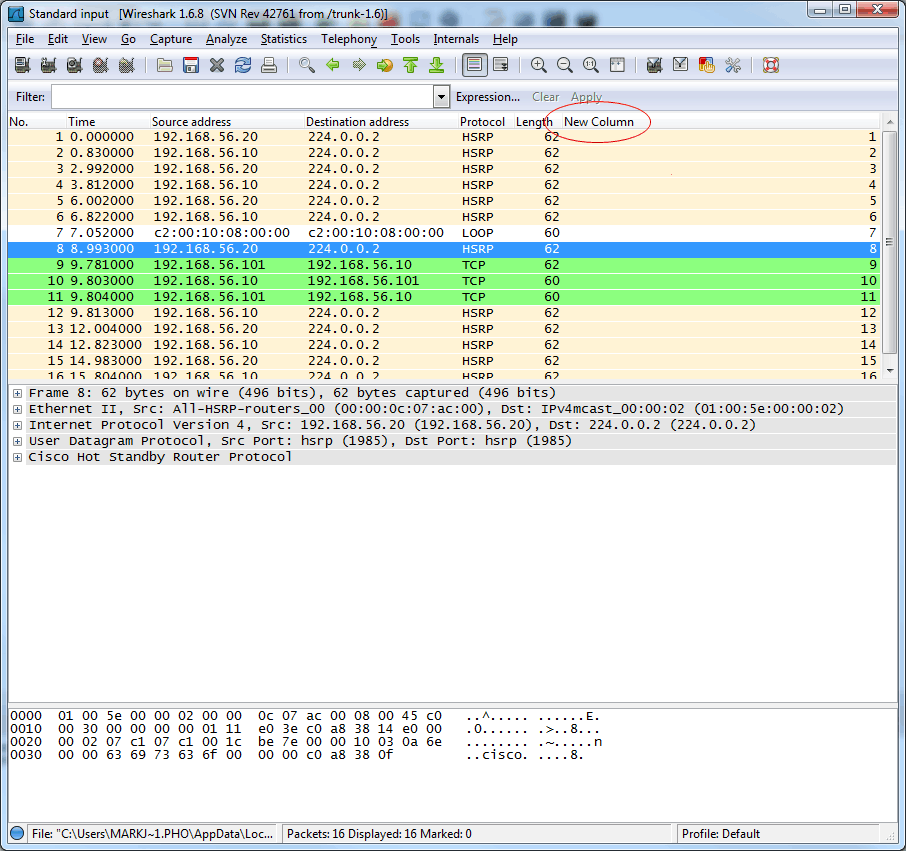
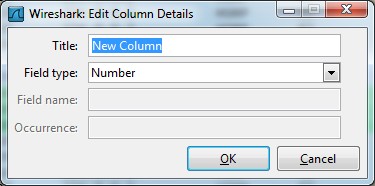
From here, I click the ‘Add’ button. This creates a ‘New Column’ and ‘Number’ as shown below:
Just click OK and you are returned to the previous view, except now you have your new column:
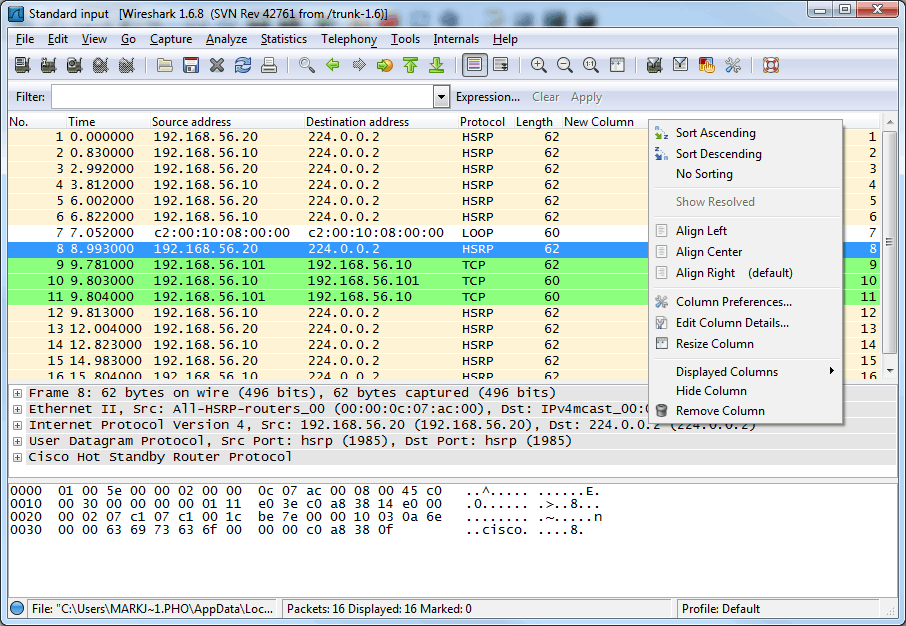
Now to make it be what we want it to be. Right-click the headings bar again (just to the right of the New Column works fine, and you will see this:
Now click Edit Column Details… and see this:
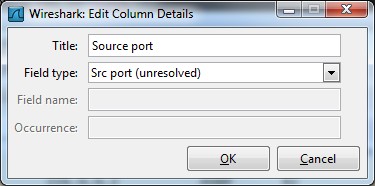
Just start typing to rename the column as you desire. I will call mine ‘Source port.’ In the field type, select your field of choice. Again, I am selecting Src Port (unresolved):
Click OK and you are returned to the original window with your happily renamed port, ready to capture traffic as you have designated. You see I now have data in that column, and I have not started a new capture to get it:
Feel free to play with these settings as you dive deep into your network traffic. I just wanted to share this little trick because sometimes I want to see my captured traffic without having to delve into the additional information below the captured frames. Feel free to share your Wireshark tricks with me, as deeper inspection of traffic flow can be fun and enlightening!
Until next time…
Mark Jacob
Cisco Instructor – Interface Technical Training
Phoenix, AZ
You May Also Like
column headings, destination port, ip http server, packet inspection, source port, telnet, traffic monitoring, Wireshark
A Simple Introduction to Cisco CML2
0 3898 0Mark Jacob, Cisco Instructor, presents an introduction to Cisco Modeling Labs 2.0 or CML2.0, an upgrade to Cisco’s VIRL Personal Edition. Mark demonstrates Terminal Emulator access to console, as well as console access from within the CML2.0 product. Hello, I’m Mark Jacob, a Cisco Instructor and Network Instructor at Interface Technical Training. I’ve been using … Continue reading A Simple Introduction to Cisco CML2
Creating Dynamic DNS in Network Environments
0 643 1This content is from our CompTIA Network + Video Certification Training Course. Start training today! In this video, CompTIA Network + instructor Rick Trader teaches how to create Dynamic DNS zones in Network Environments. Video Transcription: Now that we’ve installed DNS, we’ve created our DNS zones, the next step is now, how do we produce those … Continue reading Creating Dynamic DNS in Network Environments
Cable Testers and How to Use them in Network Environments
0 727 1This content is from our CompTIA Network + Video Certification Training Course. Start training today! In this video, CompTIA Network + instructor Rick Trader demonstrates how to use cable testers in network environments. Let’s look at some tools that we can use to test our different cables in our environment. Cable Testers Properly Wired Connectivity … Continue reading Cable Testers and How to Use them in Network Environments

