How to Create a Named Region in Excel 2010 using SharePoint

Frequently when getting data into SharePoint 2010 from Excel 2010 it becomes necessary to create named regions in the Excel Worksheets before getting them into SharePoint 2010. Often times when working with clients or students I find that they don’t know how to do this, so I decided to make a blog post to quickly bring everyone who wants to up to speed.
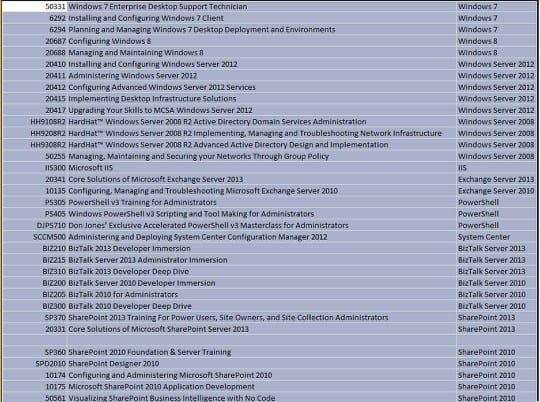
I have a workbook with several worksheets. In particular I have two sections of data I am going to want to eventually get into SharePoint 2010. In order to prepare the workbook I will create 2 named regions so that when I save and send to SharePoint or if I decide to create a list from one of the named regions the workbook is ready to go.
This skill is especially important when working with Excel 2010 and SharePoint 2010.
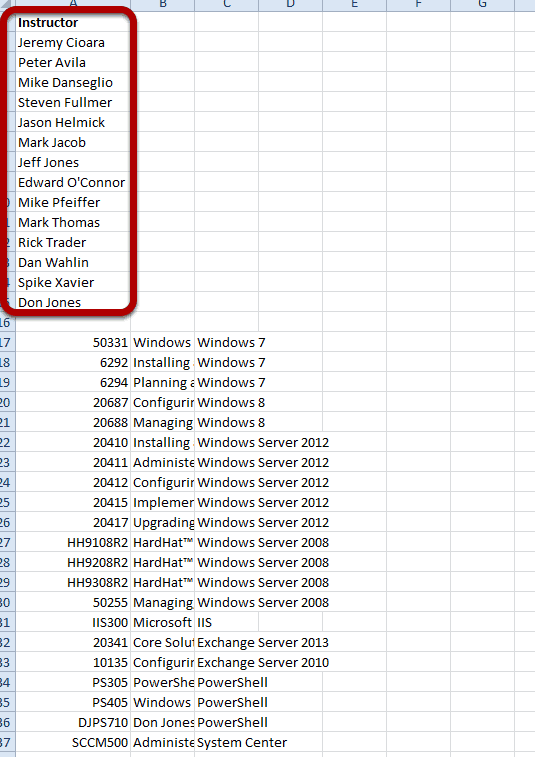
I have two sections I will prepare. One is a list of instructors and the other is a list of courses. First, I will highlight the range of cells that includes the instructors data.
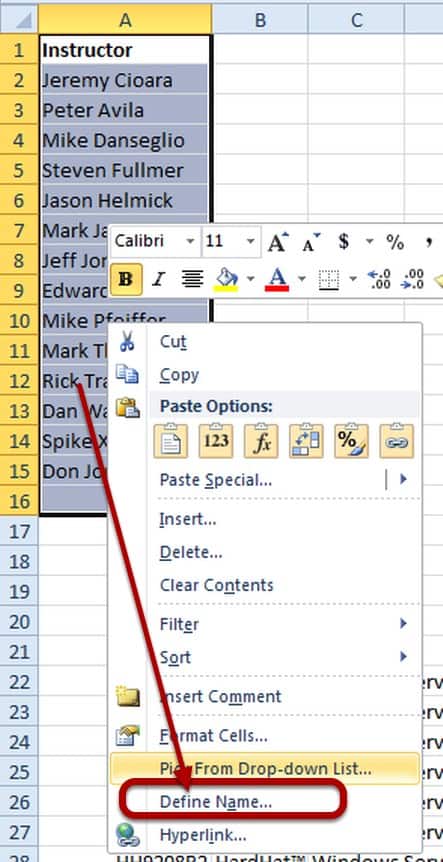
With the instructors highlighted (including the header row) I right click and choose Define Name.
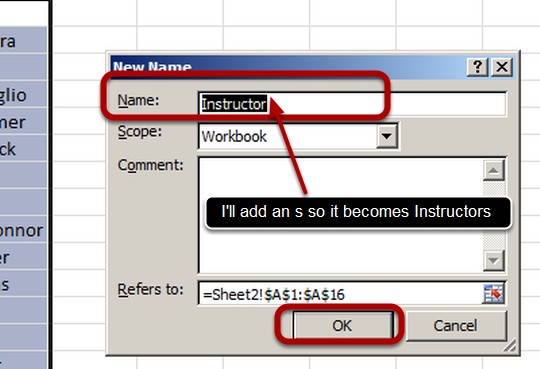
In this case, Excel 2010 used the header row to guess the name for my region, and in this case, it was close. I will simply add an “s” to Instructor so that my Named Region is Instructors. When I’m done, I’ll click OK.
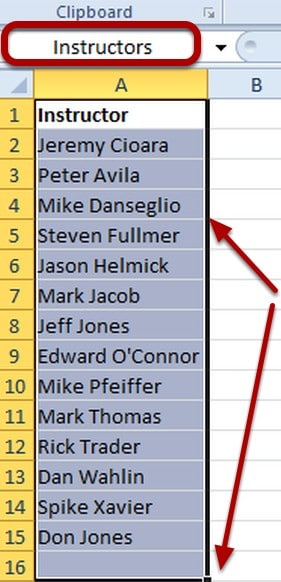
With the region highlighted, I can see that the Name of my named range appears in the small text box in the upper left section of the Ribbon so it worked.
I highlight the second range, in this case I don’t have a header row.
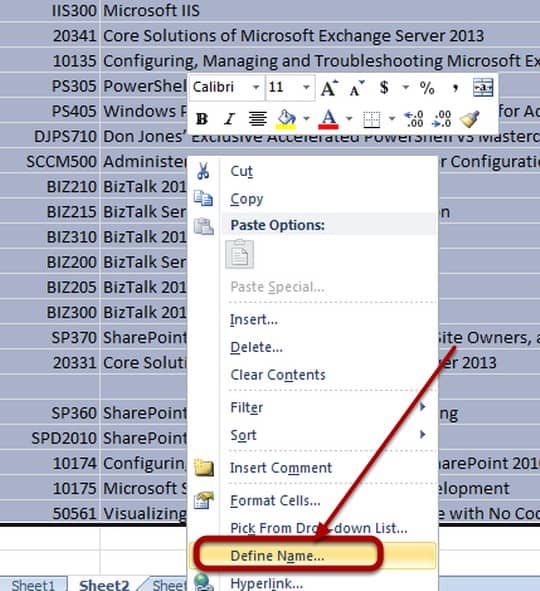
With the range of cells I want to include in the named range selected, I right click and choose Define Name.
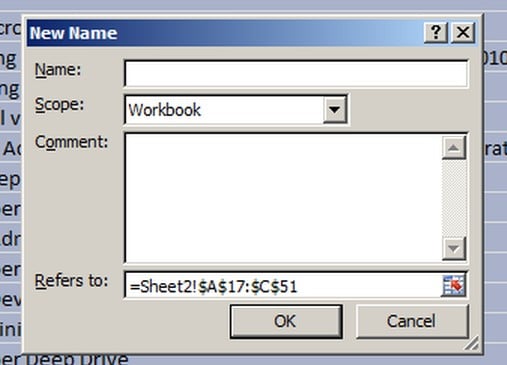
Because I had no header row, the name is currently blank.
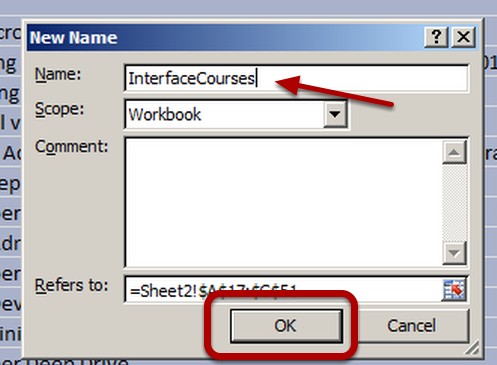
With the region still highlighted, I’ll name the range InterfaceCourses and click OK.
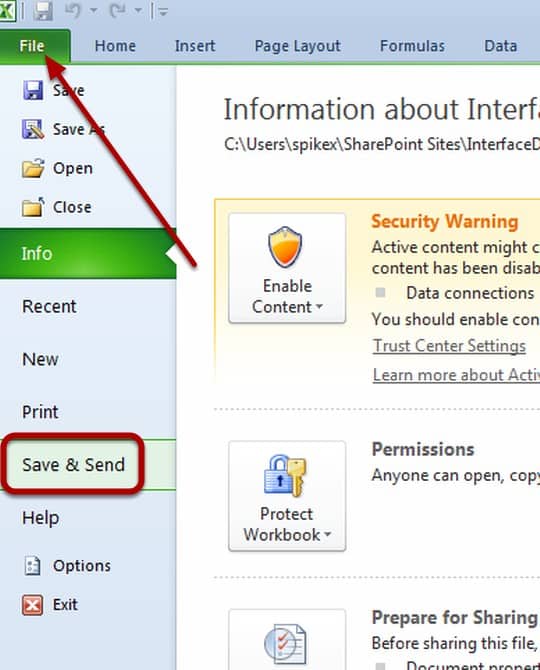
I can stop here after hitting save but if I wanted to get some or all of this into SharePoint, one way to do it would be to hit File
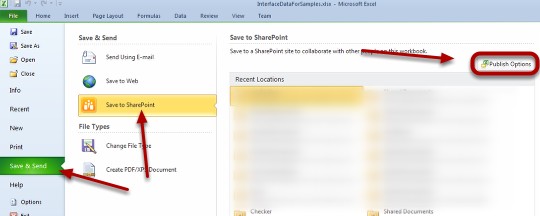
When you click Save and Send and Save To SharePoint a button will appear in the upper right side of the window that says Publish Options. I click that button to get the Publish Options Dialog box.
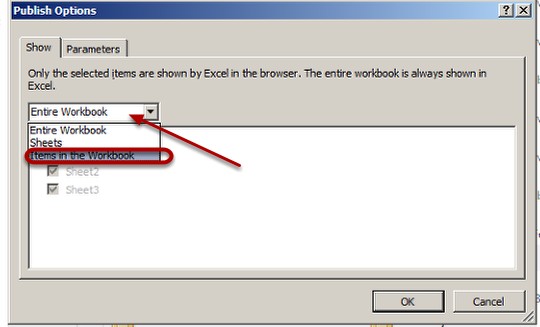
By default, the Entire Workbook will be selected, but I use the drop down menu and choose Items in the Workbook.
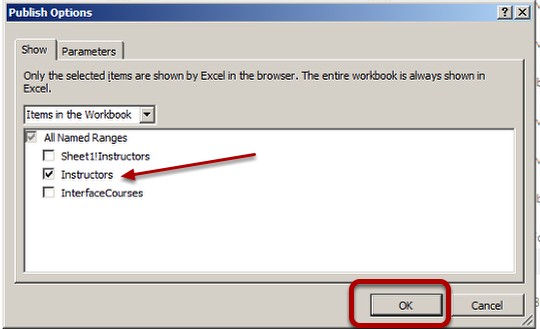
In this case, I selected Instructors and then OK. I would still have to provide a location in SharePoint to save this to but this is how you prep a workbook with Named Regions. This skill is important when working with SharePoint. It is used in many areas including, Excel Services, Excel Web Access, the creation of lists from a worksheet or portion of a worksheet and others.
That’s it!
Spike Xavier
SharePoint Instructor – Interface Technical Training
Phoenix, AZ


")

A Simple Introduction to Cisco CML2
Mark Jacob, Cisco Instructor, presents an introduction to Cisco Modeling Labs 2.0 or CML2.0, an upgrade to Cisco’s VIRL Personal Edition. Mark demonstrates Terminal Emulator access to console, as well as console access from within the CML2.0 product. Hello, I’m Mark Jacob, a Cisco Instructor and Network Instructor at Interface Technical Training. I’ve been using … Continue reading A Simple Introduction to Cisco CML2
Creating Dynamic DNS in Network Environments
This content is from our CompTIA Network + Video Certification Training Course. Start training today! In this video, CompTIA Network + instructor Rick Trader teaches how to create Dynamic DNS zones in Network Environments. Video Transcription: Now that we’ve installed DNS, we’ve created our DNS zones, the next step is now, how do we produce those … Continue reading Creating Dynamic DNS in Network Environments
Cable Testers and How to Use them in Network Environments
This content is from our CompTIA Network + Video Certification Training Course. Start training today! In this video, CompTIA Network + instructor Rick Trader demonstrates how to use cable testers in network environments. Let’s look at some tools that we can use to test our different cables in our environment. Cable Testers Properly Wired Connectivity … Continue reading Cable Testers and How to Use them in Network Environments