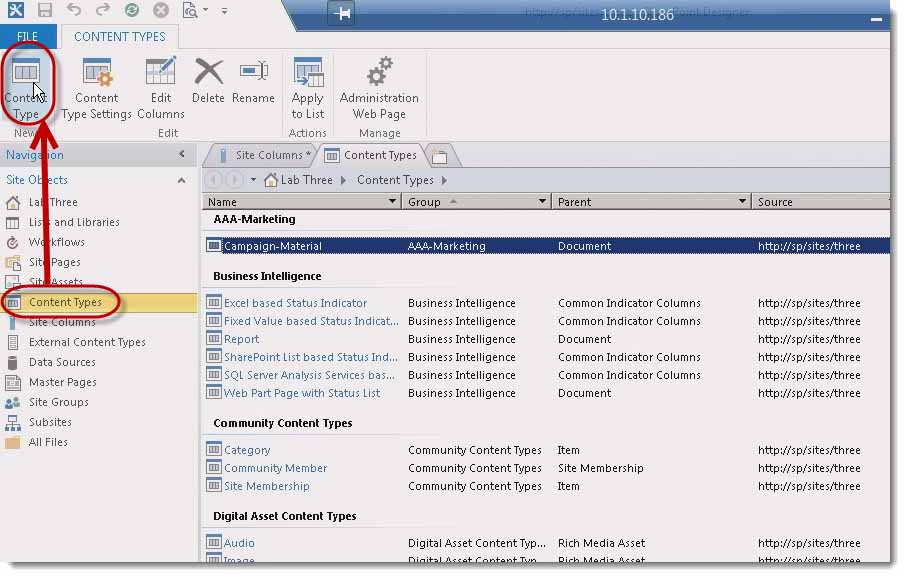
How to Create a Site Content Type based on ObjectOfItem in SharePoint Designer 2013

In order to create site Content Types based on the list parent Content Types Group ObjectOfItem, select Content Types in SharePoint Designer 2013 and then click Content Type in the ribbon.
For instructor-led SharePoint training, see our class schedule.
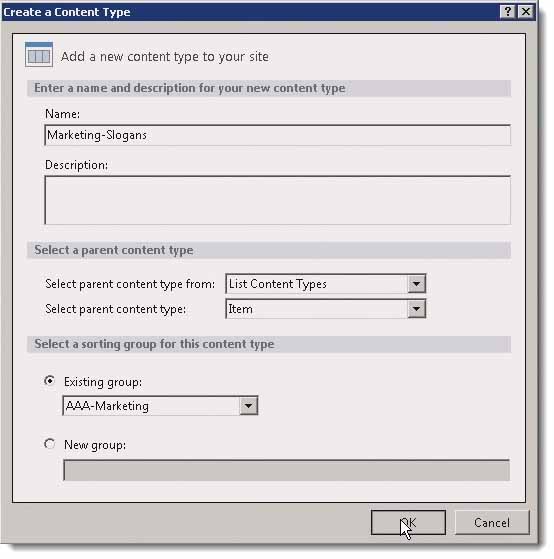
We’ll call this “Marketing‑Slogans”. It’s going to be from the parent content type “List Content Types”.
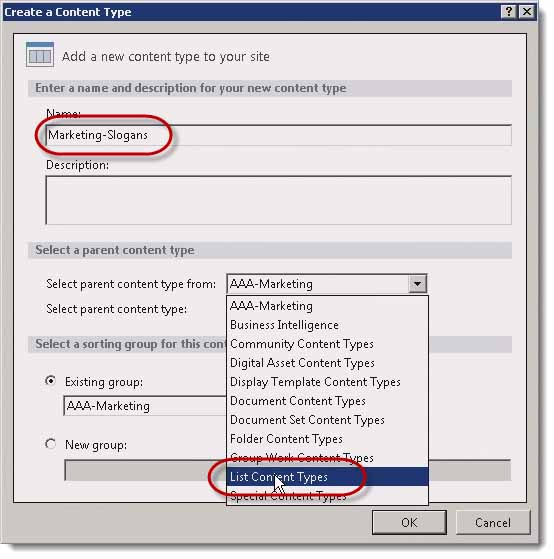
The parent content type of item.

I will keep it in the AAA-Marketing Content Types group, because this is a Marketing content type.
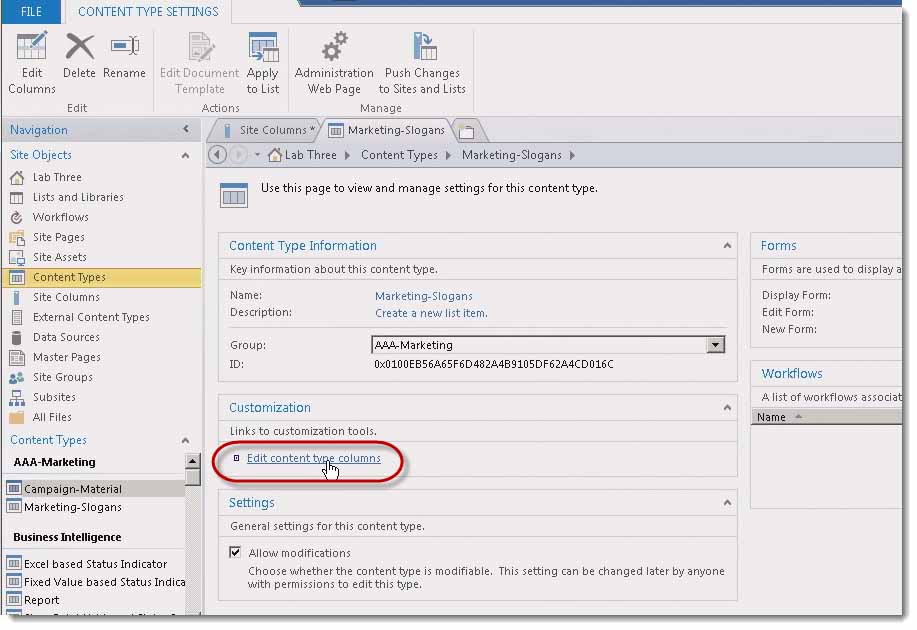
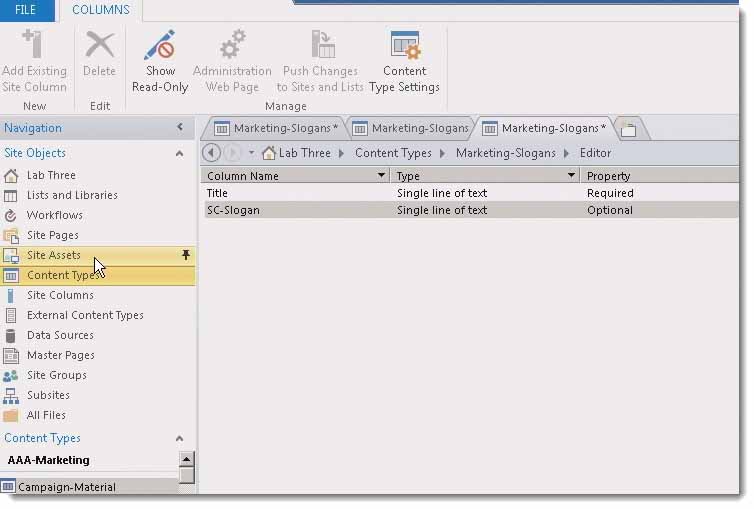
Now that I’ve got the Marketing‑Slogans content type created, I can go ahead and click on it.

It takes me to the Settings page, and then click “Edit content type columns”.
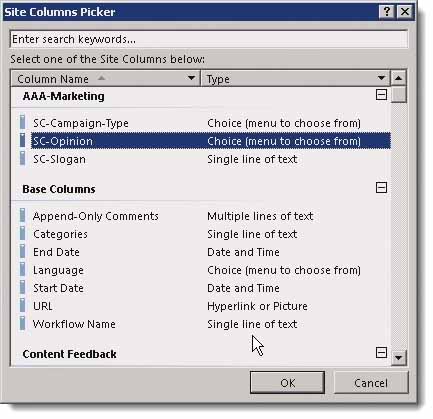
Now I can Add Existing Site Columns.
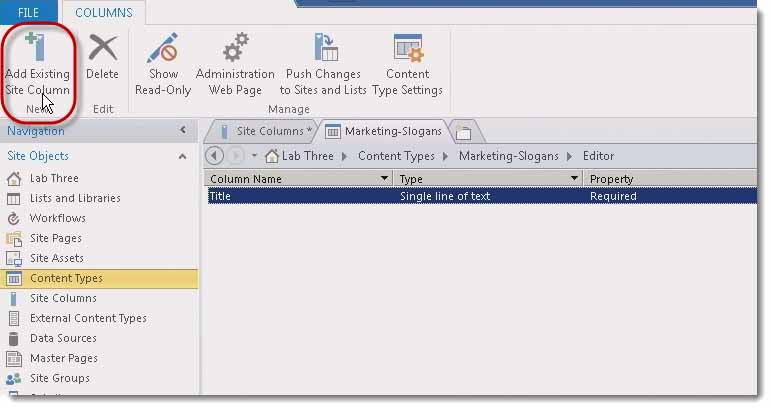
I’m looking for my new site columns.
Now interestingly enough, it did not in this UI pick up my new site columns, even though I just created them.
Because I’ve run into this type of thing before, I don’t panic. I just close SharePoint Designer, click Yes if I need to save anything.

Close the browser window, and re‑open them again. Generally this seems to fix this problem, but it’s some kind of caching deal going on.
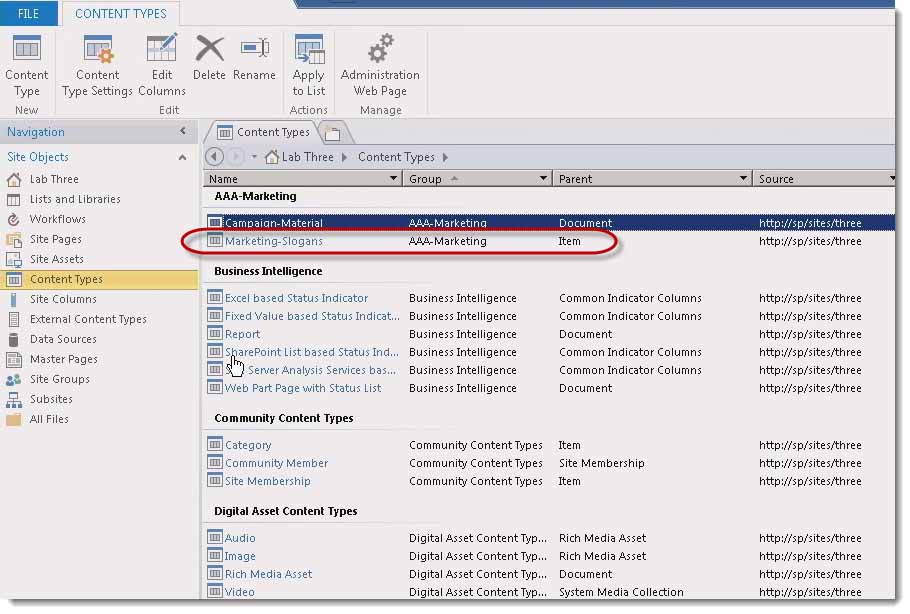
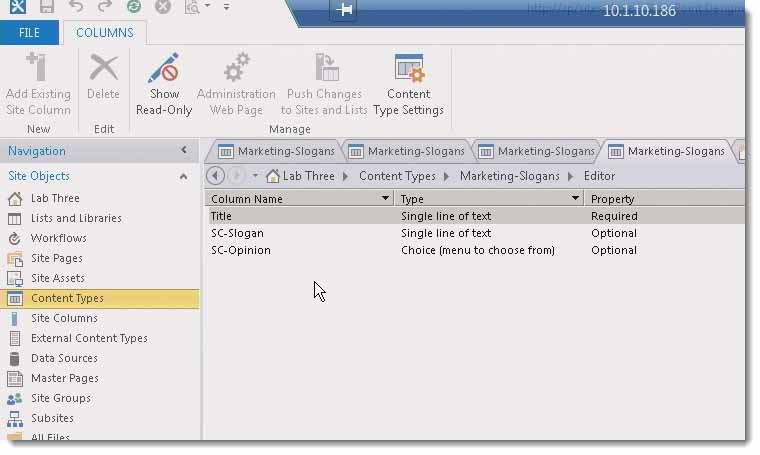
I’ll go back to my Content Types link in the navigation and then click Marketing‑Slogans
Click Edit content site columns,

Now I’ll click Add Existing Site Column.

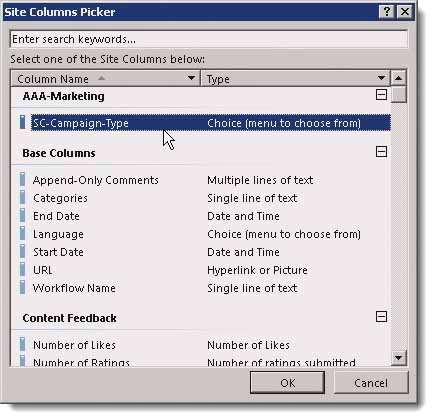
Now you see it does include my site columns.
If I try and hold one down and hit Shift, that doesn’t work. I actually have to add them one at a time. So, I’m going to first add Slogan
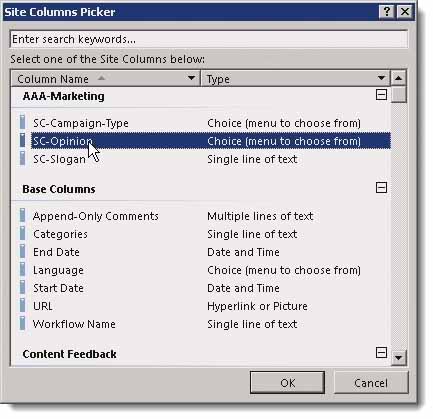
Then I’m going to click Save. I’m going to then Marketing‑Slogan > Edit Site Columns > Add Existing Site Column, and I’ll add “SC‑Opinion”.
Probably even a little faster to do this in the browser, but I want to show you how to do it in SharePoint Designer 2013, and this particular part of getting this all together.
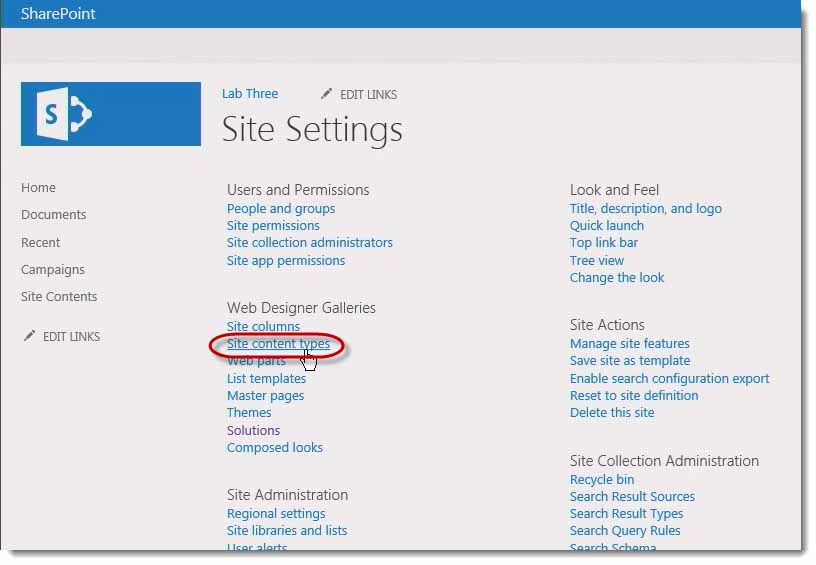
So, that hooks up the site columns to the content type. The Content Types should be ready to go. I’ll validate that by going back to the browser, going to the Site Actions, Site Settings menu
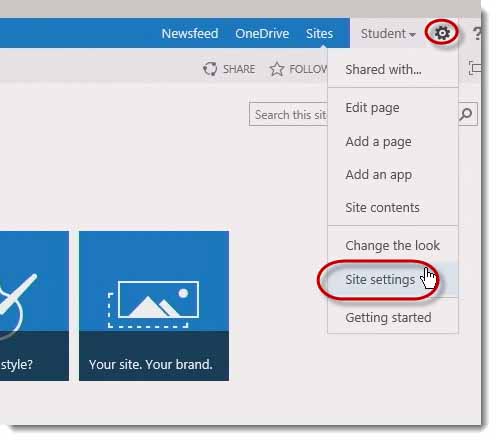
Click on the Site Content Types link.
Click on Marketing‑Slogans.
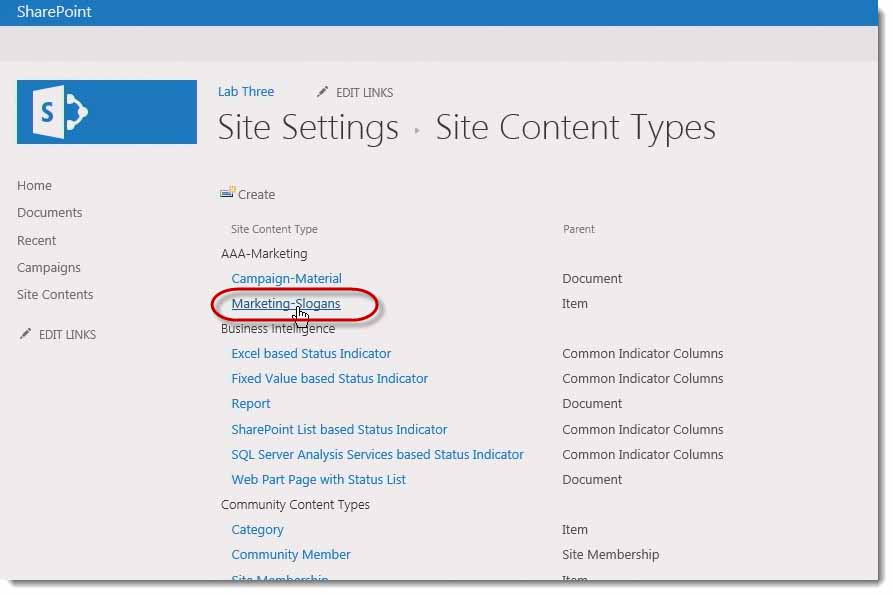
Then scroll down and you can see yes, I’ve got SC‑Slogan and SC‑Opinion.

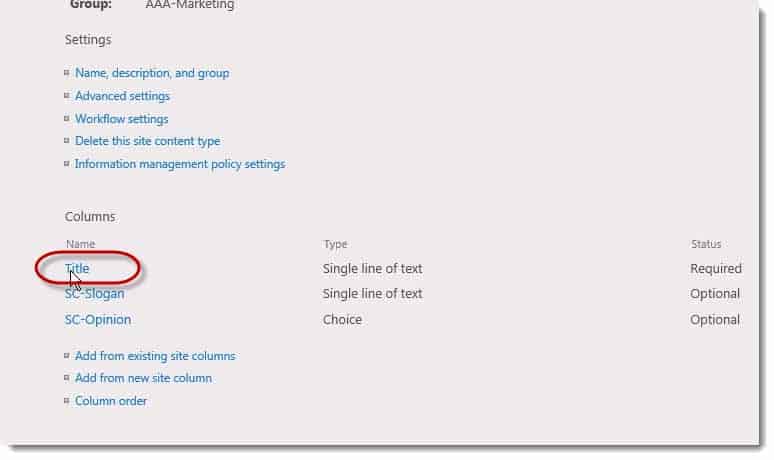
Now, the Title Column they actually want on this content type not to be a piece of the puzzle. To do that from this page, I’ll click the Title column.
Then I have an option to say, “Hidden, will not appear in forms.”
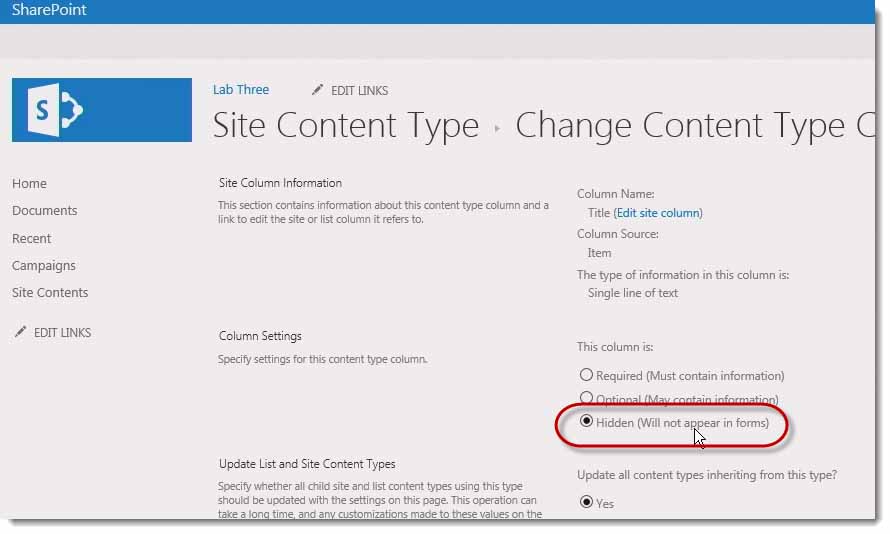
When I do that, it doesn’t give me an option to put a title in the forms, which is fine. But sometimes things like Quick Edit View don’t work as well, depending on what you’re doing.
But in this case, it’ll be fine, I’ll just use the default editing tools anyways. When I’m done I’ll click OK, so I’ve got everything configured and ready to go for this content type. I need to create a container and attach this to it.
For instructor-led SharePoint training, see our class schedule.


A Simple Introduction to Cisco CML2
Mark Jacob, Cisco Instructor, presents an introduction to Cisco Modeling Labs 2.0 or CML2.0, an upgrade to Cisco’s VIRL Personal Edition. Mark demonstrates Terminal Emulator access to console, as well as console access from within the CML2.0 product. Hello, I’m Mark Jacob, a Cisco Instructor and Network Instructor at Interface Technical Training. I’ve been using … Continue reading A Simple Introduction to Cisco CML2
Creating Dynamic DNS in Network Environments
This content is from our CompTIA Network + Video Certification Training Course. Start training today! In this video, CompTIA Network + instructor Rick Trader teaches how to create Dynamic DNS zones in Network Environments. Video Transcription: Now that we’ve installed DNS, we’ve created our DNS zones, the next step is now, how do we produce those … Continue reading Creating Dynamic DNS in Network Environments
Cable Testers and How to Use them in Network Environments
This content is from our CompTIA Network + Video Certification Training Course. Start training today! In this video, CompTIA Network + instructor Rick Trader demonstrates how to use cable testers in network environments. Let’s look at some tools that we can use to test our different cables in our environment. Cable Testers Properly Wired Connectivity … Continue reading Cable Testers and How to Use them in Network Environments