How to interact with a simple network topology built using Cisco’s VIRL

For those of you who are interested in investigating Cisco’s VIRL product, I recently posted a blog to show how to create a very simple network topology. Today’s blog will continue where that one left off. I recommend performing, or at least reviewing, the steps in the previous blog so that today’s steps make sense.
For instructor-led training, check out our complete Cisco CCNA Certification schedule.
Let’s begin.
We left off after dropping two nodes into our topology, seen in figure 1:
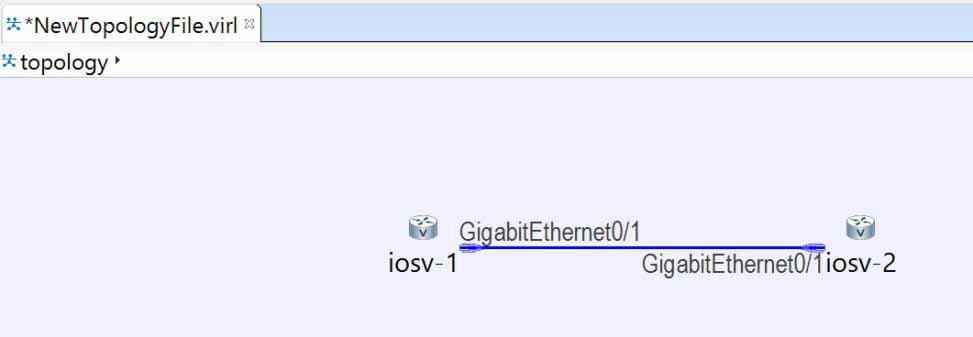
Figure 1
The default names applied to our nodes are somewhat uninspiring, so let’s pick something more memorable. To change node names, click directly on the current name, then click it again (not too quickly, or your input will be misinterpreted as a double-click. Once the name is highlighted, type a new name. In figure 2, I have already renamed the first node and am in the process of renaming the second one:
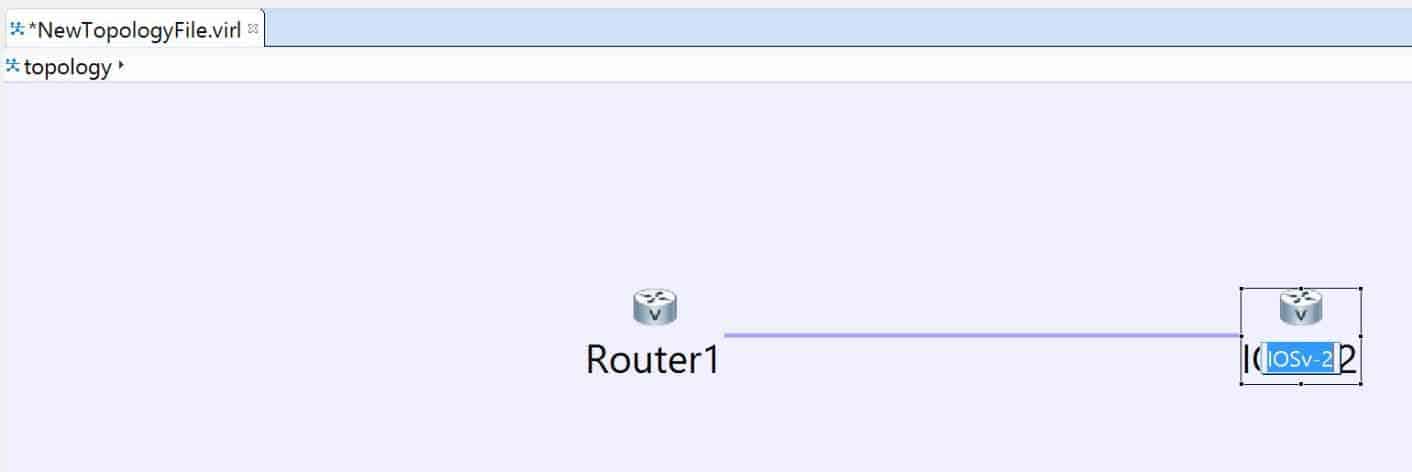
Figure 2
They have much better names now – Router1 and Router2. If you want a better look at the properties of any individual node, select it so it is highlighted and then view its properties information. See figure 3 for some of the available options:
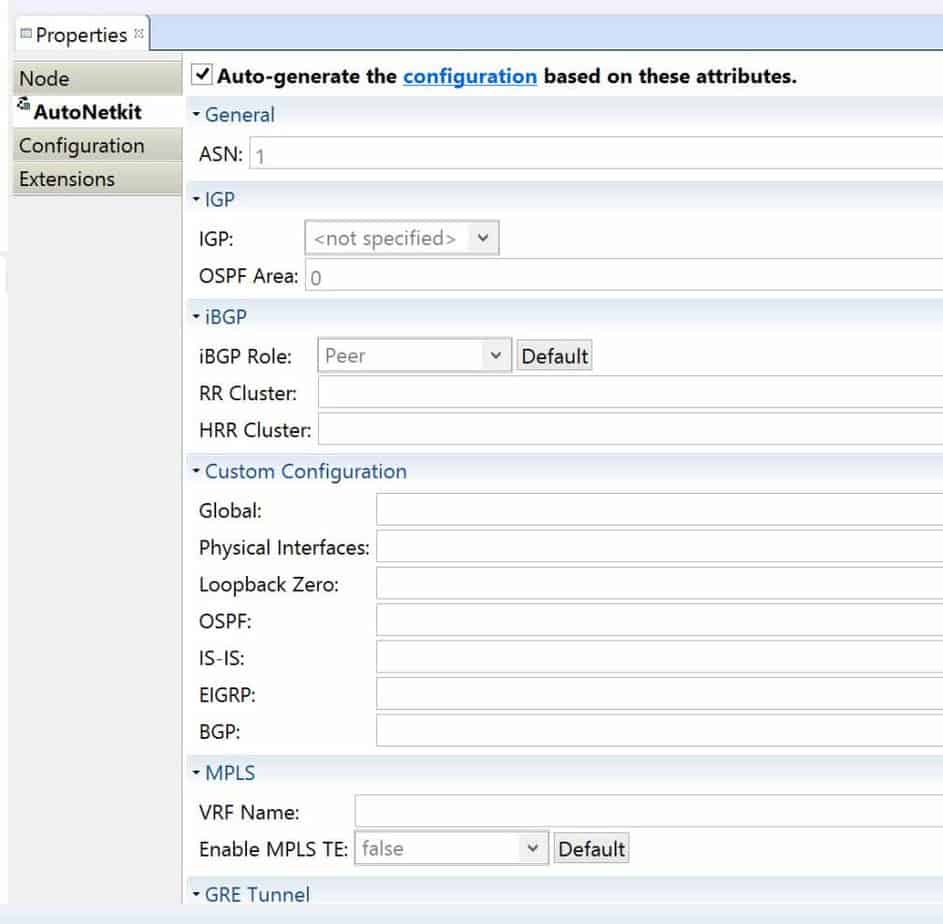
Figure 3
In my previous blog I mentioned that configurations can be auto-generated. Let’s see it happen. Click the icon along the top which will Build Initial Configurations, as shown in figure 4:
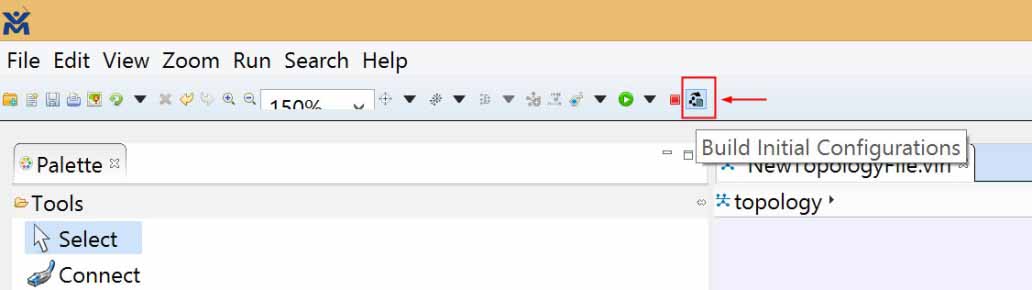
Figure 4
Upon completion, you will be presented with the window shown in figure 5:
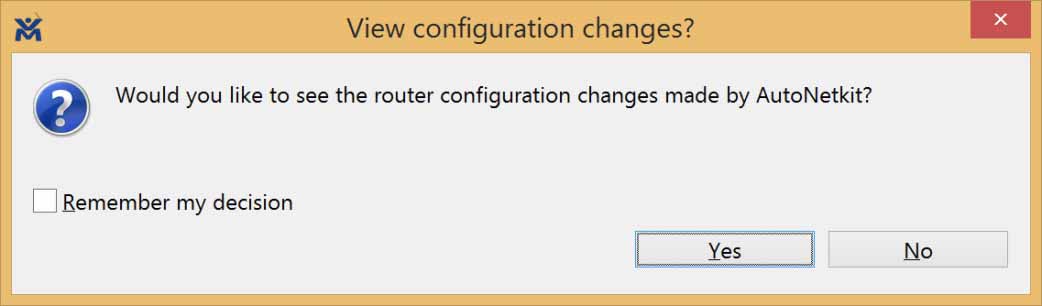
Figure 5
For this example, check the box to remember and click Yes. You will also see a window which shows the old (in our case, empty) configuration, and in the other pane, the newly created configuration. This is shown in figure 6:
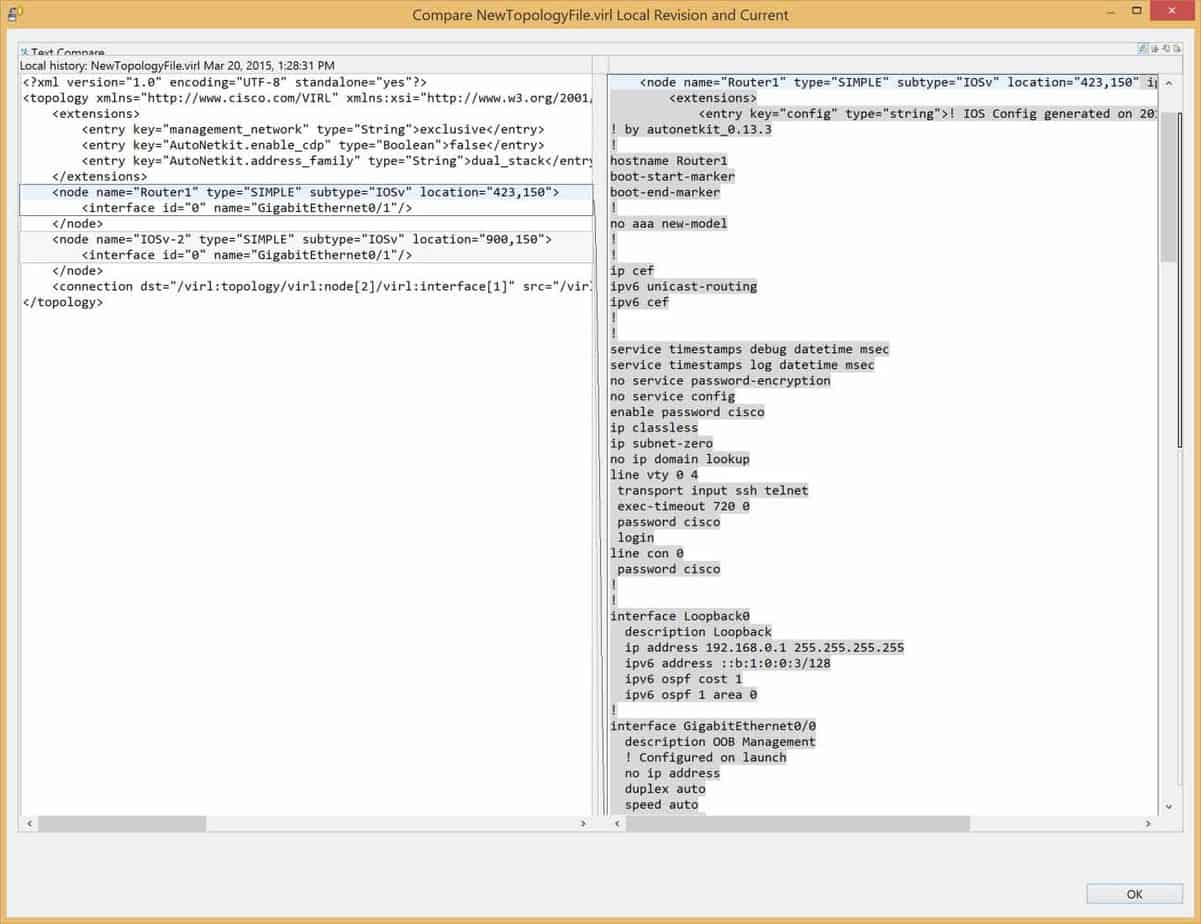
Figure 6
You will also see another window pop up with a choice. It is shown if figure 7:
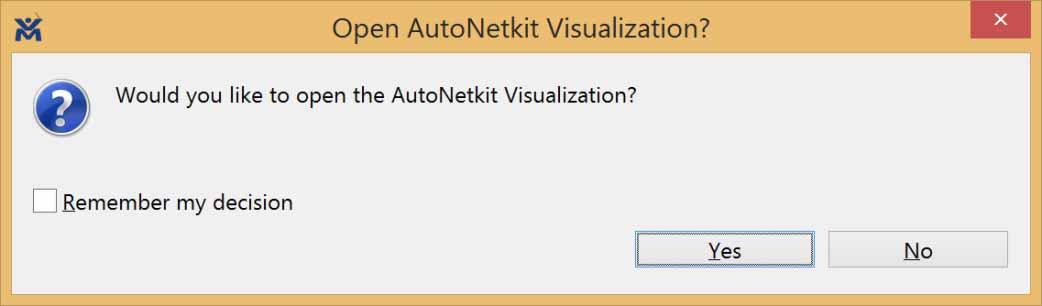
Figure 7
Once again, for our example we will check the box to remember and say yes. This will launch your default browser and show you a visual on your topology. See figure 8 for an example:
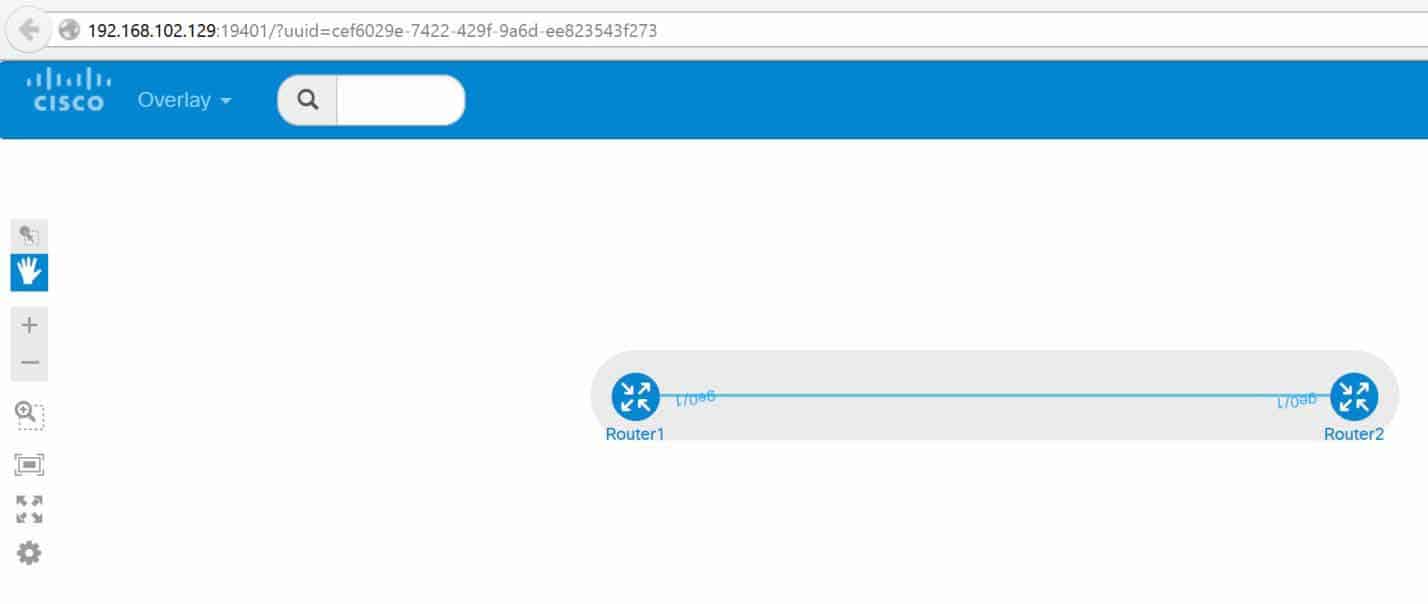
Figure 8
Now our topology exists, but is not running. Let’s kick it. Click on the Start button back in VMMaestro (figure 9) to launch our newly created simulation:
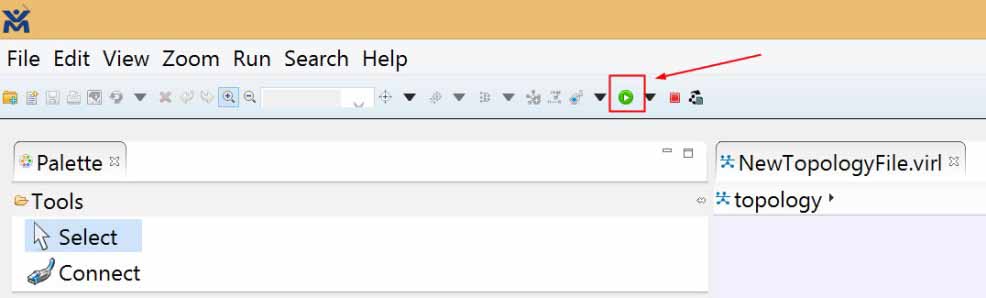
Figure 9
Simulation launches, then you will be asked if you want to view it, as shown in figure 10:
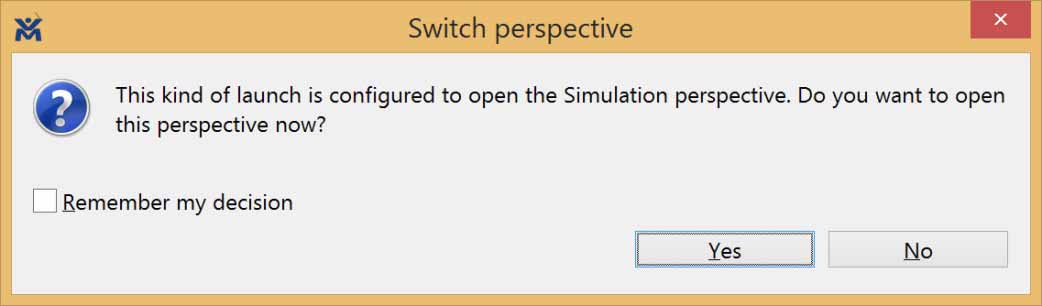
Figure 10
Of course you will click Yes! The window before this one was informational regarding the ID of the simulation. Just click OK to get past it. Depending on the power of your box and the number of nodes in your topology, it may take a while to get fully up and running, but when this happens, you will see the word Active alongside your nodes in the Simulation view, shown in figure 11:
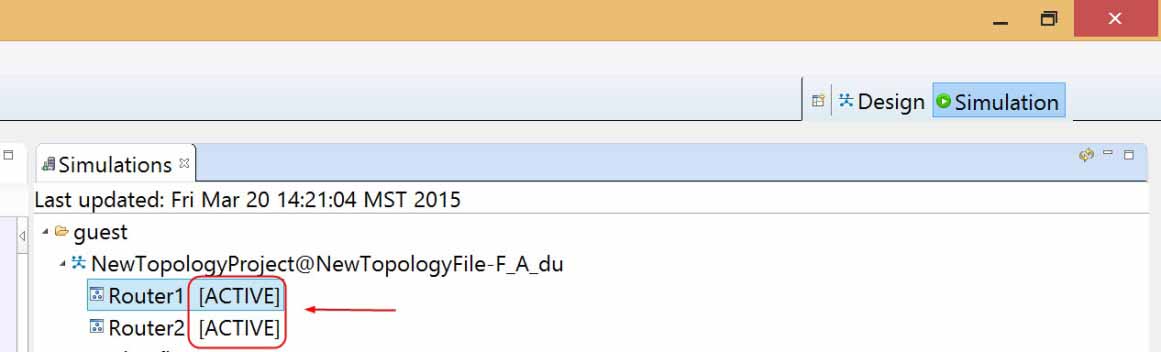
Figure 11
Figure 12 shows how to access the console of one of your nodes. Right-click on the node, select Telnet, and choose ‘to its Console port.’
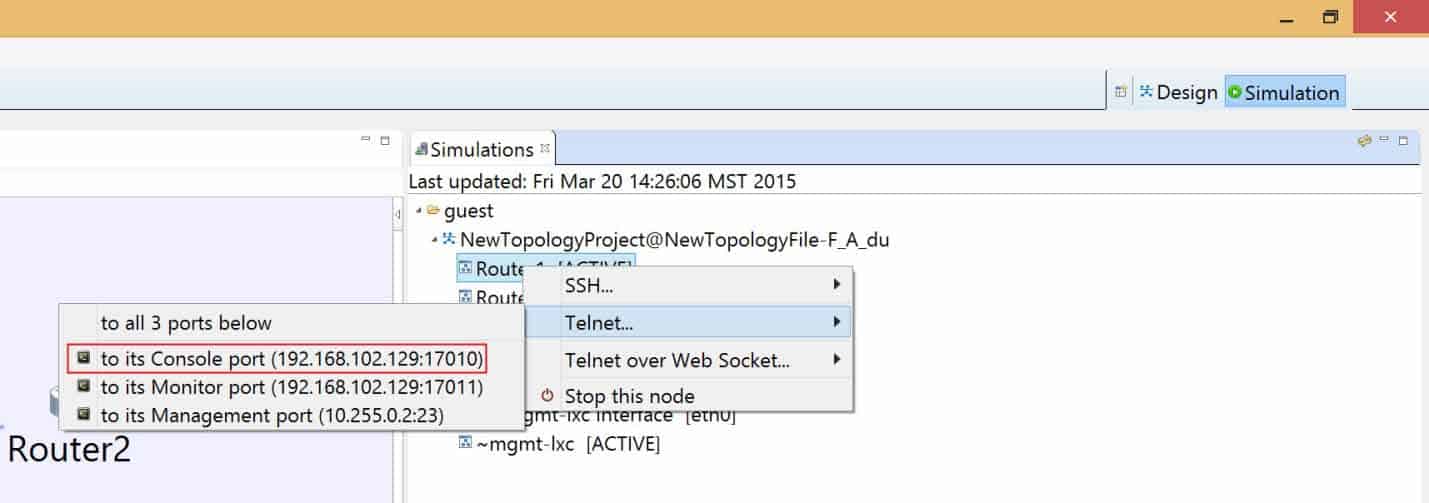
Figure 12
Do the same thing for the second node. Now feel free to drag things around your screen to situate your views as desired. You see in my screen I can see both of my console sessions – side-by-side. I can click either one and issue Cisco IOS commands. I will click on console 2 and display the output of show run in figure 13 (note that I had to enable with a password of cisco to get to privileged exec mode):
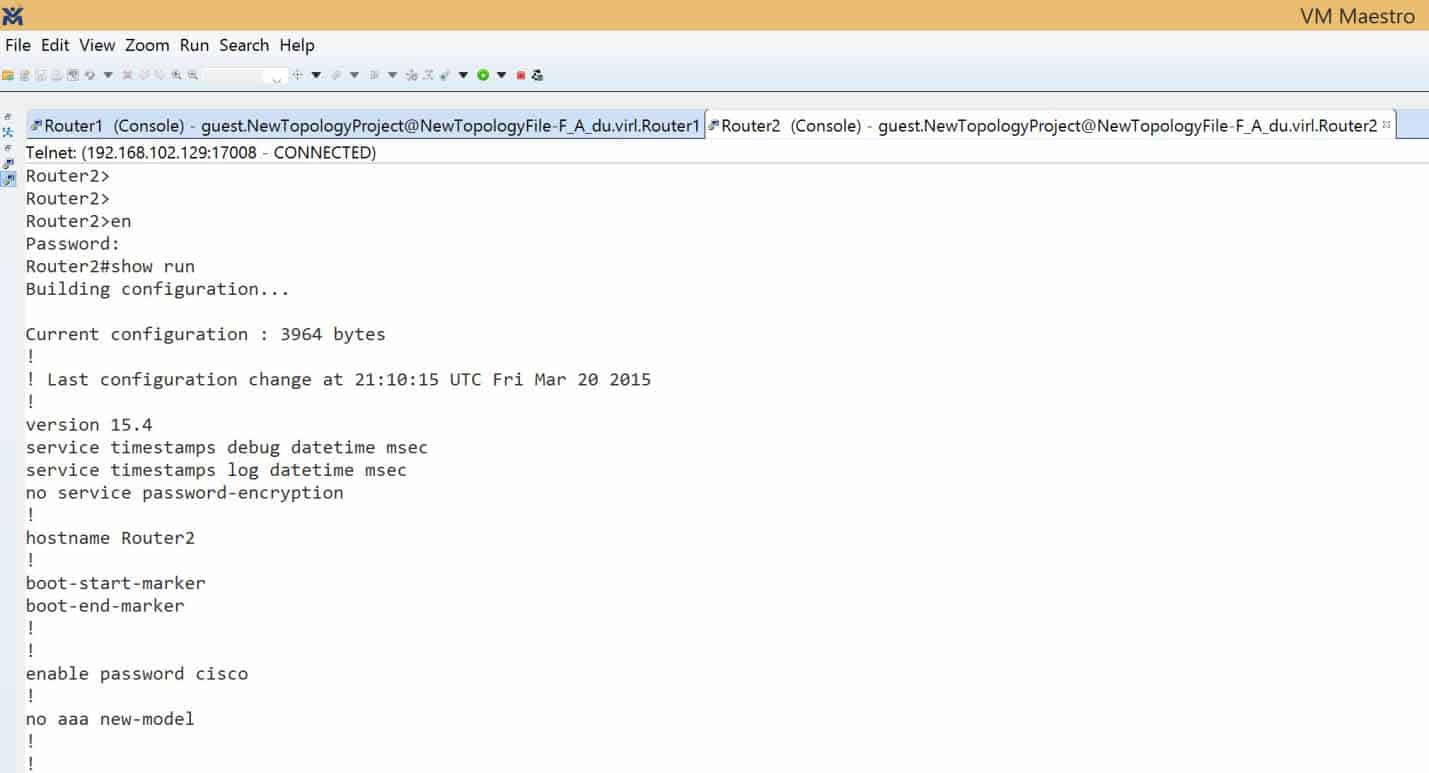
Figure 13
The IP addresses were placed on the interfaces for me. Routing protocols were configured for me. As an example, figure 14 shows a portion of the running-config that displays the dynamic routing protocol information:

Figure 14
I get OSPF, OSPFv3, BGP, hey is this great or what?! I did not have to configure any of that myself. Of course, anything you want to modify is wide open. Feel free to modify and manipulate your topology as you see fit.
You can even verify connectivity. Figure 15 shows that Router1 can successfully ping Router2:
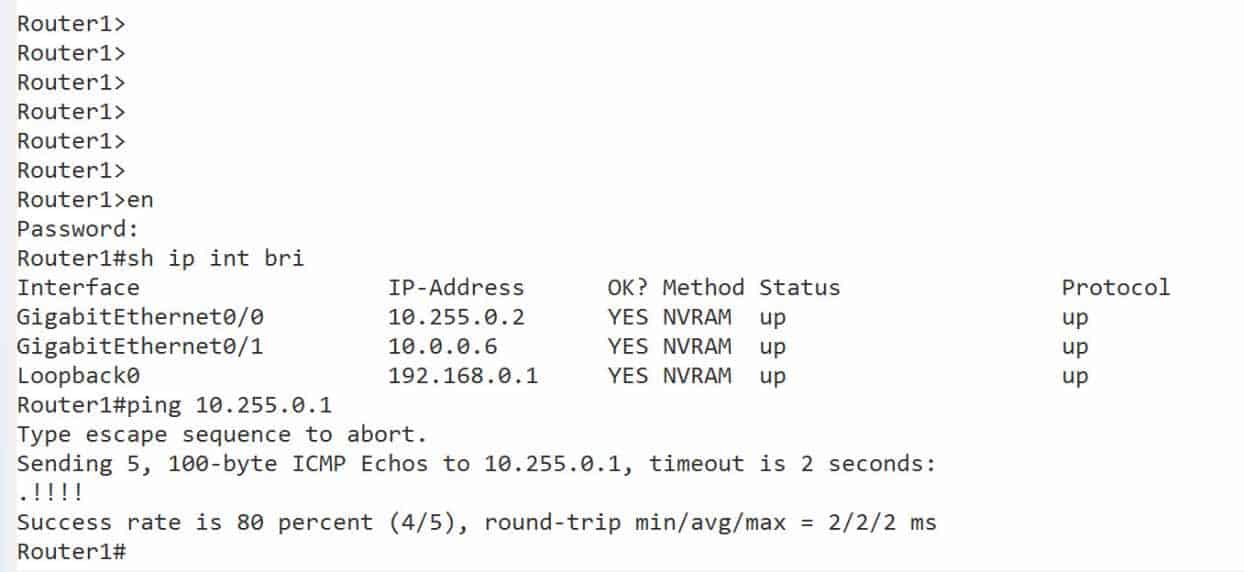
Figure 15
I hope this step-by-step guide makes it a little easier to get VIRL out of the box. It takes a little time to get used to it, but I have barely scratched the surface of what it can do for you as a network admin practicing and honing your skills, without jeopardizing a production network in the process. Feel free to post any comments regarding your VIRL experiences.
Until next time.
Mark Jacob
Cisco and CompTIA Network + Instructor – Interface Technical Training
Phoenix, AZ


A Simple Introduction to Cisco CML2
Mark Jacob, Cisco Instructor, presents an introduction to Cisco Modeling Labs 2.0 or CML2.0, an upgrade to Cisco’s VIRL Personal Edition. Mark demonstrates Terminal Emulator access to console, as well as console access from within the CML2.0 product. Hello, I’m Mark Jacob, a Cisco Instructor and Network Instructor at Interface Technical Training. I’ve been using … Continue reading A Simple Introduction to Cisco CML2
Creating Dynamic DNS in Network Environments
This content is from our CompTIA Network + Video Certification Training Course. Start training today! In this video, CompTIA Network + instructor Rick Trader teaches how to create Dynamic DNS zones in Network Environments. Video Transcription: Now that we’ve installed DNS, we’ve created our DNS zones, the next step is now, how do we produce those … Continue reading Creating Dynamic DNS in Network Environments
Cable Testers and How to Use them in Network Environments
This content is from our CompTIA Network + Video Certification Training Course. Start training today! In this video, CompTIA Network + instructor Rick Trader demonstrates how to use cable testers in network environments. Let’s look at some tools that we can use to test our different cables in our environment. Cable Testers Properly Wired Connectivity … Continue reading Cable Testers and How to Use them in Network Environments