How to use PowerShell to Generate Reports in Exchange Server 2010

One of the big things that Exchange Server Administrators end up using the shell for is generating reports and this can be for monitoring or alerting, firing up that report data and the email or something like that. There are all kinds of different cases for this and PowerShell’s a great tool to generate reports.
For example in the shell I can do something like Get-Mailbox and get the mailboxes out on the sales organizational unit.
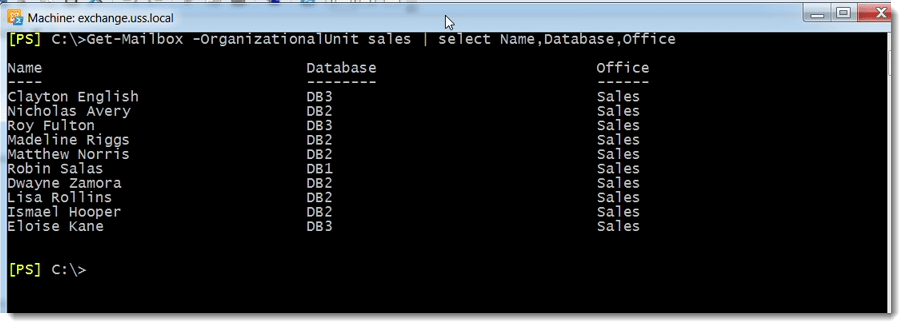
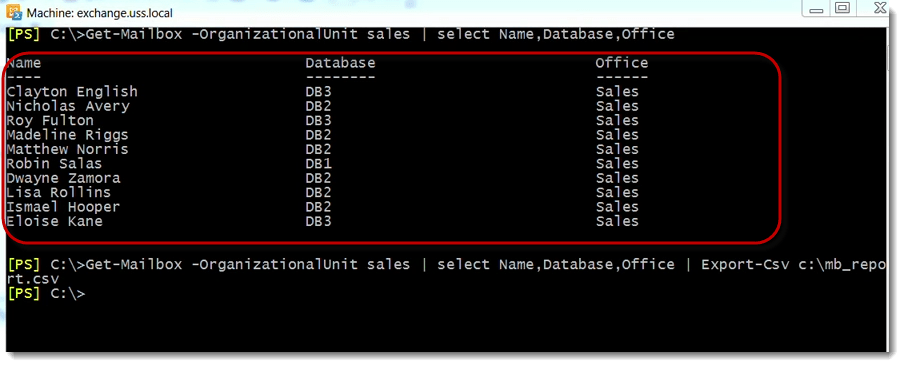
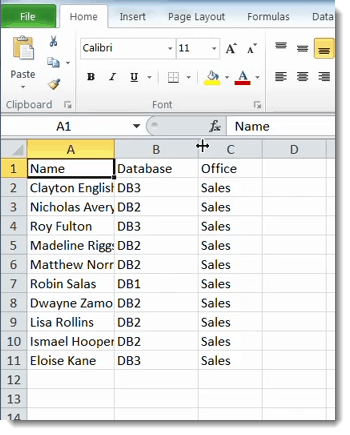
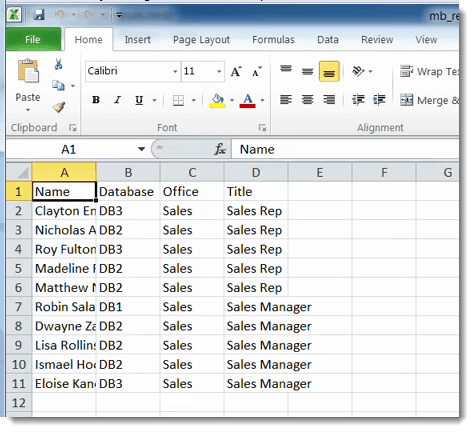
I want to select just a couple properties like name and database and maybe the office. That gives me a nice report and I’m selectively grabbing the properties I’m interested in and then from there I can do an export csv and Export-Csv c:\mb_report.csv and if I run that, that will actually take this view and put it into a csv file that I can open up in Excel.
Notice that for all the properties I selected I get those three, those property names, or the column headers and then I get rows for each of those users.
That’s kind of a quick way to get this out into a csv and save in Office in xls and add more style to it.
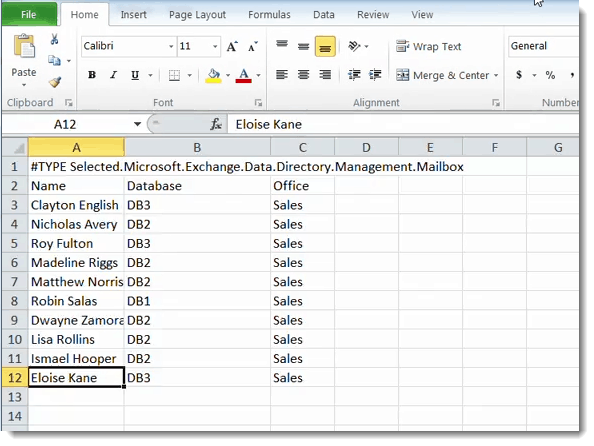
Something I find irritating in this configuration is the default is to dump the type header information into that first row.
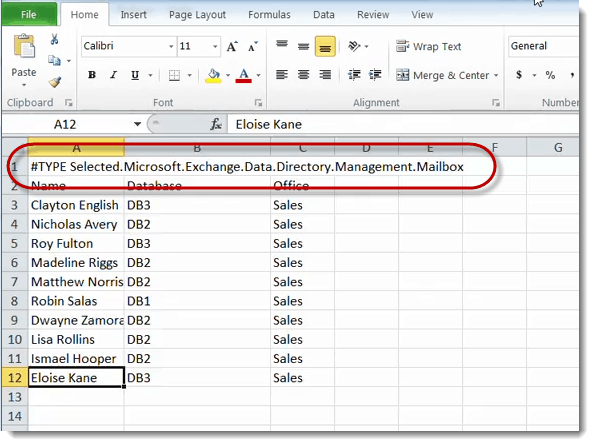
Now for some reason, that’s the default. I’m not really sure why but to fix that let me show you. What you would do is just go to your previous command by running a the export .csv using a primary called -NoTypeInformation.

This is a switch parameter, doesn’t require value. So basically we’re just going to take this report data one more time. Dump it out to csv and ignore the type information that would give us a nice csv report out here on the C drive and this time that first row with all of that garbage is gone.
So pretty simple. Another common scenario is to generate an html reports. So instead of exporting to csv, you might actually want to ConvertTo-Html.

What that will do is actually take that data notice that it is riding out the html.
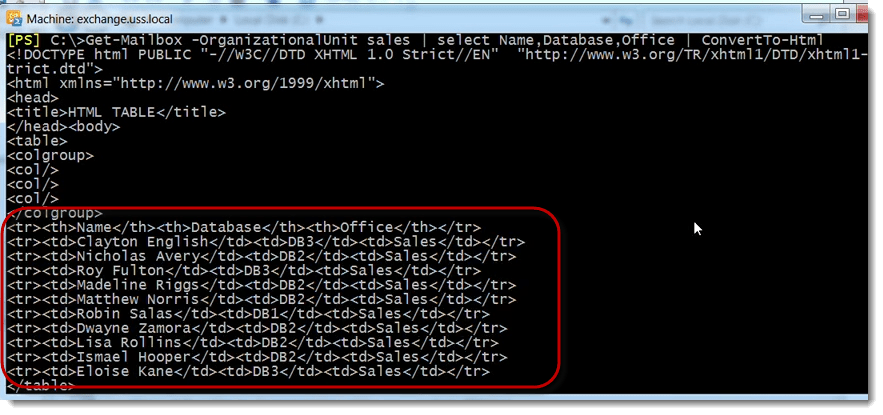
Now I need to get this into a file. You would think that there’s an export to an html, there’s actually not so you first convert. Then you can just continue typing to all file and say give me an mb_report.html this time.

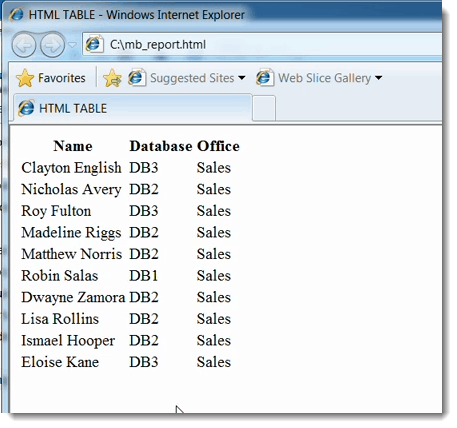
You could use some css styling but that’s a quick way to get your information out into an html or csv file.
You probably worked with this in the past but obviously you can use select here to figure out which properties you want to use.
It’s not usually this straight-forward, a typical report would be:
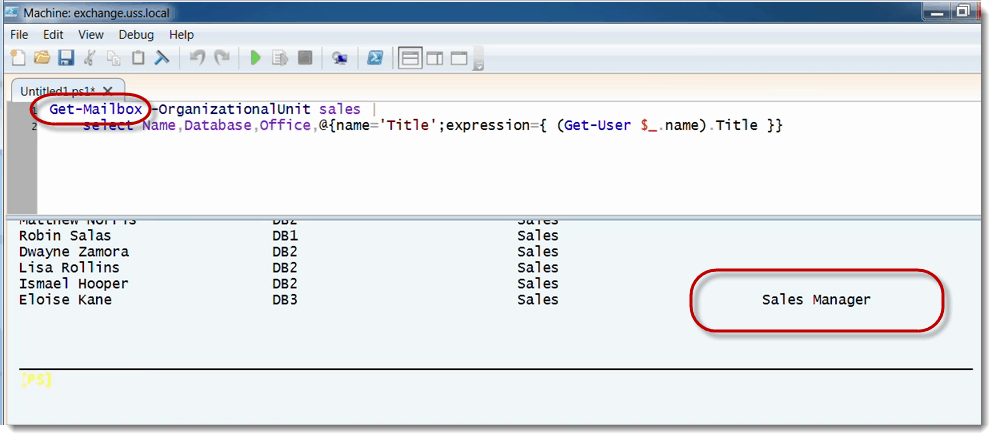
C:\>Get-Mailbox – OrganizationalUnit sales | select Name, Database,Office,Titile

Notice that the Title empty?
In this particular instance the title property is returned by a separate cmdlet and that’s Get-User.
So if I run Get-User – OrganizationalUnit sales – RecipientTypeDetails usermailbox | select Name,Title
You can see that that property is actually returned by that cmdlet.

So the question really becomes how do I take properties from different commands and merge them into one view?
How do I take data coming out of Get-User and populate the (Title) column while I’m grabbing these other properties from Get-Mailbox?
This is a common dilemma for most Exchange Server Admins. The way that we address this is by using a couple of techniques and PowerShell. The best one that I would like to use is using something called a calculated property or also known as a custom property. To make this a little bit easier to read I’m actually going to do this in the ISE.
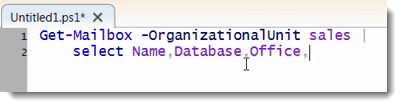
So let’s start off with Get-Mailbox -OrganizationalUnit sales | and hit return because it’s easier for me to kind of read it this way.
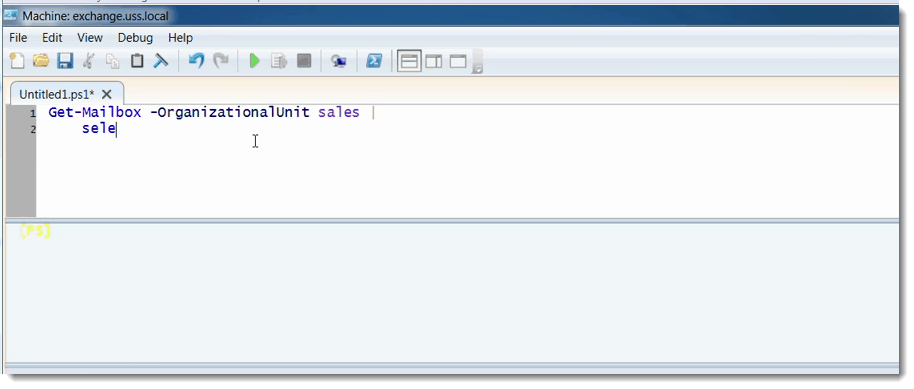
So you don’t have to escape anything after a pipe. You can just simply hit return. I’ll continue with Name,Databse,Office. Now I’m at the point where I want my title property.
Well this is where the syntax gets a little weird to credit custom property.
The way that we do this is hash table. So hash table always starts with a @ sign and it’s contained in curly braces {} and as a key value pair.
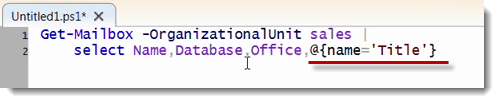
So name would be title in this case. You separate the name key with a semi colon and you’re expression is the actual value and then from there that’s also enclosed in curly braces.
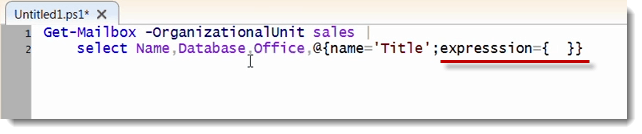
So in here this is essentially what we call as a script block so I can actually run code in here. I can run Get-User on the object coming across the pipeline.
If I wrap that command in parenthesis and access the .title property. I can retrieve that information. So kind of tricky syntax but really useful.

Let me go and run this and I’ve got an illegal syntax in here. It’s because I spelled expression wrong. Too many s’s.
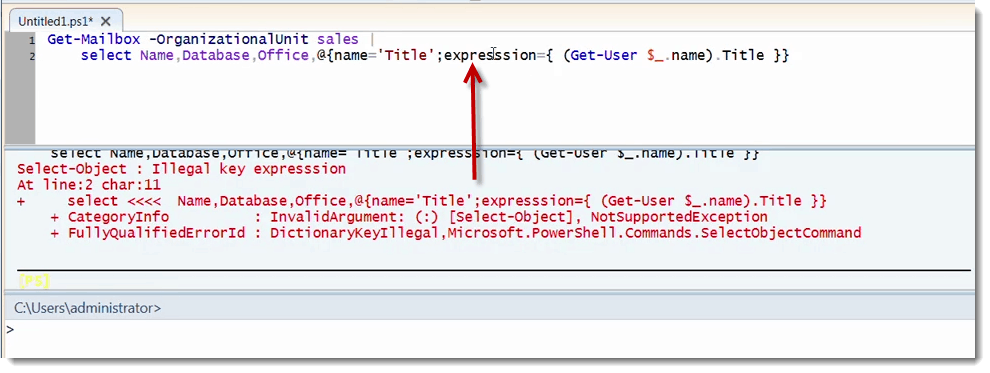 Run it again. So notice this time it ran without errors. But there is one problem I only got the title information for one user. So this is kind of tricky. This is one of the pitfalls of working with the Exchange Management Shell (EMS).
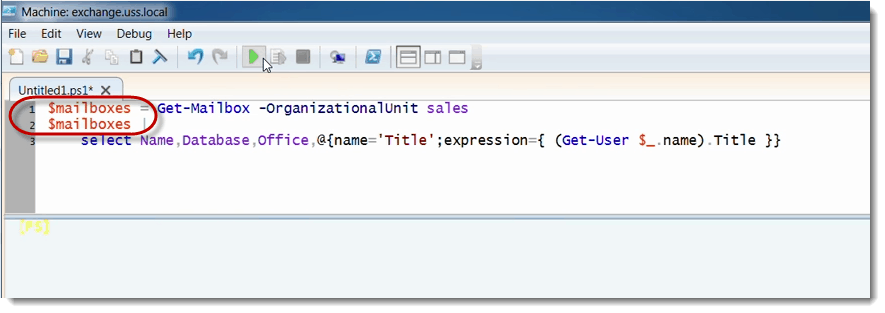
It’s’ because the Exchange Management Shell or any other PowerShell remote kind of configuration is affected by something called a concurrent pipeline error. We’re running get mailbox and sending out objects over the pipeline one at a time. We’re trying to open up another pipeline and that’s not supported. So in these instances the best way to handle this is really to save that output first into something like a variable like mailboxes.
Then you pipe the variable over to your command.
As you can see this time it actually works just fine.
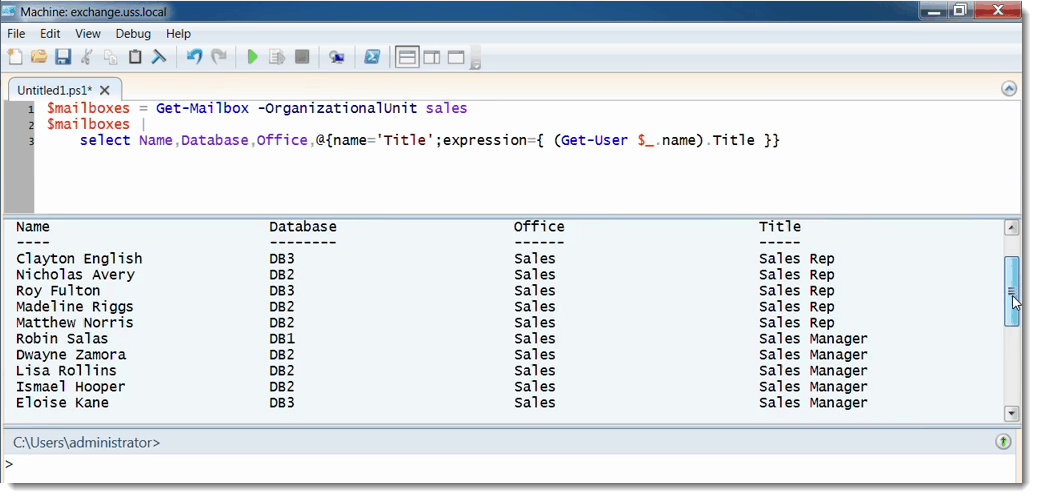
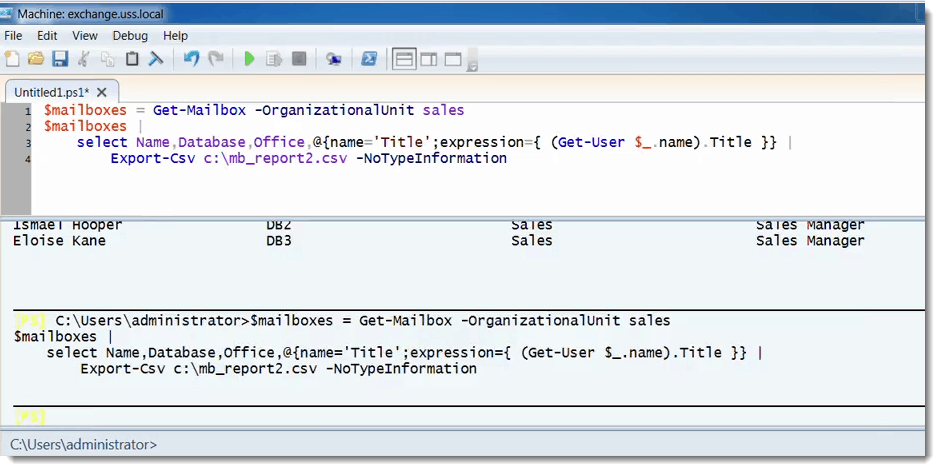
It’s able to go out and pull the right information. Now I’ve merged data from two cmdlets so from Get-Mailbox and also Get-User, I’ve merged those into one single view that can be piped on over to: Export-Csv c:\mb_report2.csv -NoTypeInformation.
Let me run that. Didn’t get any errors.
Go out in the C drive and take a look. And there’s our nice pretty looking report.
So you could also from here convert this to html and run report that way. Also it will be nice to save at this point this file. I’ll save this in my document and we’ll call this salesmbreport.ps1.
So just a couple of common scenarios running reports, exporting to csv and html and also creating kind of a custom property and generating a custom view for these commands.


A Simple Introduction to Cisco CML2
Mark Jacob, Cisco Instructor, presents an introduction to Cisco Modeling Labs 2.0 or CML2.0, an upgrade to Cisco’s VIRL Personal Edition. Mark demonstrates Terminal Emulator access to console, as well as console access from within the CML2.0 product. Hello, I’m Mark Jacob, a Cisco Instructor and Network Instructor at Interface Technical Training. I’ve been using … Continue reading A Simple Introduction to Cisco CML2
Creating Dynamic DNS in Network Environments
This content is from our CompTIA Network + Video Certification Training Course. Start training today! In this video, CompTIA Network + instructor Rick Trader teaches how to create Dynamic DNS zones in Network Environments. Video Transcription: Now that we’ve installed DNS, we’ve created our DNS zones, the next step is now, how do we produce those … Continue reading Creating Dynamic DNS in Network Environments
Cable Testers and How to Use them in Network Environments
This content is from our CompTIA Network + Video Certification Training Course. Start training today! In this video, CompTIA Network + instructor Rick Trader demonstrates how to use cable testers in network environments. Let’s look at some tools that we can use to test our different cables in our environment. Cable Testers Properly Wired Connectivity … Continue reading Cable Testers and How to Use them in Network Environments