ITIL – Building a Service Catalog in 4 steps, Part 2 of 3

In part one of this blog series, we discussed Step 1 to my first Service Catalog (Get something out there!). In this part, I’d like to share with your our final three steps.
Step 2: Refine the catalog with meaningful information.
Once we had a basic catalog launched with key services, we found our first big issue. Customers started calling us with two important pieces of information: 1) they loved the new site, and 2) they noticed that we forgot a few things. Now I found out that the little ‘favors’ we did for certain customers were no longer just favors, they were service expectations. Many of these were legitimate services that we didn’t document in our first round, but how do we manage all of this? We had to determine how to add/change/remove services and their details from our catalog in an organized fashion.
Believe it or not, this was easier than I expected. Most likely because we already had mature change and release process as well as defined roles for each service. Leveraging our service owners and change management, our Service Catalog was essentially updated on a release schedule, meaning that as we documented new or changed services with our customers, a new release of the catalog was deployed, and of course this was approved by the appropriate change authority.
Like before, here are my notes from this step:

- Define the process for adding, removing, and amending services in our catalog through change and release management
- Leverage our service owners to own the identification, scoping, and updating of services – they will represent service changes in the CAB (Change Advisory Board)
- Since we really don’t have Service Levels agreed yet, let’s get some targets defined with input from the customers so we can use this in our upcoming Service Level Management program
Step 3: Automate where possible to allow customers to perform self-help.
This was probably the biggest eye opener for me. My original plan was to shop for an integrated Service Management tool that offered workflow to support our self-service capabilities and replace our aging ticketing platform. What I found was that we had an in house capability to build a catalog first, without a costly investment – it was SharePoint. Lucky for us, we had a closet SharePoint expert on staff who led the charge here.
The plan was to build the catalog in SharePoint first to work out the bugs, then use that as a blueprint to launch the catalog into a newly selected integrated Service Management tool (I’ll explain more about selecting an integrated Service Management tool in a later blog). This later proved to be a big success for us.
Besides launching a customer view of the catalog, building self-help capability to our portal was one of our most talked about capabilities (according to customer feedback). Our users loved it! Where did we start? Moves – Adds – Changes. Now, customers could request new user set up (or move, or retirement, etc.), by literally filling out an online form that triggered a series of work orders, all of which culminated in a successful transaction. Of course, these had to be verified and approved by the appropriate managers. If there’s one thing our team did to make the Service Catalog a success, it was adding self-help.
Some selected notes from this step:
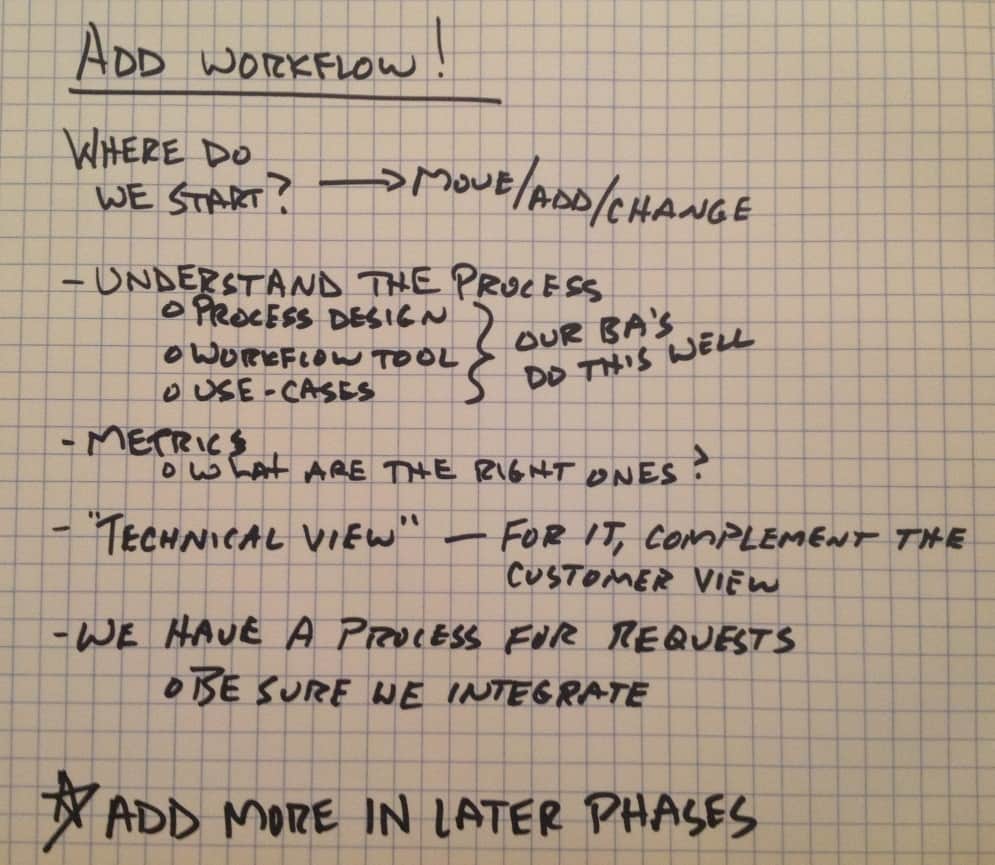
- Get our BA’s involved, we want to make sure there is a process behind the tool (complete with requirements and use-cases)
- Determine the right metrics and reporting functionality we need
- Add the “technical view” to the catalog, information relevant to IT in supplying the services
- Formally link this to the Request Fulfillment process
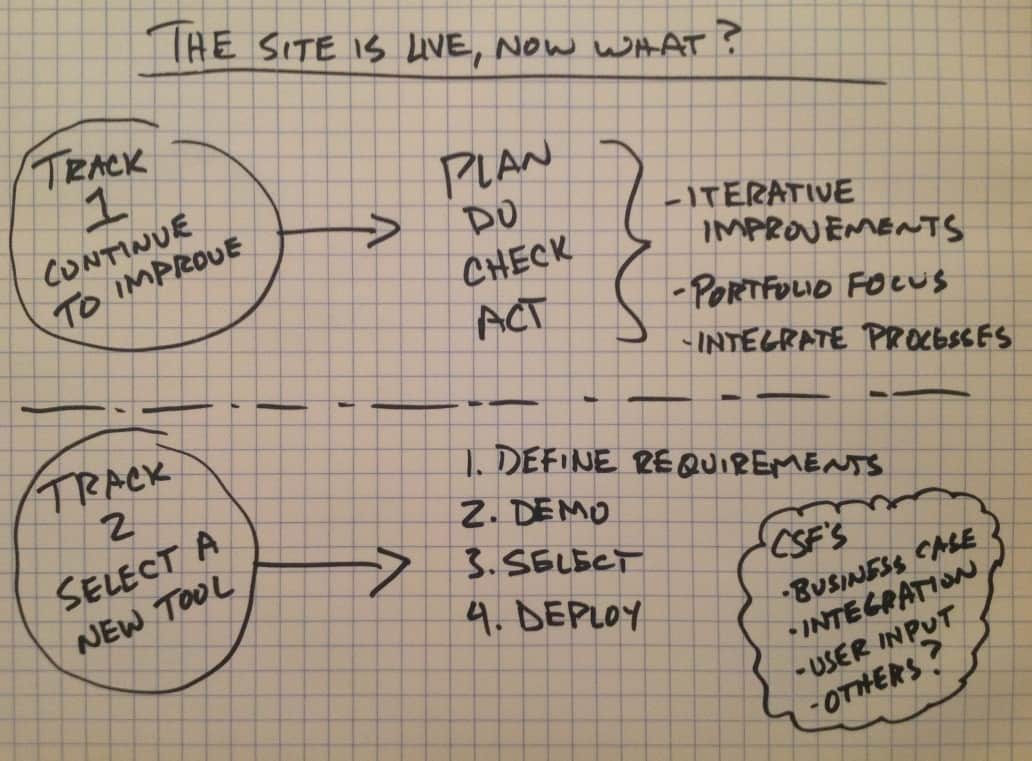
Step 4: Continually improve, update and modify the catalog contents.
It’s one thing to do a bottom-up approach like we did, but a complete new perspective to start looking at this is from the top down. Our toughest challenge was to understand where these services really fit in the overall portfolio. Some would criticize that we took the wrong approach, but considering the cultural and managerial aspects of this company (we had to move quickly), I feel we did it right. In order to continually improve, we had to look at the overall structure, and how this fit into the organization. Essentially, we built our portfolio from the bottom up.
This phase was iterative, and is still going on today. Our plan was to essentially follow the Deming Approach (Plan, Do, Check, Act) to continually build on the early successes of the Service Catalog Deployment by making appropriate changes that add value to the customer, and make IT a part of the team, not just a group of tech-heads on the first floor.
Part of this phase was the selection and implementation of a full Service Management tool that allowed us to fully integrate and leverage all of our Service Management processes.
Finally, some selected notes from this phase.
- Measure, report and adjust the catalog (i.e. what self-services are customers using?)
- Understand our capabilities then attack Service level Agreements (include OLAs and Underpinning contracts as well)
- Build an IT Service Portfolio that includes services from the catalog, as well as those in the pipeline (we worked with the PMO to do this)
- Continue to integrate processes, and conduct a successful tool implementation
- In the future, look into how we identify and manage costs
Now, we had what we felt was a great foundation in place that we could continually update as services were added or changed. This allowed us to move on to other key processes. Next we’ll finish building our Service Catalog with Step 3 – Take Action. In this third and final blog of this series, I’ll outline what I feel were some of the most critical aspects of this project.
Mark Thomas – Director of Business Services
Interface Technical Training


A Simple Introduction to Cisco CML2
Mark Jacob, Cisco Instructor, presents an introduction to Cisco Modeling Labs 2.0 or CML2.0, an upgrade to Cisco’s VIRL Personal Edition. Mark demonstrates Terminal Emulator access to console, as well as console access from within the CML2.0 product. Hello, I’m Mark Jacob, a Cisco Instructor and Network Instructor at Interface Technical Training. I’ve been using … Continue reading A Simple Introduction to Cisco CML2
Creating Dynamic DNS in Network Environments
This content is from our CompTIA Network + Video Certification Training Course. Start training today! In this video, CompTIA Network + instructor Rick Trader teaches how to create Dynamic DNS zones in Network Environments. Video Transcription: Now that we’ve installed DNS, we’ve created our DNS zones, the next step is now, how do we produce those … Continue reading Creating Dynamic DNS in Network Environments
Cable Testers and How to Use them in Network Environments
This content is from our CompTIA Network + Video Certification Training Course. Start training today! In this video, CompTIA Network + instructor Rick Trader demonstrates how to use cable testers in network environments. Let’s look at some tools that we can use to test our different cables in our environment. Cable Testers Properly Wired Connectivity … Continue reading Cable Testers and How to Use them in Network Environments
See what people are saying...