Part 4 – How to Import a CSV Text File into SharePoint 2013 – Create Views in SharePoint

SharePoint Video Training Series – Importing a CSV file into SharePoint 2013.
- Introduction
- Prepare the Excel File
- Create the List in SharePoint 2013
- Create the Views in SharePoint 2013
- Create the SharePoint Home Page Dashboard
For instructor-led SharePoint training, see our class schedule.
This is the fourth of a five‑part video series where we’ve taken some data from the CSV file, brought into Excel, got that Excel data into SharePoint, modified the default view, set some of the list column properties and names, and went ahead and created a calculated column. That’s where we left off in the last movie.
Download the Products.csv file.
Now what we’re going to do is we’re going to create separate views, or ways that we want to look at this data.
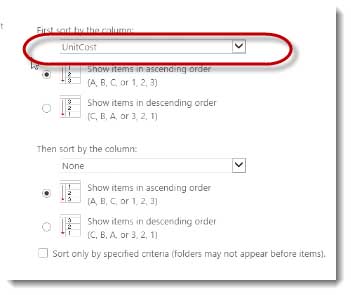
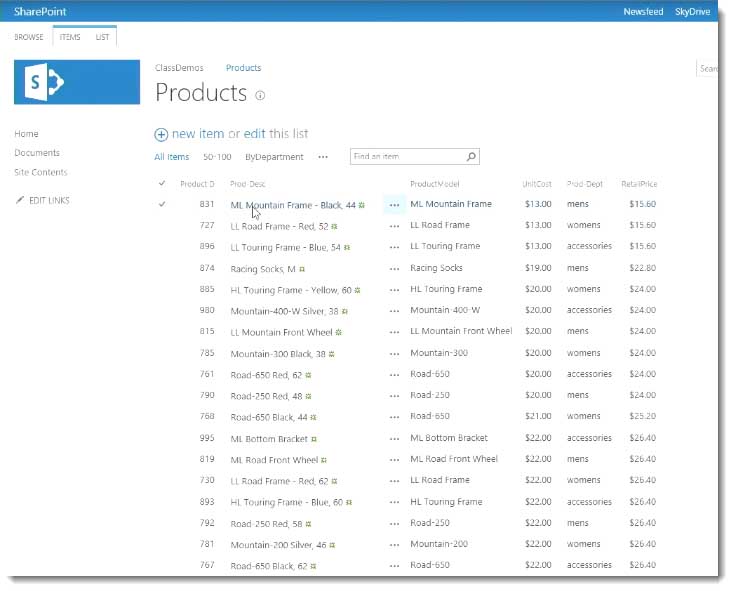
The default view is showing everything and it’s sorted by the unit cost, from low to high.

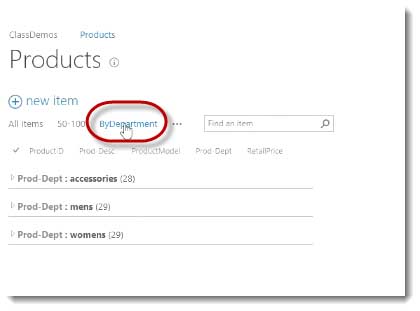
The first thing we’re going to do is create a view that groups the products by departments. You can see some of them are Men’s, Women’s, Accessories.
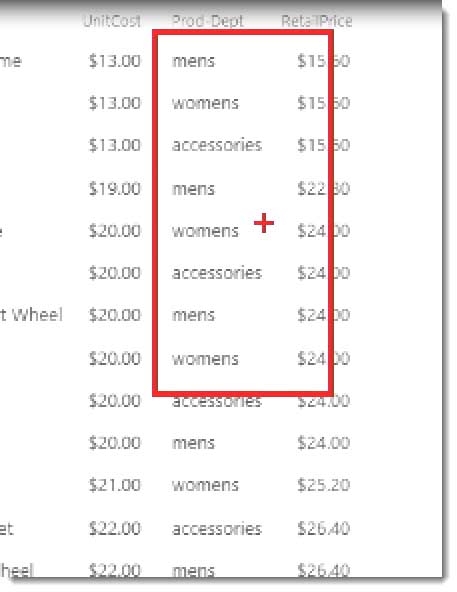
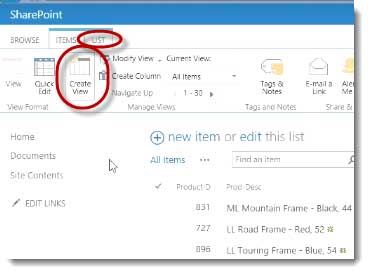
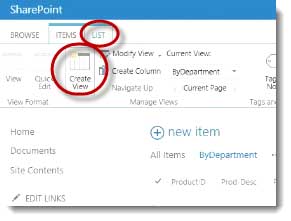
There’s three different departments, and we’re going to go ahead and have a view that looks at things based on the department they’re on. I’ll do that by clicking up here in the ribbon. I have clicked the List Tab. I’m going to click Create View.
What I’m going to do is start from the existing view, which is All Items.
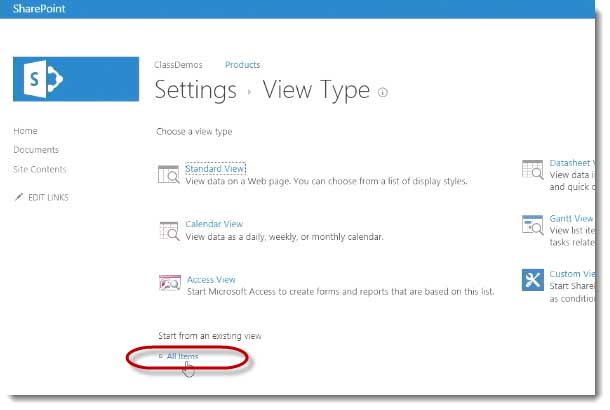
I’m going to click All Items. Then what I’m going to do is call this one By Department.
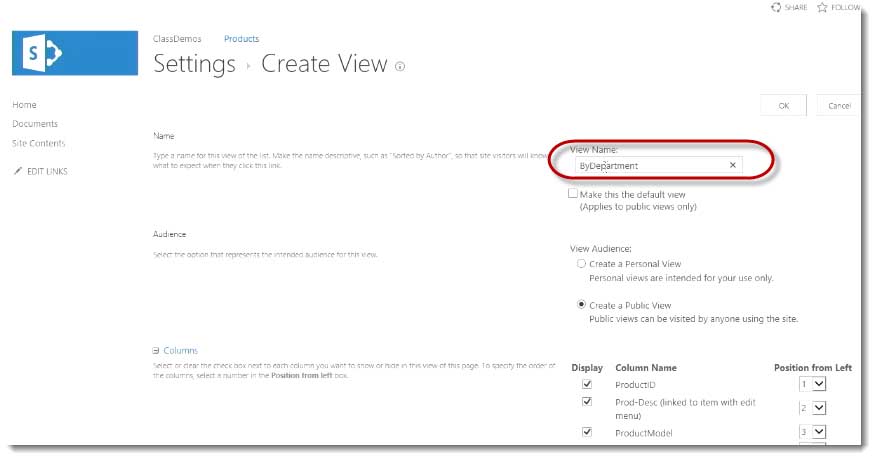
I don’t actually need the unit cost in this view, so I’m going to uncheck Unit Cost.
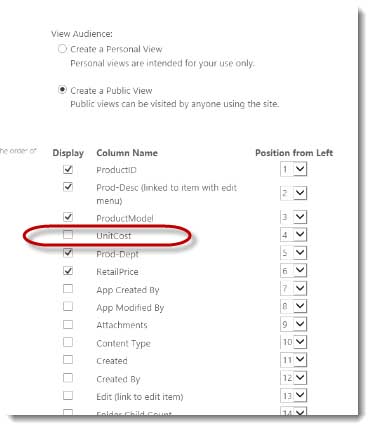
That’s information I’m deriving my retail price and my calculating column from, but I don’t really need it in this view.
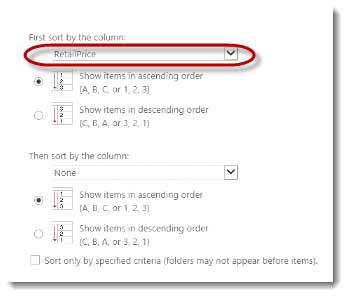
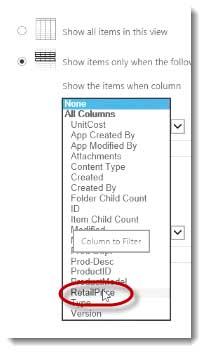
I’ll change the sorting to RetailPrice.
Since retail price is in this view, it will make more sense if anyone comes back later.
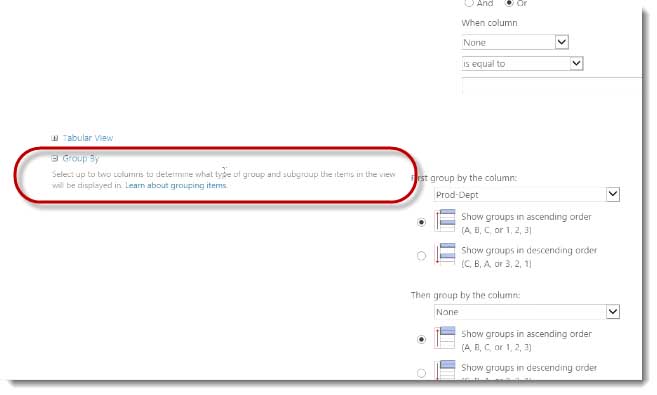
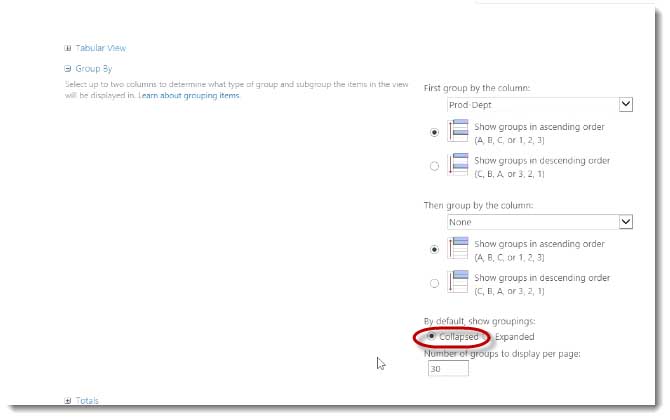
What I want to do is choose, over here on the left side, the Group By section.
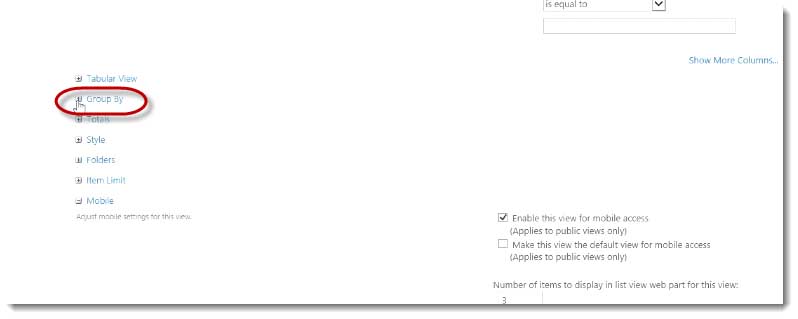
There is a little plus sign. If I expand that, I want to group by the column Product Department, so ProdDept. SharePoint does all the work for me.
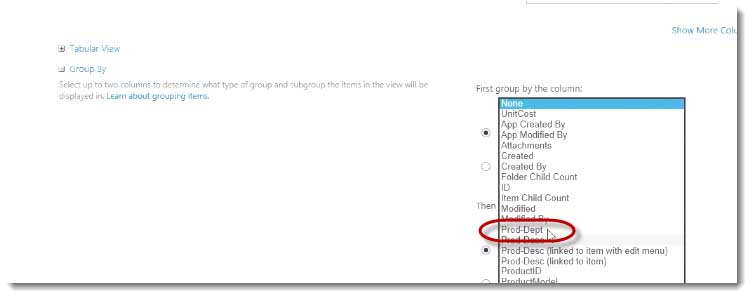
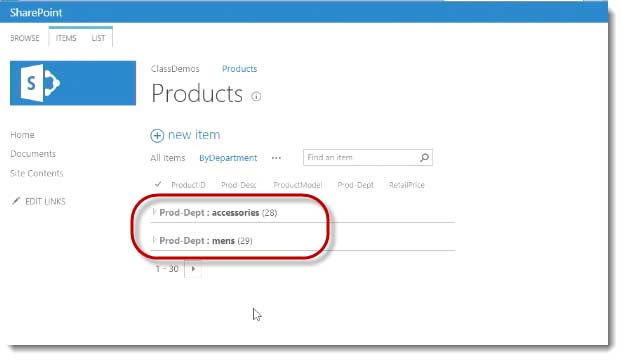
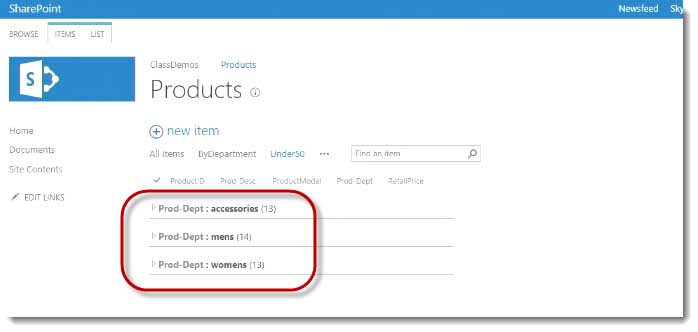
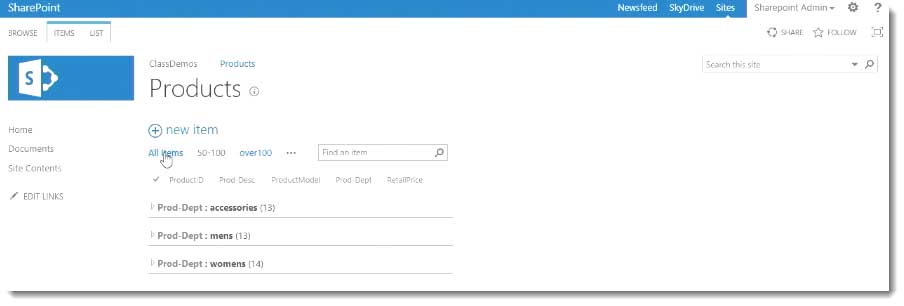
I click OK, and I’ve got a view of the data in that list by department.
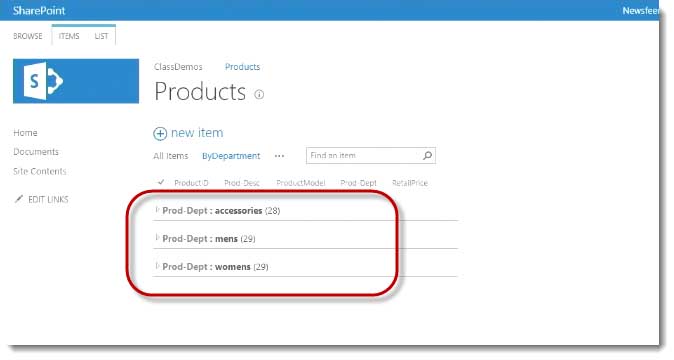
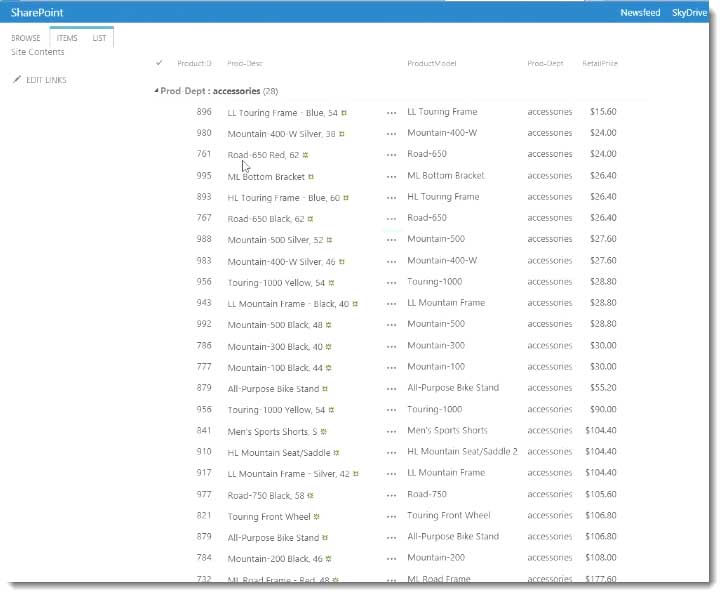
By default it’s collapsed. It shows that I’ve got 28 products that are Accessories, 29 that are in the Men’s department, and 29 in the Women’s department.
If I want to see the individual items, I can click that arrow to expand and contract that.
Again, it’s all out of the box stuff.
If I wanted them to start off expanded, that is an option. I could go Modify This View.
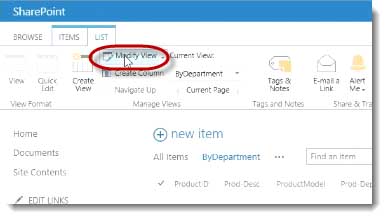
Then scroll down to that area where I grouped everything. Again, I’m going to expand Group By.
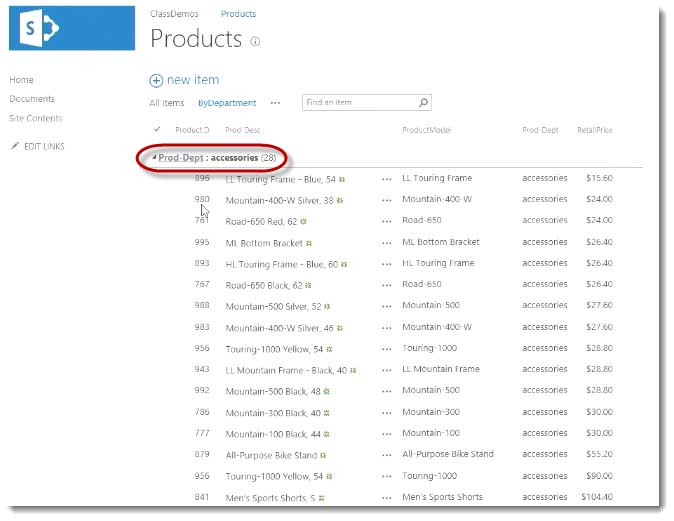
It says by default, “Do you want to show things collapsed or expanded?” I tend to prefer them collapsed if I have a decent amount of items. I’ll click Expand it right now, to show you what that will look like.
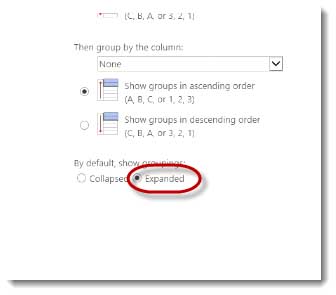
You’ll see it shows them already expanded.
In this case I have enough products that it will cause some paging and I really like the idea of having just one dashboard here.
It’s honoring the paging here, even though I have room to go back. I’m going to go back and change that, just wanted to show you that setting, because sometimes that is something you want to do.
I’m going to come down to the Group By > Collapsed
That’s my Products by Department view in SharePoint.
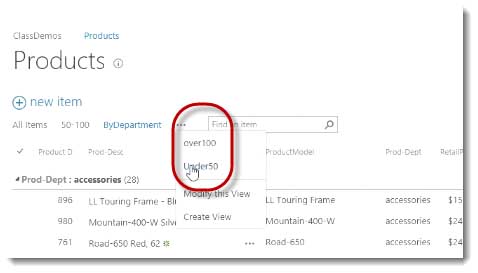
I’m going to go ahead and create a view of products from $0 to under $50, so $0 to $49.99 basically.
I am going again click the List Tab, I’m going to click Create View.
I’m going to save myself some time, because we have the option of By Department
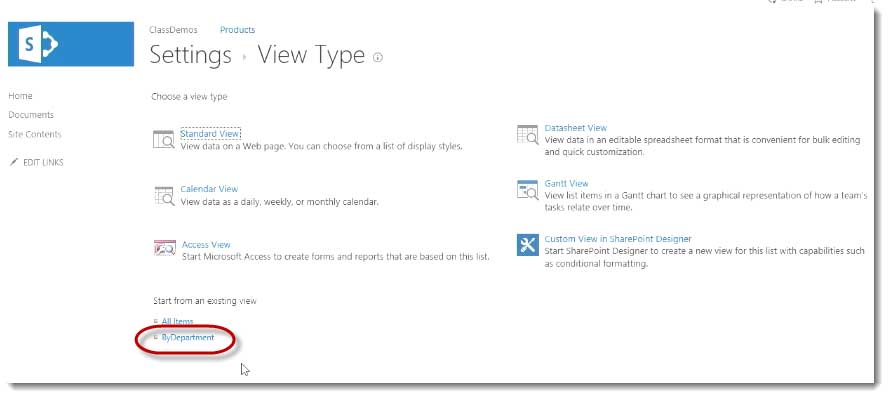
This it’s sorting by retail price and it does not have unit cost in there.
Since I have already done that work, I’m going to start there instead of from scratch. I’m going to call this Under50.
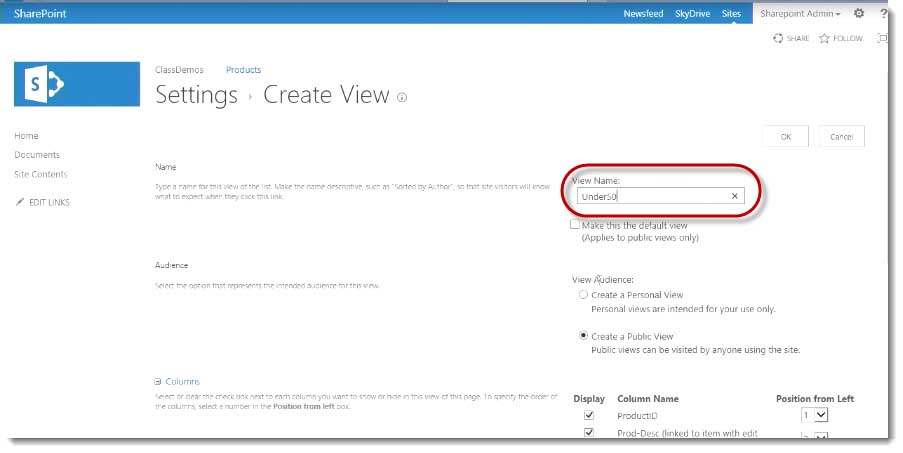
That’s the name of my view, Under50. I can scroll right on down and go to the filter section, and I can check the radio button that says, “Show items only when the following is true.”
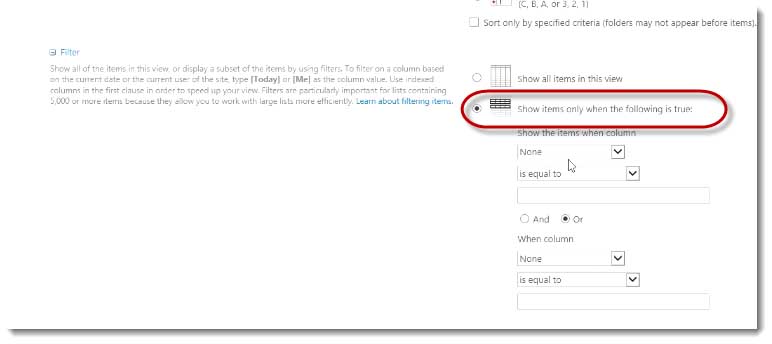
What is it I am trying to say? I’m trying to say, when the retail price is less than…
If I do less than or equal to that will be all the way and including $50. But if I do less than $50, that will be $0 to $49.99.
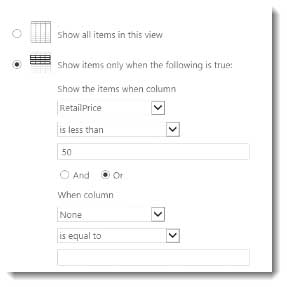
I would do whatever it is that would I desire at this time, and then I’m going to click OK.
What’s going to happen is, I brought in the Group By, because that’s where I started from the view that already had that.
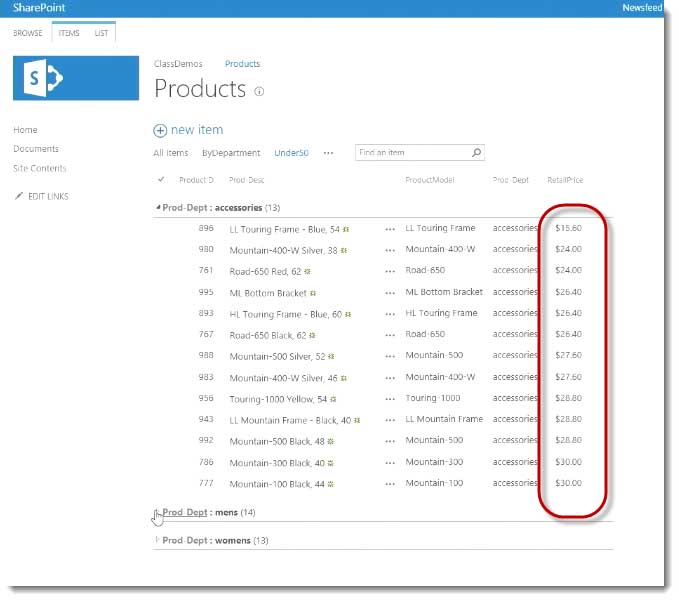
Here are my under $50 products and they’re all grouped.
I have got 13 in Accessories. If I wanted to expand that, they are all retail‑priced under $50, and sure enough everything seems to be just fine. That’s great.
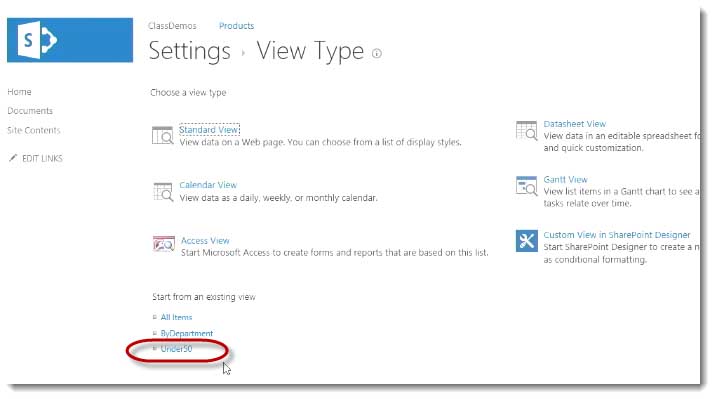
I’m going to create another view. I’ll click the List Tab, Create View.

This time I’ll start with the under $50 products view.
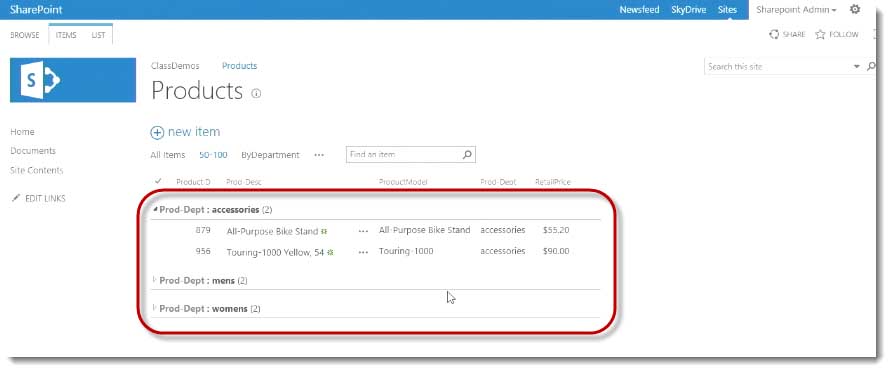
I’ll say $50 to $100. This will be $50 to $100.

I’ll scroll down and I’ll leverage everything I did, but instead of Retail Price is less than, I’m going to say is greater than or equal to $50. I will add a second condition, where the retail price is less than or equal to $100.
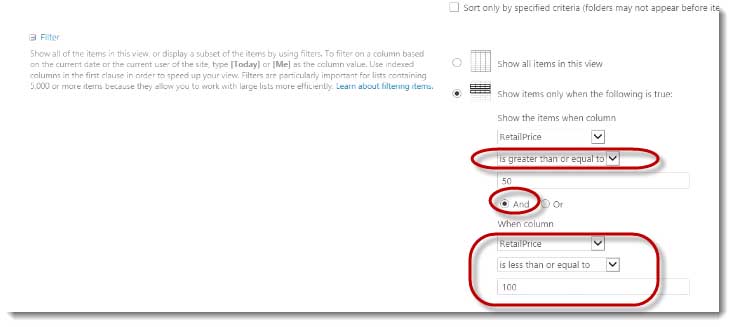
Again, I don’t have to do anything in the Group By, because I’m starting with the view that already had that applied, so that’s applying that as well. There’s not that many products here, but you can see these are all meeting both greater than or equal to $50 and less than or equal to $100.
Finally, the last view I want to create, I will say Create View. I’ll click the List Tab, Create View. I’m going back to starting with under $50

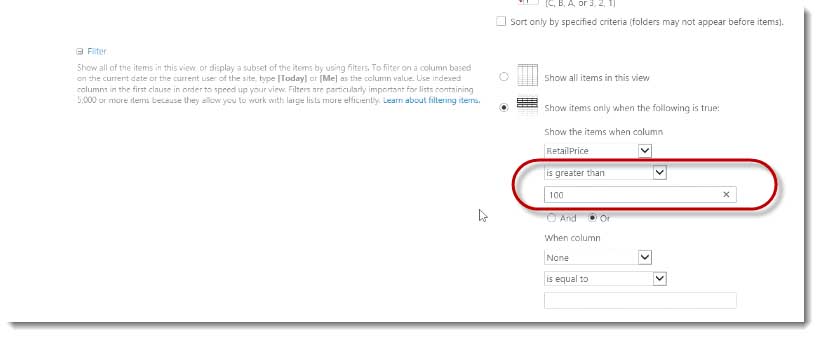
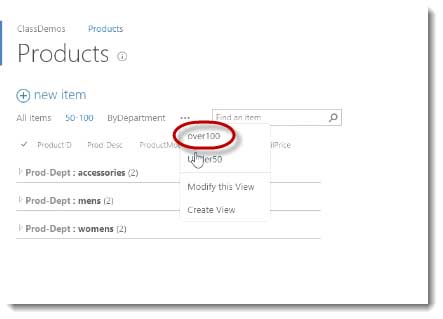
And I’m going to title this View over $100.
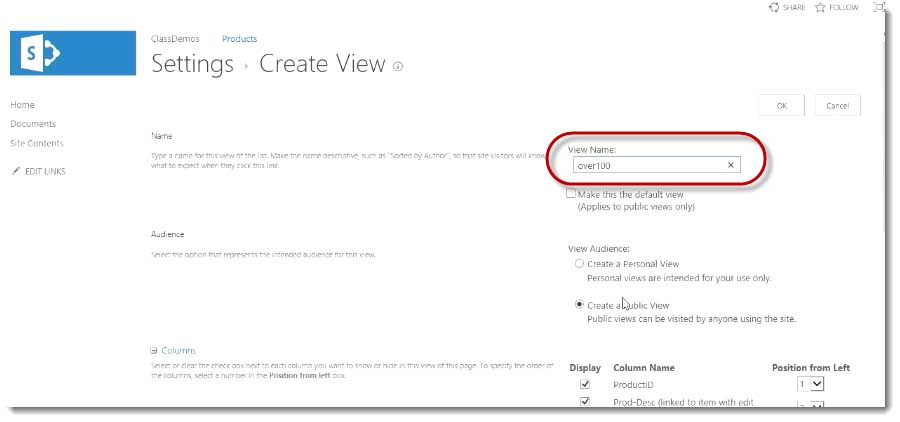
I’ll come back down to filtering and Retail Price is greater than, and I’m going to change $50 to $100.
It’s a really good idea, especially when you get into views that are even more complex than this and you are filtering out how much in columns, you can really leverage that work by starting from one of those views and creating other views.
Now I have got my over $100.
I’ve got several different views and I’ve got All Items which is just when the list was created.
I modified that to sort by Unit Cost, low to high. I’ve got By Department, which is grouping all the products by departments.
Since I started with the All Items, it should honor that sorting from low to high. I’ve got under $50, those are all my products under $50. There’s all my products from $50 to $00.
Then finally, I’ve got over $100. Anything that’s over $100 should be showing up there.
That is creating all the views.
Next video, we’re going to use all these views and leverage them on SharePoint Wiki pages, in order to create dashboards and then hook up all the navigation. Set one of those as our home page, and we’ll be done.
Spike Xavier
SharePoint Instructor – Interface Technical Training
Phoenix, AZ
5 Part SharePoint Video Training Series – Importing a CSV file into SharePoint 2013.


")
A Simple Introduction to Cisco CML2
Mark Jacob, Cisco Instructor, presents an introduction to Cisco Modeling Labs 2.0 or CML2.0, an upgrade to Cisco’s VIRL Personal Edition. Mark demonstrates Terminal Emulator access to console, as well as console access from within the CML2.0 product. Hello, I’m Mark Jacob, a Cisco Instructor and Network Instructor at Interface Technical Training. I’ve been using … Continue reading A Simple Introduction to Cisco CML2
Cable Testers and How to Use them in Network Environments
This content is from our CompTIA Network + Video Certification Training Course. Start training today! In this video, CompTIA Network + instructor Rick Trader demonstrates how to use cable testers in network environments. Let’s look at some tools that we can use to test our different cables in our environment. Cable Testers Properly Wired Connectivity … Continue reading Cable Testers and How to Use them in Network Environments
Data Models in Business Analysis
This video is from our PMI-PBA Business Analysis for IT Analysts and Project Managers (PMI-PBA)® Certification now available at Interface Technical Training. Also see Steve’s PMP Project Management Certification Course: Project Management Professional (PMP®) Certification Video Training PMBOK® 6th Edition Video Transcription: Data Models are part of the elicitation analysis in PMI-PBA. This is the way … Continue reading Data Models in Business Analysis
Pingback: Video - Creating the list in SharePoint to import a CSV Text File