Part 5 – Importing a CSV file into SharePoint 2013: Create Home Page Dashboards

SharePoint Video Training Series – Importing a CSV file into SharePoint 2013.
- Introduction
- Prepare the Excel File
- Create the List in SharePoint 2013
- Create the Views in SharePoint 2013
- Create the SharePoint Home Page Dashboard
For instructor-led SharePoint training, see our class schedule.
This is the fifth and final video in our SharePoint training series and really where we get to get all the payoff. We’re going to create some dashboards.
Download the Products.csv file.
Now, these are not PerformancePoint dashboards or Excel Web Access dashboards. These are dashboards using out of the box wiki pages on a SharePoint team site, and some views that we created in order to let users see what they need to see very easily without having to know any programming or JavaScript or anything like that.
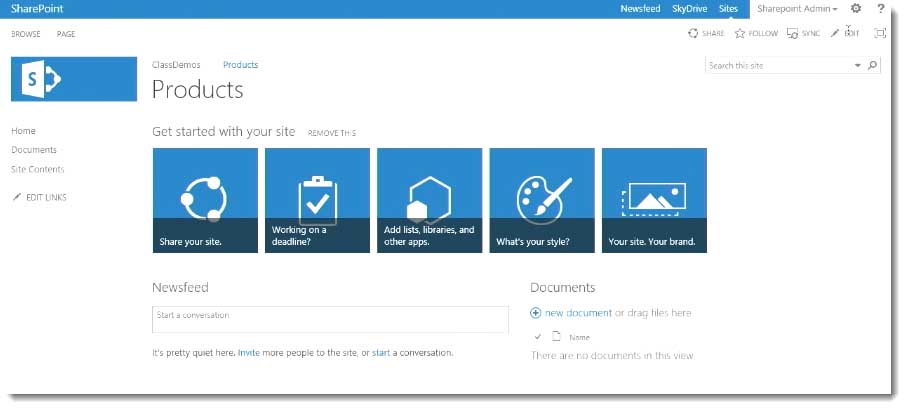
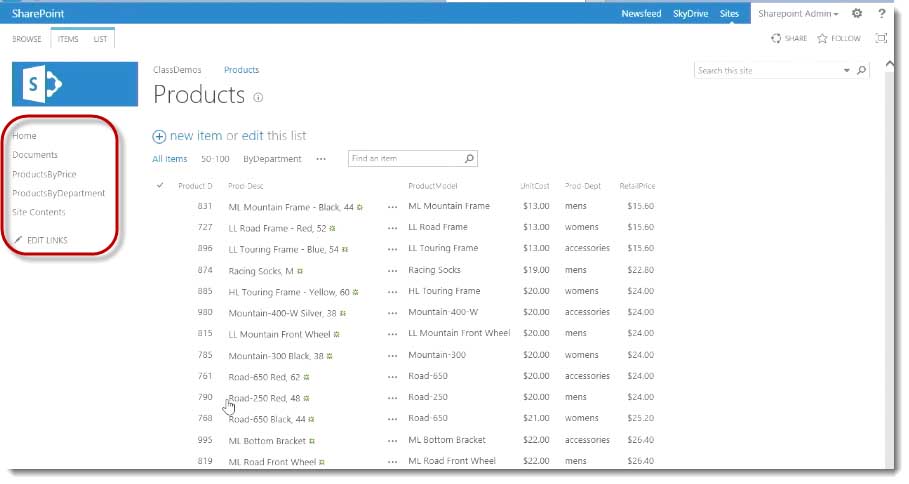
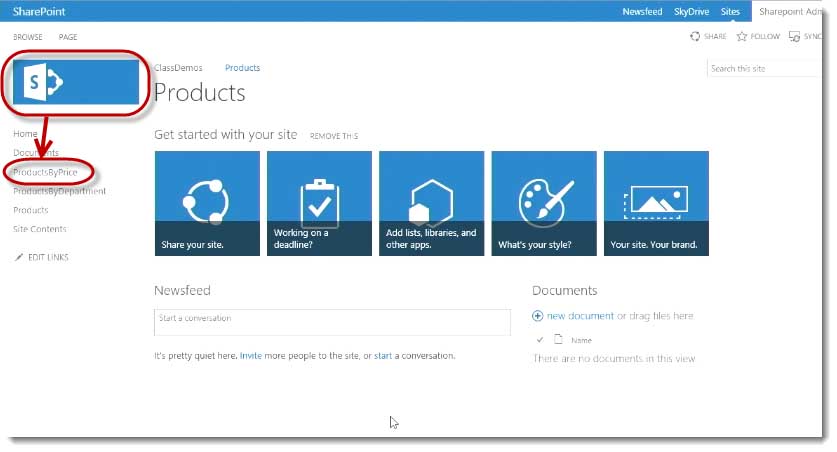
I’m on my site here, my products site.
I’ll click the link and go to the home page. I have that products list that I’ve been working with.
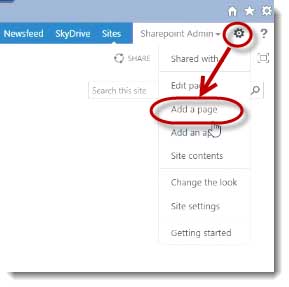
What I’m going to do is simply click the gear and say Add a Page.
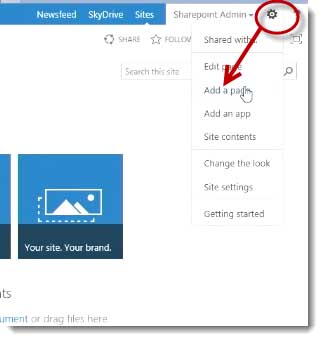
Now, because this is a site that was based on the team side template, it’s going to put my page in the site pages library. I’m just going to name this ProductsByDepartment.
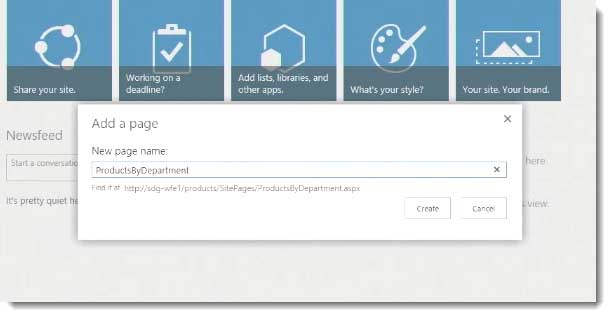
I’ll click Create, and it’s going to go ahead and create my page for me. It’s a blank wiki page, it goes right into edit mode.
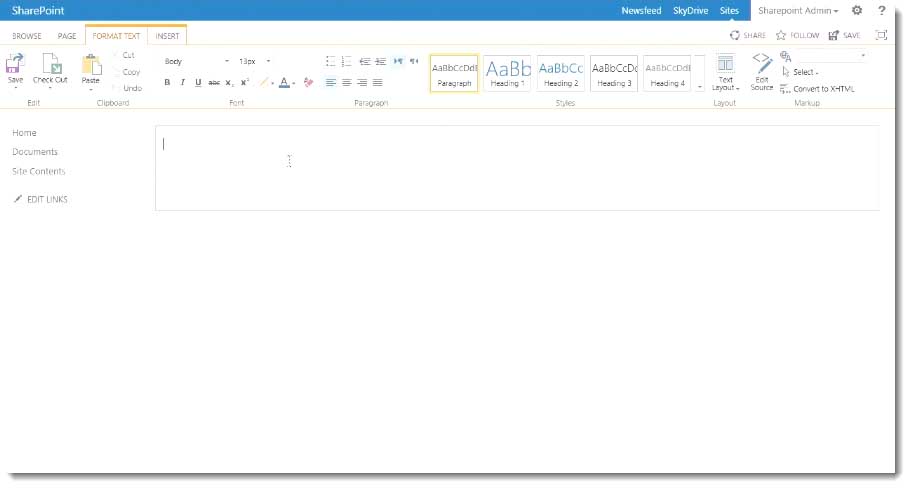
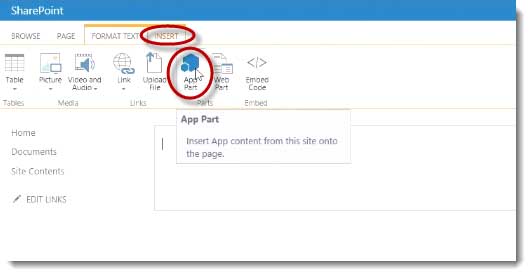
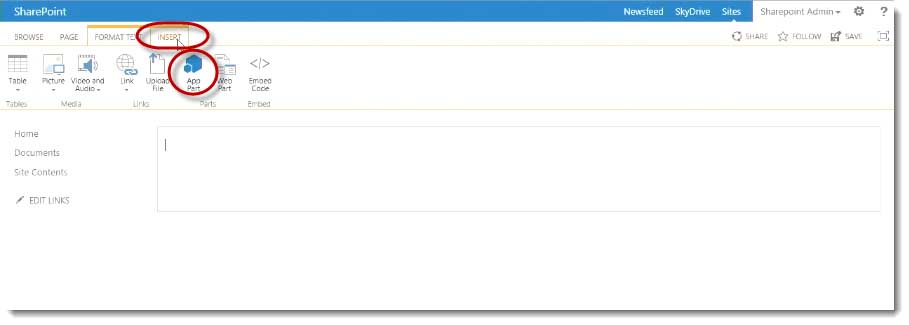
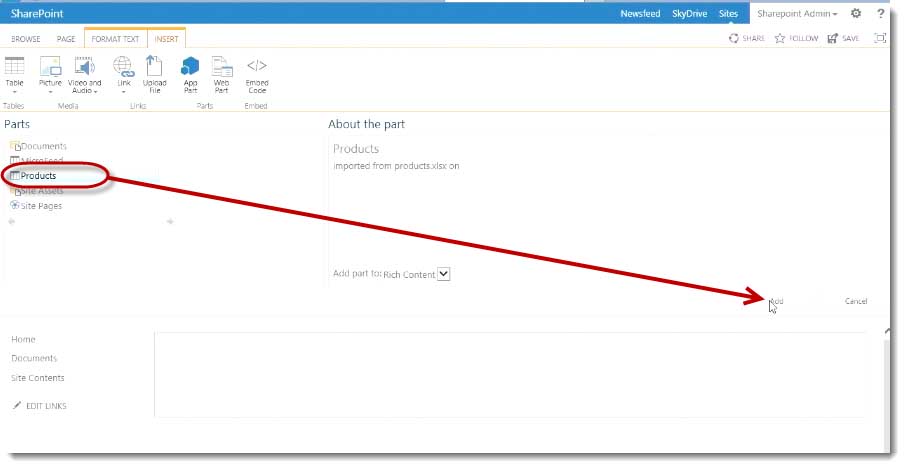
I’m going to insert an App Part, because it’s from our products app, which list an app that are used the same in this context.
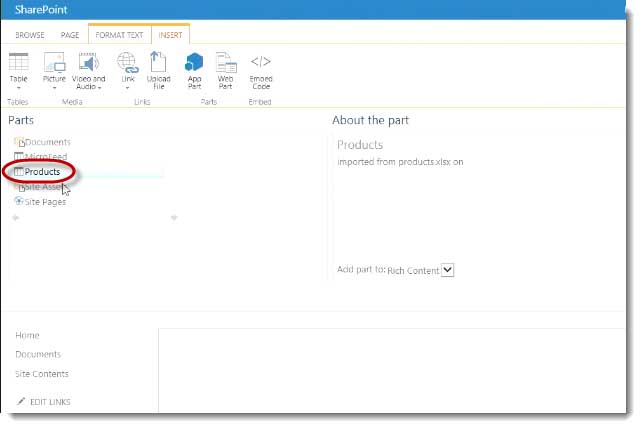
I’ll select Products and click Add.
It’s going to add all the items, the view of all the items,

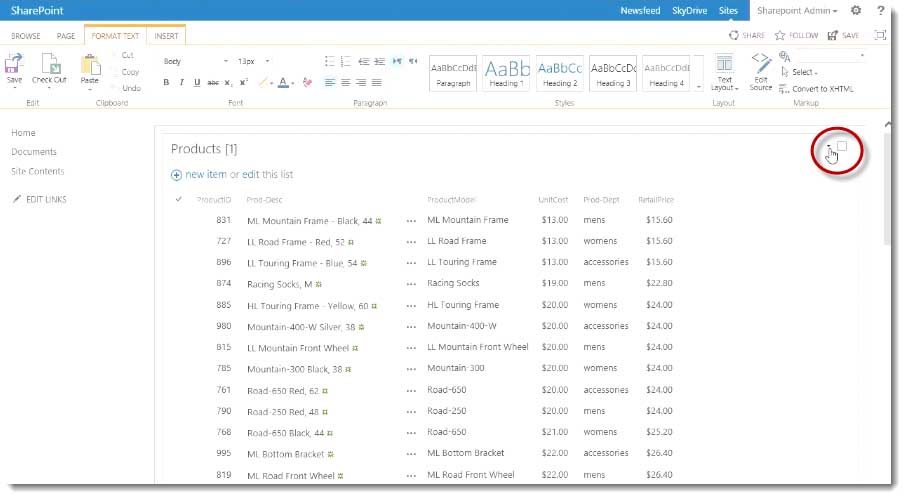
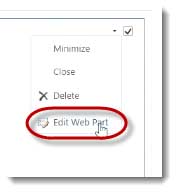
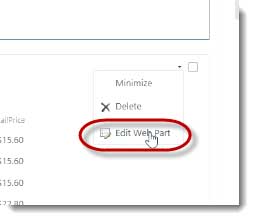
While it’s in edit mode, I’m going to click what I refer to as the black UFO triangle right there. I’m going to click that black UFO triangle and I’m going to say Edit Web Part.
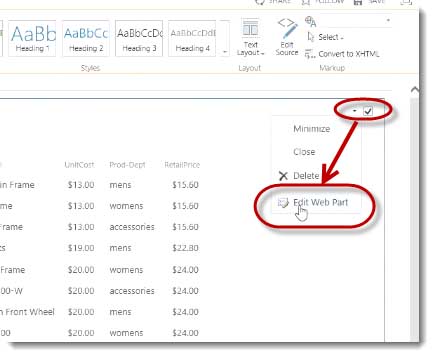
This will take me to the Web Part properties section or little area here on the right side.
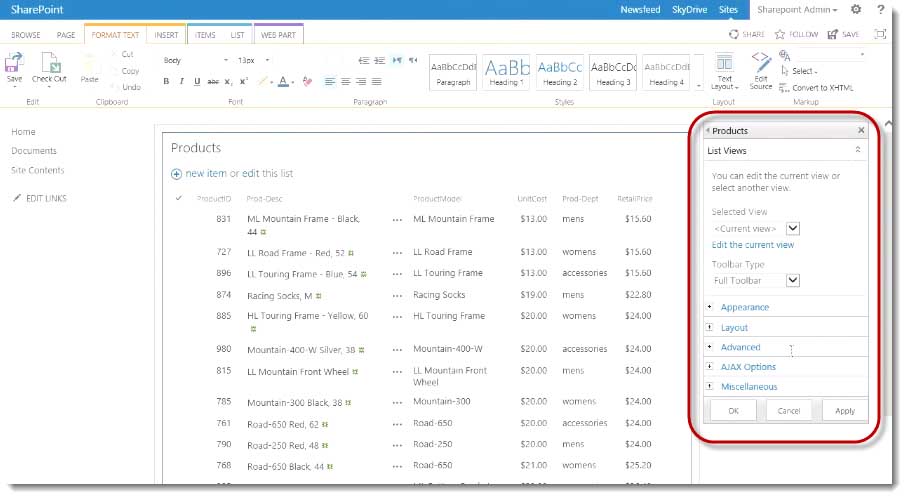
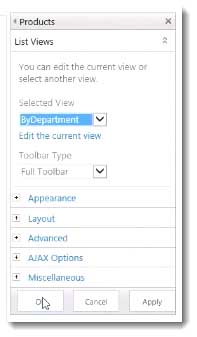
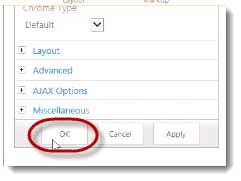
Sometimes you have to scroll over, depending on your resolution. I’m going to bind this Web Part to my by Department view and I’ll click OK.
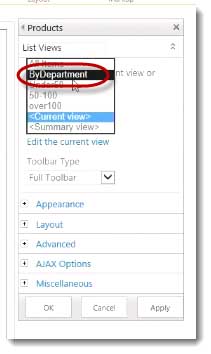
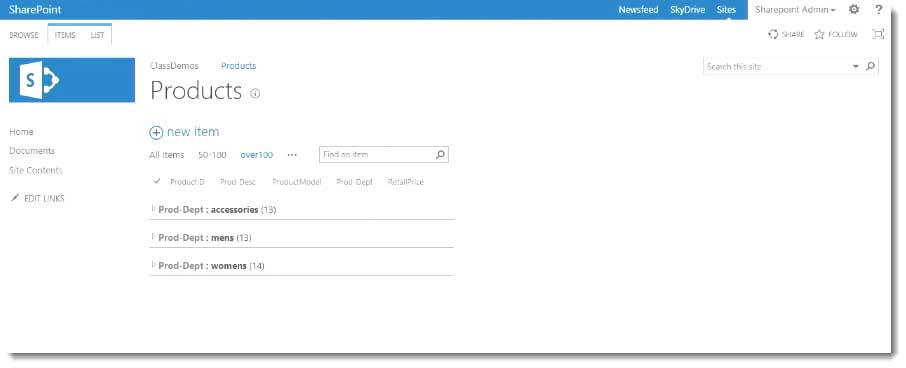
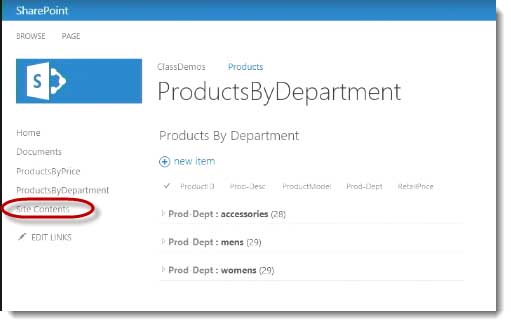
That’s the view that we created in the last video, that groups all the products by department.
Then I’m going to change, in the appearance. From the word Products I’m going to call it Products by Department
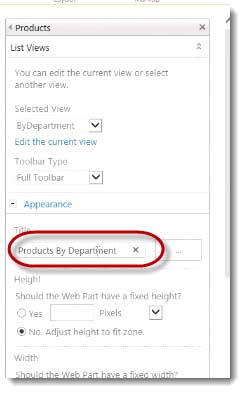
You can actually edit the title of the Web Part.
Finally I’ll click OK,
And without any custom coding whatsoever I’ve got a SharePoint page which I’m going to call a dashboard, that shows all the products, by department.

If I expand those.
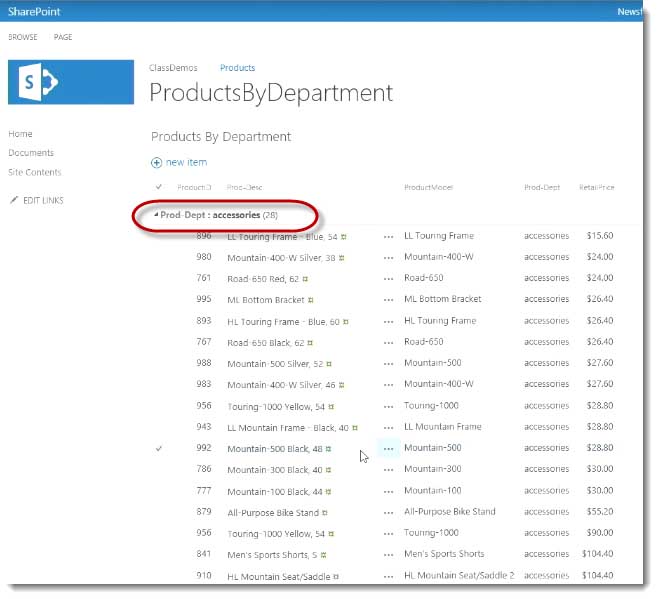
We can see where you can actually go in and set the settings of a view to open already expanded, but in this case it would be a lot of products and you’ll get paging, so this probably is a really useful way to do it. You’ll have to decide what makes sense in your organization.
Now I’ve got a page of ProductsByDepartment and I can expand them all by applying a view to a Web Part Properties on a page.
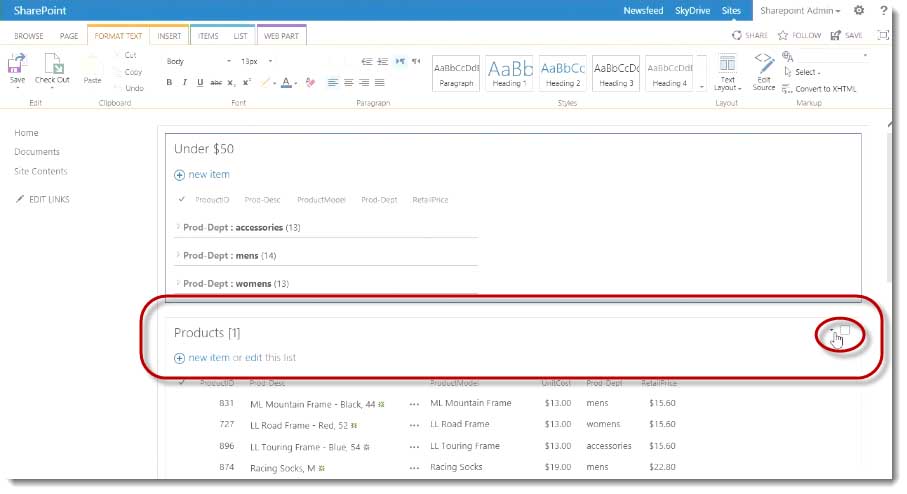
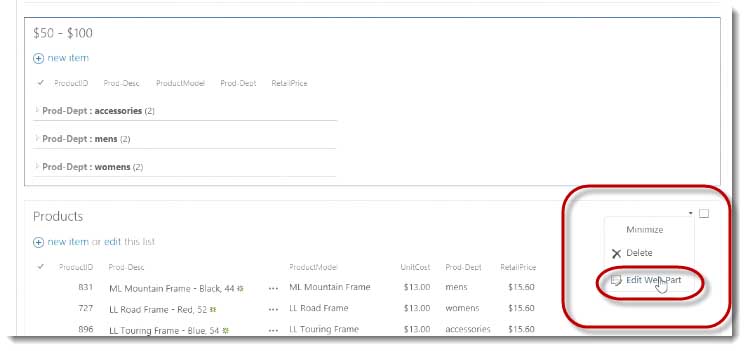
The second dashboard that I’m going to create is just going to have a few more Web Parts on it. It is going to have products under $50, products $50 to $100, and products over $100.
Again I’m going to say Site Actions, Add a Page.
Then, add a title of ProductsByPrice.

SharePoint will automatically add .ASPX.
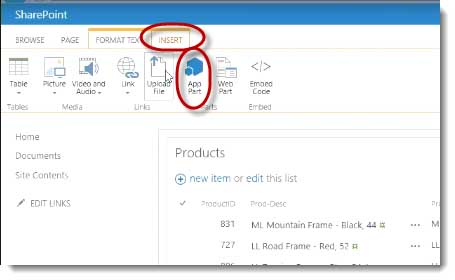
I’m going to click the Insert tab because it opens in the edit mode and App Part,
Then I’m going to click Products and Add
Then Insert, App Part then Add
It should fill that I was selecting Products the last time.
Again repeat the same process one last time. Insert, App Part, Products, and Add.
Now I’ve added three Web Parts to this page. They’re all using the same view, so it’s a long page at this point, but it’s still in edit mode. Now on the top Web Part I’m going to click the black triangle.
And then select “Edit Web Part”.
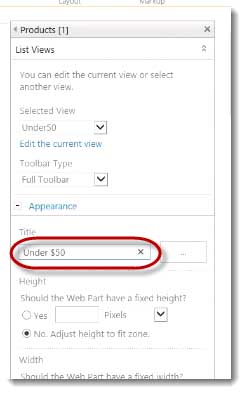
I’m going to bind the very top Web Part to the Under $50 view.
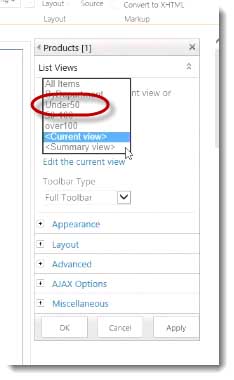
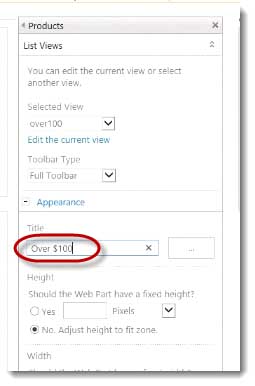
I’m going to change the appearance to say, “Under $50” to make sense to my users, and I’m going to click OK.
Then I’m going to go to the next Web Part, the second Web Part down. See the top one’s bound to Under $50. I’m going to click the black triangle.
Click Edit Web Part.
I’m going to bind this Web Part to the $50 to $100 view.
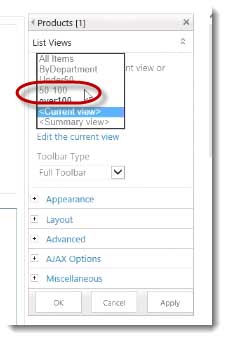
Then I’m going to click Check on Appearance, and I’m going to call this “$50 to $100.”
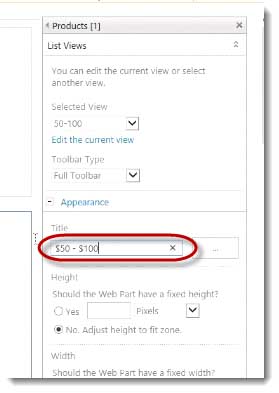
That should be fine, using dollar signs in that particular location.
Then finally I’m going to bind the third Web Part, at the very bottom, I’m going to bind that to over $100.
Again, select the black triangle, Edit Web Part.
Then I’m going to click the drop down menu here to bind this Web Part to the over $100 view that I created in the other video.
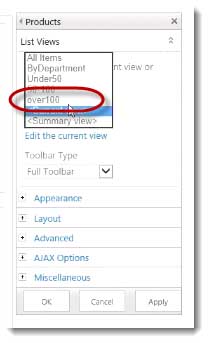
Expand the appearance here and say “Over $100.”
Then I’m going to click OK, and I’m done.
As far as the dashboard’s going, I’m done. I’ve created my page.

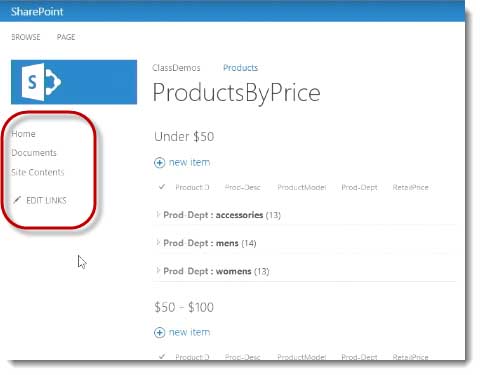
I’ve now got a page that says ProductsByPrice, I’ve got under 50 bucks and it’s got a sub‑grouping by category, which is great. There’s $50 to $100, there’s over $100.
Now, these aren’t showing up in the navigation yet.
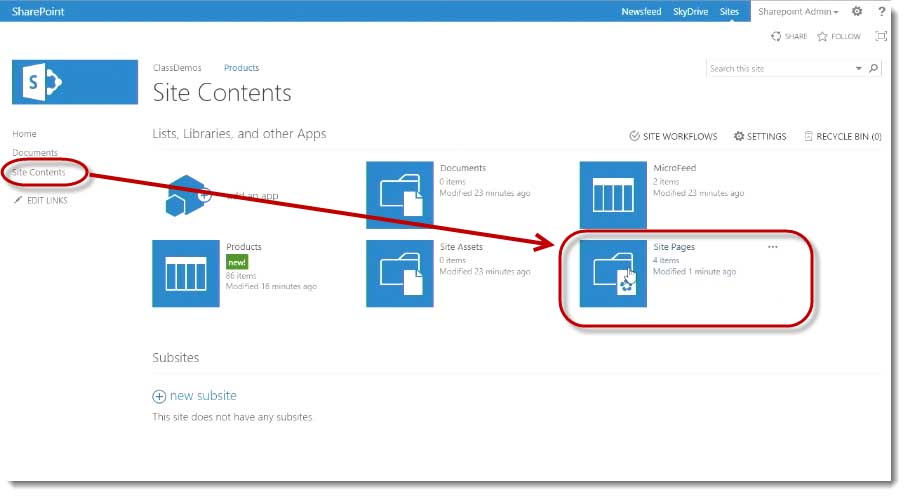
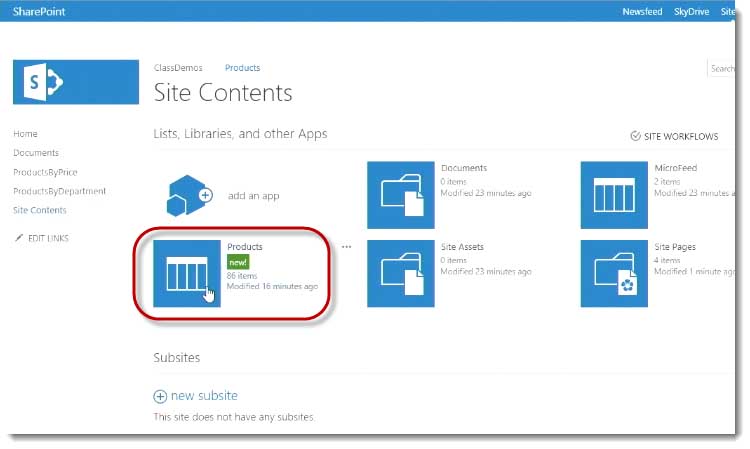
I can change that by clicking on Site Contents, opening up the site pages library.
Then click on Edit Links.
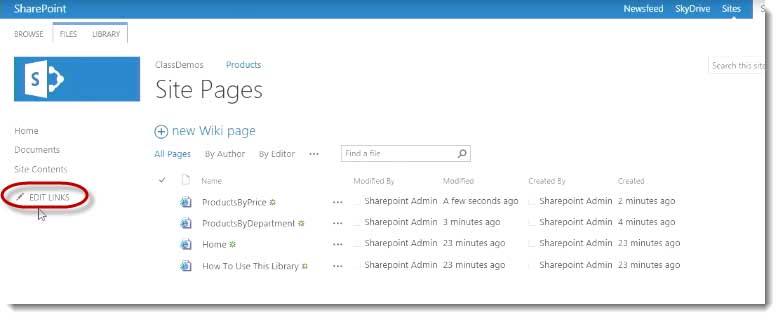
Now I can grab Products by Price there, and Products by Department. I’ll drag and drop it to just underneath there and click Save.

Now I’ve got navigation of Products by Price.

When you create a list by importing a spreadsheet ‑‑ I’ll click on Site Contents
The go to my Products list.
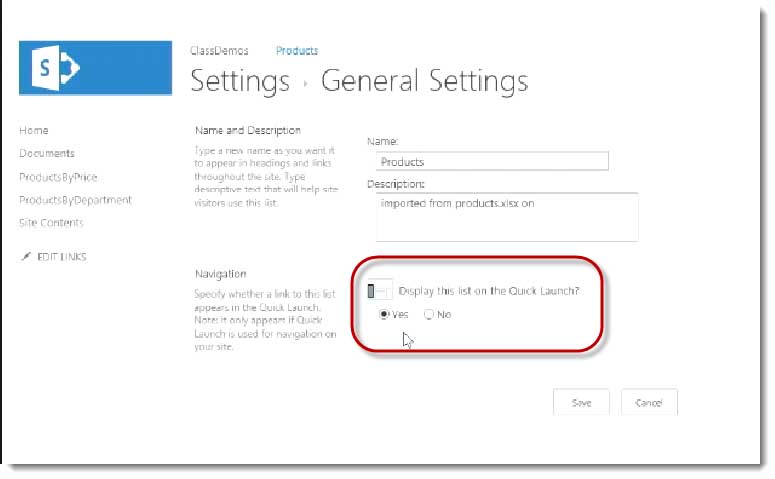
This is that list that we did a few videos ago. You’ll notice it doesn’t show up on the quick launch.
If you want it to, I could drag it over like I did out of the site contents page, but also what you could do is go to the actual list settings. I went to the List > List Settings and then List name, Description, and navigation.
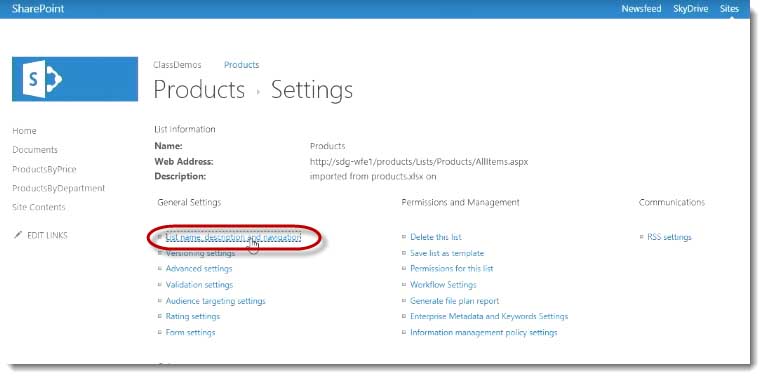
There’s just a radio button that says, “Do you want to display it on the quick launch bar?” You most likely do, unless you have a reason not to.
Now I can see the products list. I can go to my ProductsByDepartment page.

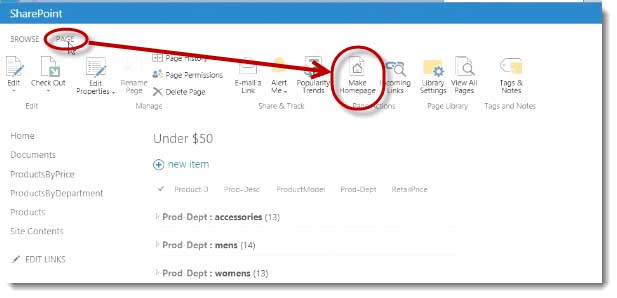
I can go to my ProductsByPrice page, and in fact what I’m going to do is, I like this page so much, if I click the logo that takes me the home page of the site, I’m going to make my Products by Price page the home page of this site.
To do that, I’m going to go to the page, click on the Page tab, and then there’s actually an icon that says Make Home Page, which is awesome. I can click Make Home Page, click OK, and now this is the home page of this sub site.
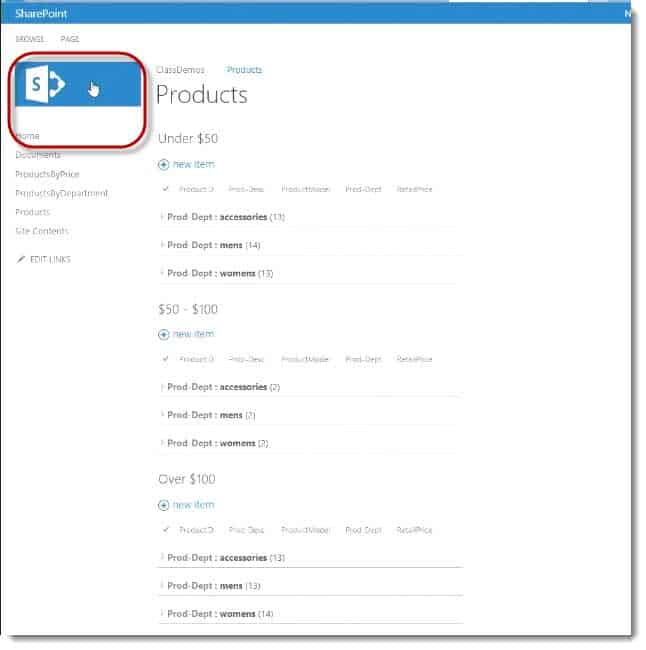
If I scroll over here to Home, or click Home, or if I click that logo, or if I go back up to the top level site and then click the Products link, that is now the home page of my actual site.
That concludes our five‑part video series. No custom code, everything out of the box, starting with a simple CSV file, creating some dashboards, hooking up the navigation. Enjoy.
Spike Xavier
SharePoint Instructor – Interface Technical Training
Phoenix, AZ


")
A Simple Introduction to Cisco CML2
Mark Jacob, Cisco Instructor, presents an introduction to Cisco Modeling Labs 2.0 or CML2.0, an upgrade to Cisco’s VIRL Personal Edition. Mark demonstrates Terminal Emulator access to console, as well as console access from within the CML2.0 product. Hello, I’m Mark Jacob, a Cisco Instructor and Network Instructor at Interface Technical Training. I’ve been using … Continue reading A Simple Introduction to Cisco CML2
Creating Dynamic DNS in Network Environments
This content is from our CompTIA Network + Video Certification Training Course. Start training today! In this video, CompTIA Network + instructor Rick Trader teaches how to create Dynamic DNS zones in Network Environments. Video Transcription: Now that we’ve installed DNS, we’ve created our DNS zones, the next step is now, how do we produce those … Continue reading Creating Dynamic DNS in Network Environments
Cable Testers and How to Use them in Network Environments
This content is from our CompTIA Network + Video Certification Training Course. Start training today! In this video, CompTIA Network + instructor Rick Trader demonstrates how to use cable testers in network environments. Let’s look at some tools that we can use to test our different cables in our environment. Cable Testers Properly Wired Connectivity … Continue reading Cable Testers and How to Use them in Network Environments
Pingback: Video Part 4 How to Create Views in SharePoint 2013 for import CSV file into SharePoint