SharePoint 2010 Web Part Series – Page Viewer Web Part

In this blog we will explore a use of the Page Viewer Web Part in SharePoint 2010. We will use the Page Viewer Web Part in order to bring in an outside web page and display it within SharePoint (this is done behind the scenes via IFrames). This will allow us to avoid having to build two pages one outside of SharePoint and one inside of SharePoint. Normally the biggest drawback to this is the 'double navigation' issue. To minimize this, I like to use web part pages which, by default, do not show the Quick Launch Bar.
This blog is part of a series of blogs which explore the out of the box Web Parts that come with SharePoint 2010.
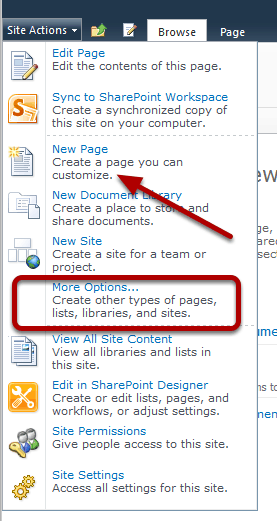
Site Actions > More Options. I do not choose New Page because this would create an aspx page, which would allow me to place web parts on it. However, it uses a master page that displays the quick launch bar and I don't want that on my page.
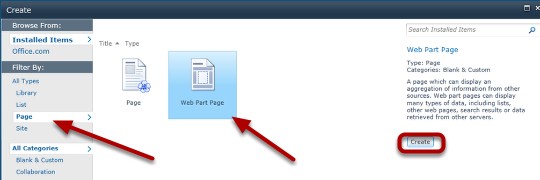
Select Filter By: Page and Select the Web Part Page then click the Create Button.
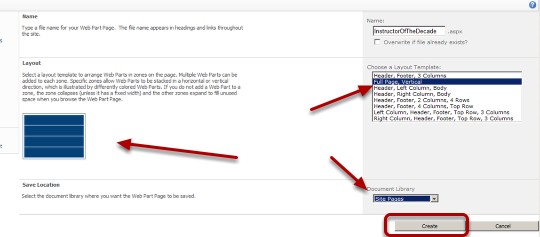
Fill Out The Form. Since I'm creating an Instructor of the Decade page, I name it that. Then I choose the Full Page, Vertical Layout Template. Notice how there is an animated graphic showing the layout of the web part zones? I change the Document Library to the Site Pages Library, then click OK.
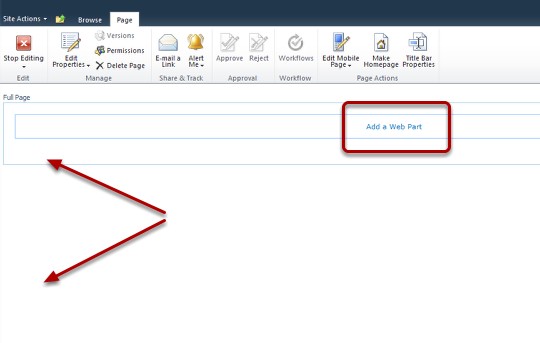
Click the Add a Web Part Link to Add A Web Part. Notice the lack of a Quick Launch Bar? This is why I selected Web Part Page earlier.
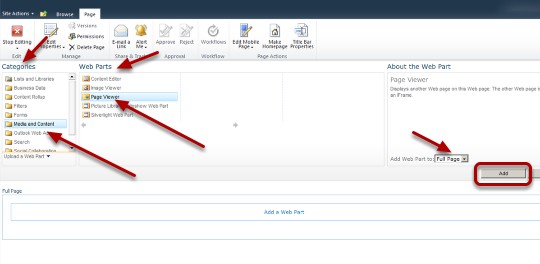
Select the Media and Content Category and then select the Page Viewer Web Part. I leave the default Full Page Web Part Zone as-is and click Add.
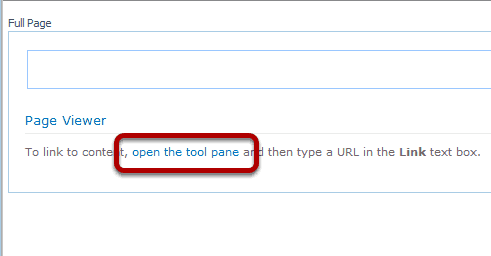
Open the tool pane link in the Page Viewer Web Part in order to configure the Web Part Properties.
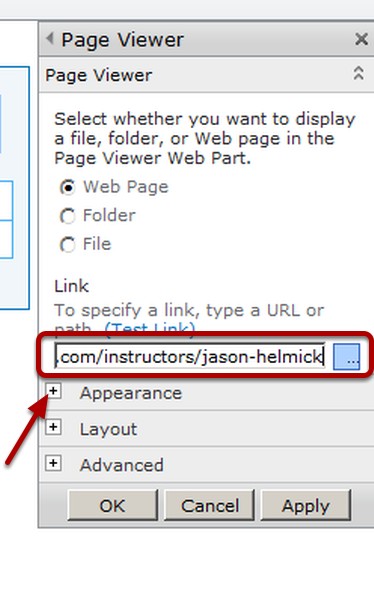
I'll paste in a link to the web page I want to display and then click the + sign next to Appearance to expand these properties.
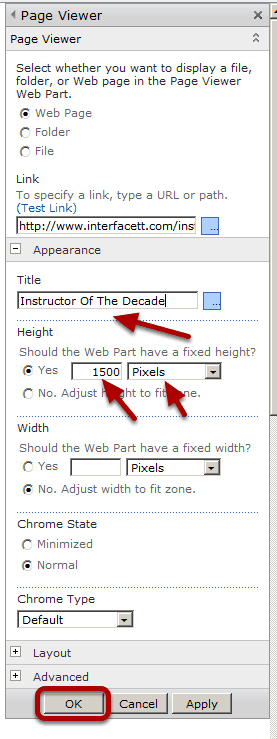
I"ll use 1500 Pixels in order to accommodate the web page I want to display. Next enter an appropriate Title and then click OK.
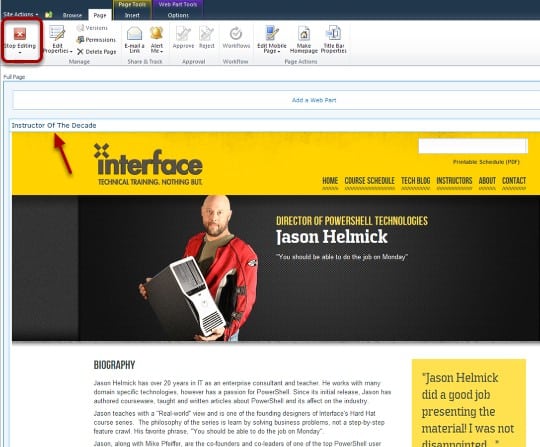
Click Stop Editing. (Notice the title is now appearing)
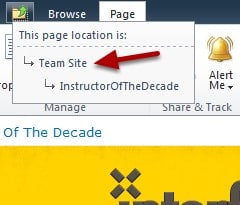
I'll use the Navigate Up control to return to the home page where I will add a link to this new page.
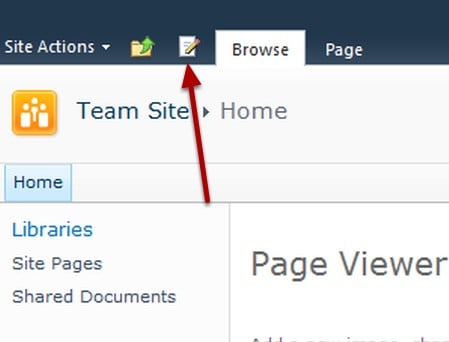
Click the edit page Icon to put the home page into edit mode.
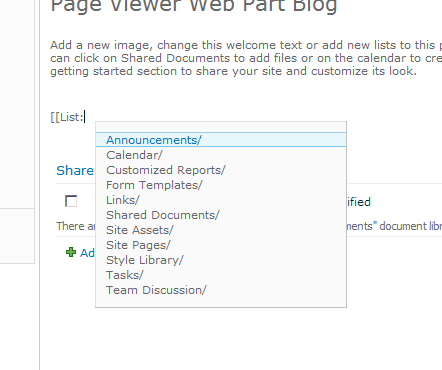
I use the Wiki Page functionality of typing [[ and then navigating my way to the new web part page and close with ]].
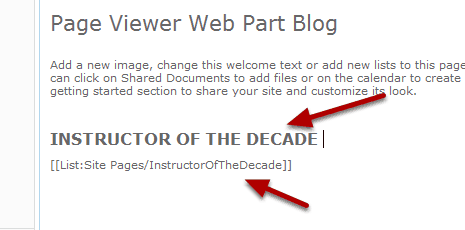
Add INSTRUCTOR OF THE DECADE above what will be my new link.
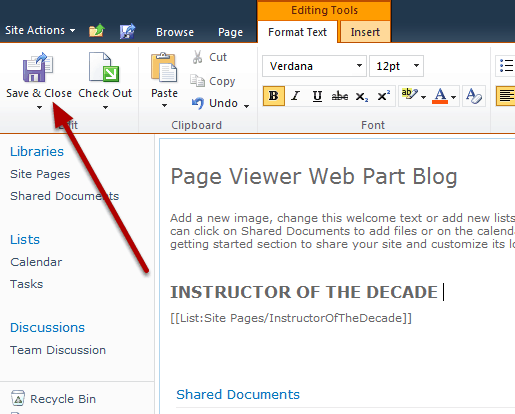
Click Save and Close.
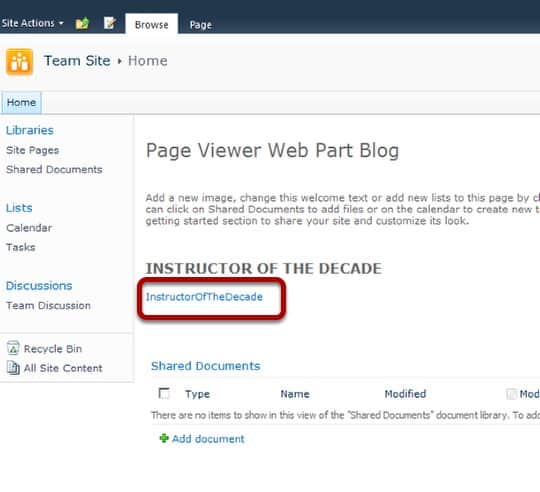
Click on the link to test it.
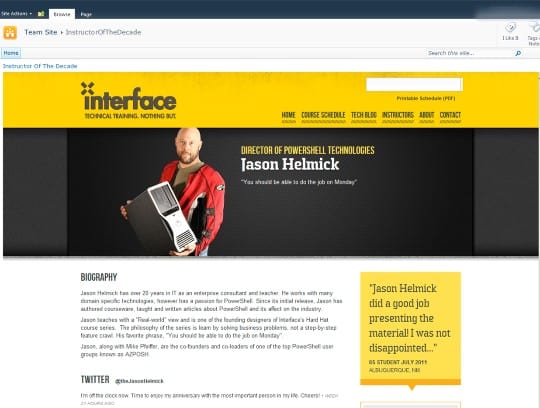
Walla! The new Instructor of the Decade page is ready. Congratulations Jason Helmick! By using the Page Viewer Web Part I have saved myself from having to re-create what' s already done.
Enjoy!
Spike Xavier
SharePoint Instructor – Interface Technical Training
Phoenix, AZ


A Simple Introduction to Cisco CML2
Mark Jacob, Cisco Instructor, presents an introduction to Cisco Modeling Labs 2.0 or CML2.0, an upgrade to Cisco’s VIRL Personal Edition. Mark demonstrates Terminal Emulator access to console, as well as console access from within the CML2.0 product. Hello, I’m Mark Jacob, a Cisco Instructor and Network Instructor at Interface Technical Training. I’ve been using … Continue reading A Simple Introduction to Cisco CML2
Creating Dynamic DNS in Network Environments
This content is from our CompTIA Network + Video Certification Training Course. Start training today! In this video, CompTIA Network + instructor Rick Trader teaches how to create Dynamic DNS zones in Network Environments. Video Transcription: Now that we’ve installed DNS, we’ve created our DNS zones, the next step is now, how do we produce those … Continue reading Creating Dynamic DNS in Network Environments
Cable Testers and How to Use them in Network Environments
This content is from our CompTIA Network + Video Certification Training Course. Start training today! In this video, CompTIA Network + instructor Rick Trader demonstrates how to use cable testers in network environments. Let’s look at some tools that we can use to test our different cables in our environment. Cable Testers Properly Wired Connectivity … Continue reading Cable Testers and How to Use them in Network Environments
Pingback: Create A Page Viewer Web Part – How ot be in 2016
Pingback: SharePoint Good One « Share your knowledge