Windows 10 After Eye Surgery – Personalizing Advanced Display Settings

A couple of older friends have recently had eye surgeries, and one experienced an eye infection, that made them extremely sensitive to bright contrast. Dark black on bright white hurts the eyes and pounds the brain (they are not likely to read this article.).
They begged my assistance to modify Windows 10 (and application settings) so they could go about daily PC activities without an ensuing migraine.
Option 1:
Dimming the monitor itself is always and option, either via buttons on the monitor or within your Settings/control panel.
Under Windows 10, you may use Windows Settings > System > Display to reach your display options.
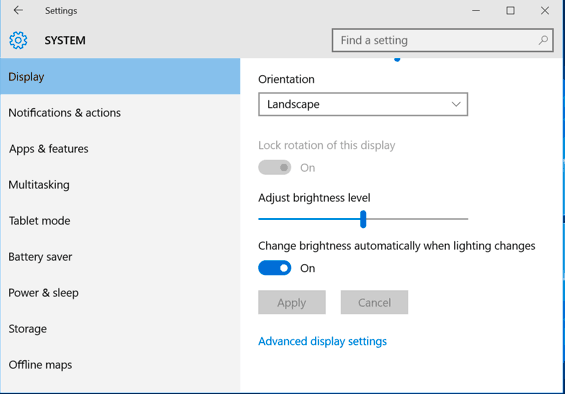
Use the slider bar to Adjust the Brightness level of your screen.
While this will not remove the white background (that created the discomfort for my friends), it might soften the intensity somewhat. If you have vision problems, this might make low contrast text like the dim, gray fonts above, difficult to read. You might them move to Option 2 below, in order to adjust your High Contrast Settings (found under Personalization > Colors).
NOTE: Some display drivers might not enable the slider bar. I had to enable Tablet Mode on my laptop to see additional Display configuration options, for instance.
The expanded flexibility of Windows 10, combined with automated configuration, can make discovery of settings options a daunting task. Just keep looking, which is a great way to learn what Windows 10 might offer for your PC platform.
Option 2:
Windows 10 supports personalization for the visually impaired or color blind.
The first effort should include launching Settings, and selecting Personalization.
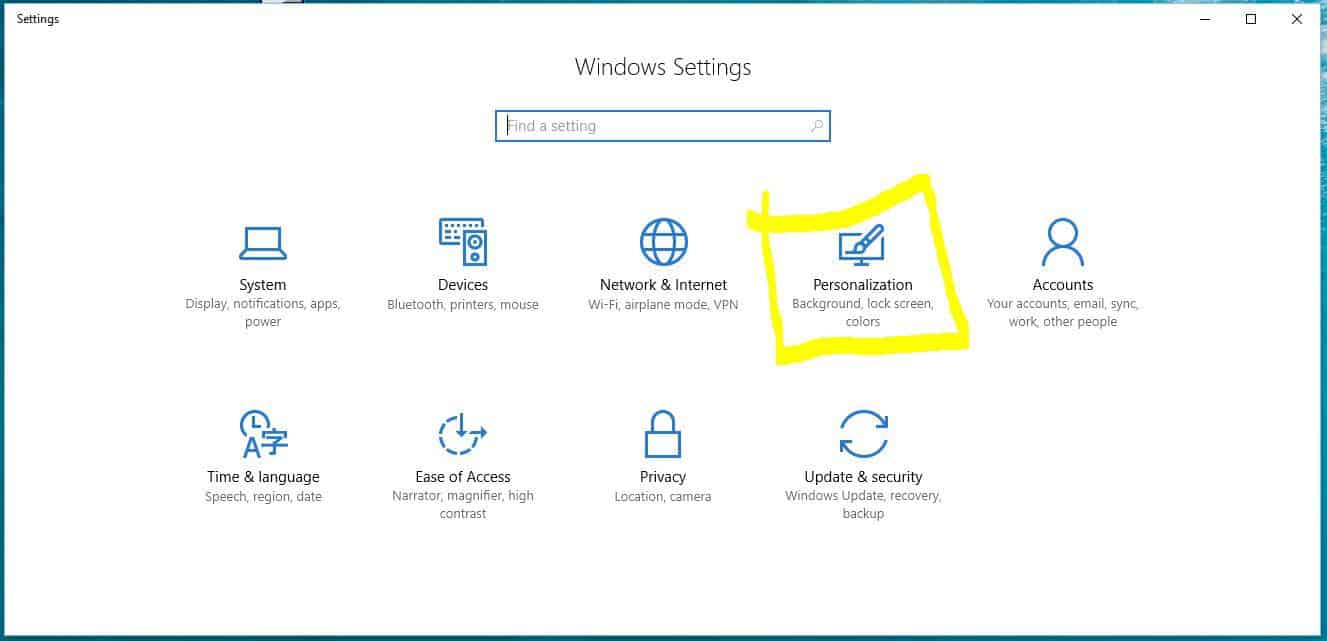
Then, under Personalization, select Colors.
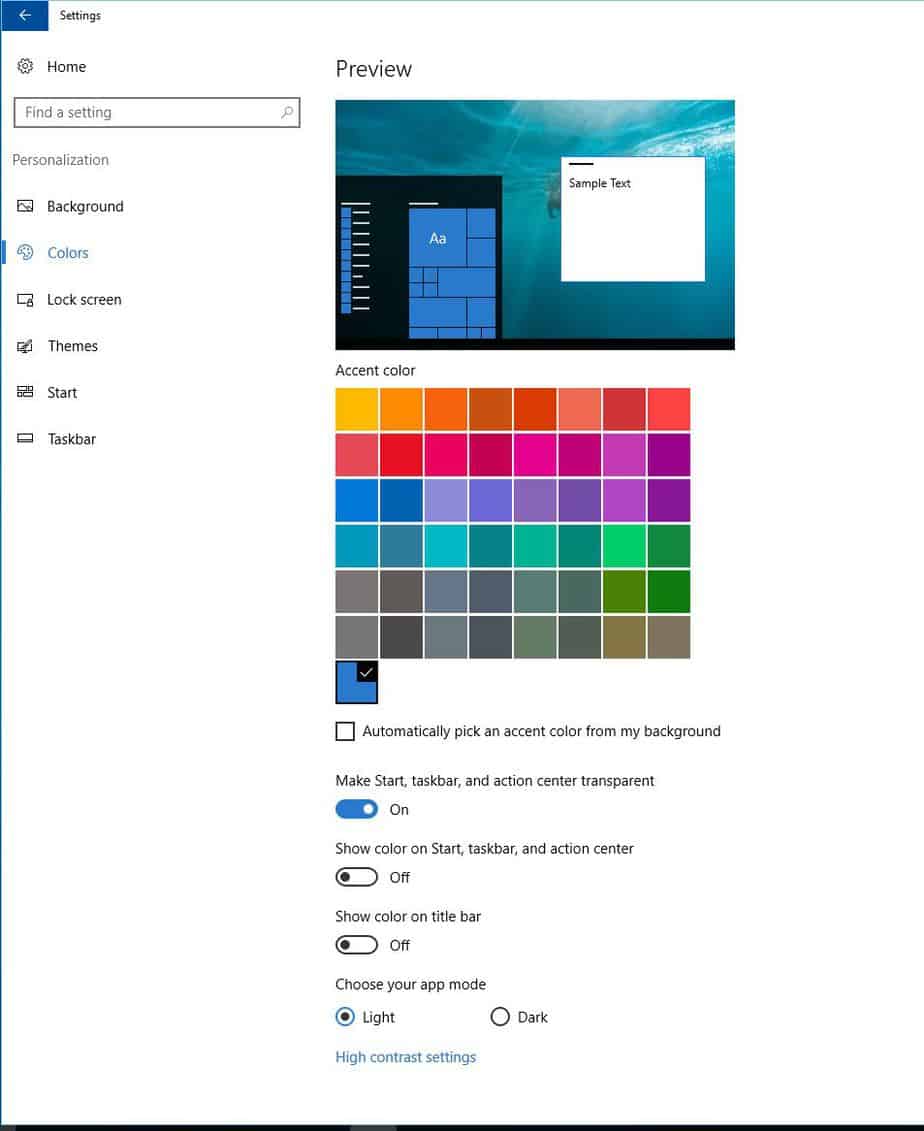
You might want to try various colors that you find more soothing, though in the case of my friends, their concern was with intensely white backgrounds given the sensitivity of their vision.
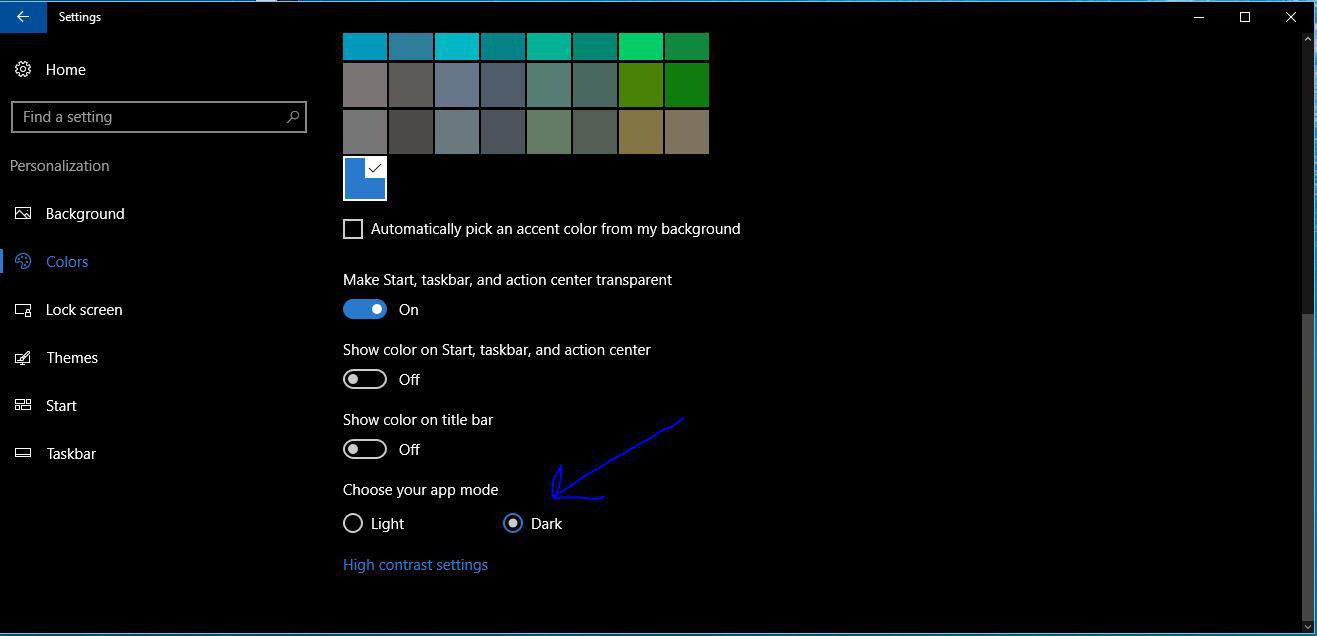
My first recommendation was to change the Choose your app mode setting to Dark. While reading white or colored fonts on a black background might not seem common today, I recall the original computer monitors where white, yellow, or green on a black background was the standard. The broad font and color spectrum now available affords a significant improvement.
Option 3:
Rather than selecting the Dark Choose your app mode, you might select the link at the bottom of the settings > Colors panel that suggests High Contrast Settings.
In the following panel, I navigated to High Contrast Settings and selected the High Contrast Black theme from the drop down list.
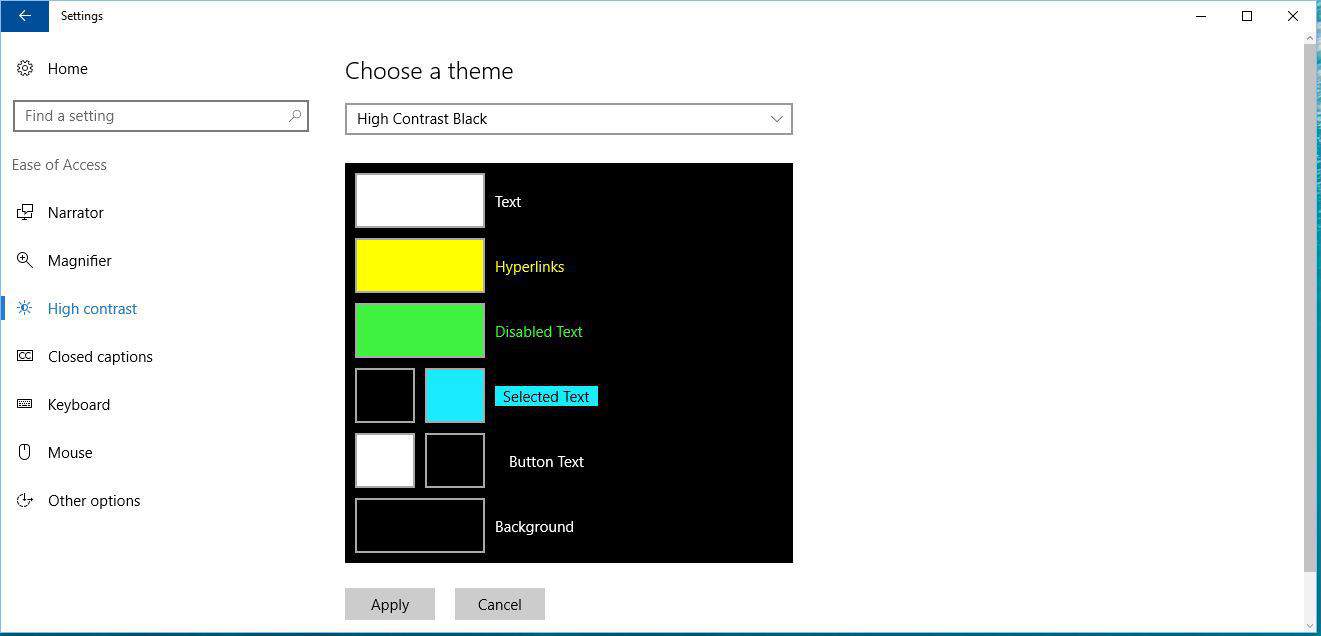
This yields an experience similar to the Choose your app mode, although across your entire desktop.
While you are exploring the High Contrast themes, you might also consider combining the Theme selection with other options found in the left panel, like the Magnifier, Mouse and Other Options selections that will enable larger fonts, larger mouse pointers, and Cursor thickness to offset any visual navigation issues that might arise due to your color and contrast selections.
Option 4:
Combine the choices by first selecting the High Contrast Theme, then the monitor brightness, and adding App Mode until your find the combination of the three that you prefer.
Continue to vary your combinations until you find the ones most soothing to your PC experience.
The nice part of the options provided is the ease of changing them or removing them once you have recovered your vision or reduced your sensitivity to light.
Good luck!
I look forward to seeing you in the classroom, or online!
Steven Fullmer
Interface Technical Training Staff Instructor
Steve teaches PMP: Project Management Fundamentals and Professional Certification, Windows 10, and CompTIA classes in Phoenix, Arizona.


A Simple Introduction to Cisco CML2
Mark Jacob, Cisco Instructor, presents an introduction to Cisco Modeling Labs 2.0 or CML2.0, an upgrade to Cisco’s VIRL Personal Edition. Mark demonstrates Terminal Emulator access to console, as well as console access from within the CML2.0 product. Hello, I’m Mark Jacob, a Cisco Instructor and Network Instructor at Interface Technical Training. I’ve been using … Continue reading A Simple Introduction to Cisco CML2
Creating Dynamic DNS in Network Environments
This content is from our CompTIA Network + Video Certification Training Course. Start training today! In this video, CompTIA Network + instructor Rick Trader teaches how to create Dynamic DNS zones in Network Environments. Video Transcription: Now that we’ve installed DNS, we’ve created our DNS zones, the next step is now, how do we produce those … Continue reading Creating Dynamic DNS in Network Environments
Cable Testers and How to Use them in Network Environments
This content is from our CompTIA Network + Video Certification Training Course. Start training today! In this video, CompTIA Network + instructor Rick Trader demonstrates how to use cable testers in network environments. Let’s look at some tools that we can use to test our different cables in our environment. Cable Testers Properly Wired Connectivity … Continue reading Cable Testers and How to Use them in Network Environments