Wireshark: Display filter vs Capture filter
Wireshark: Display filter vs Capture filter
In a perfect world, there would be no need to monitor network traffic looking for interlopers. Since we don’t live in a perfect world, I wanted to demonstrate a little piece of the freely downloadable network packet sniffer called Wireshark. When running a full-bore packet capture session, you may find that data are accumulating quite rapidly and likely you are obtaining much more than you want to look at. In cases like this, filtering is a must. Today I will discuss two ways to filter in Wireshark: display filter and capture filter.
Don’t get me wrong – Wireshark is well documented. I just want to show the difference in a more visual way, ‘cause some people learn better that way! For my screenshots, I will be using what is (at the time of this writing) the latest version, which is 1.12.3. Let us begin.
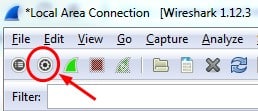
The first type of filter we will discuss is the capture filter. The type of filter controls what type of traffic is captured, and disregards all non-matching traffic. It is easily accessed by clicking the icon at the top left of the main window. It is shown in figure 1:
Figure 1
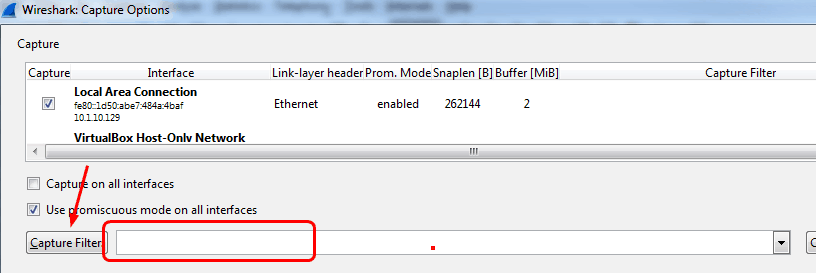
Once you click that, you will see (with some of the window omitted) what is shown in figure 2:
Figure 2
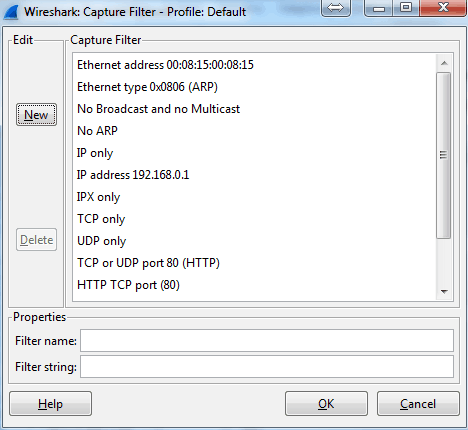
If you already know your filter topic, you can just type in the area noted by the red box. Or you can select the Capture Filter button and choose from the precompiled list. You can also edit the existing Capture Filter choices when clicking that button. Selections and editing appearance is shown in figure 3:
Figure 3
As an example, I have created a filter called My machine. It watches for traffic containing the IP address of the machine on which I created this blog, which is 10.1.10.129. Let see what happens when I apply this filter and then ping 8.8.8.8:
Figure 4
As you can see, my capture ONLY includes traffic from or to the specified IP address. Then I don’t have to look at all the other traffic happening on the machine I am using to run Wireshark. Depending on the network, this could be a substantial amount of traffic!
The other type of filter I will discuss is the display filter. The control what is seen from an EXISTING packet capture, but does not influence WHAT traffic is actually captured. It is accessed as shown in figure 5:
Figure 5
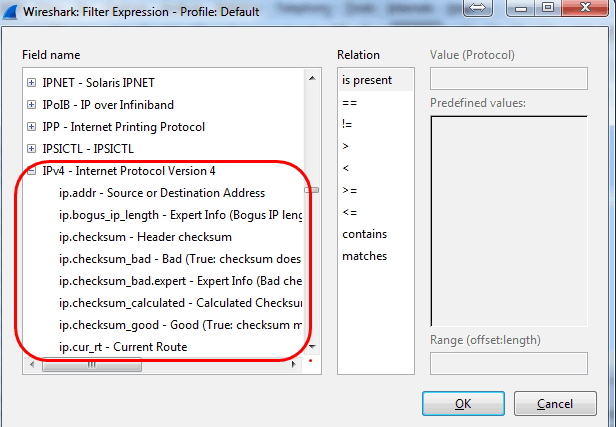
In the filter box, you can just type what you want to filter, or, if you don’t know it by heart, click the Expression button and select from the existing list of available filters. Figure 6 shows, for example, some of the IPv4 display filters:
Figure 6
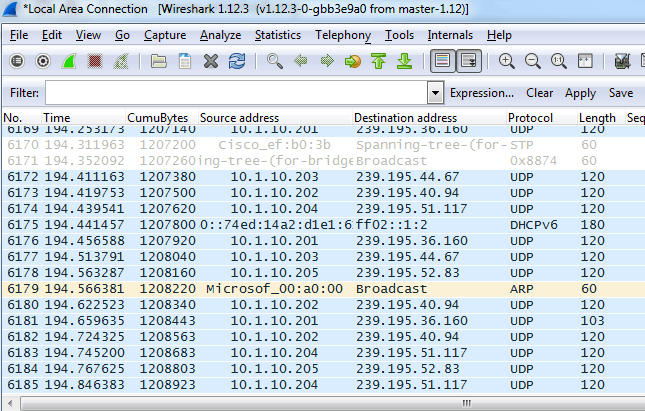
Let’s choose a source address of my host machine again. I already have a capture running. let’s see what it looks like before applying the filter:
Figure 7
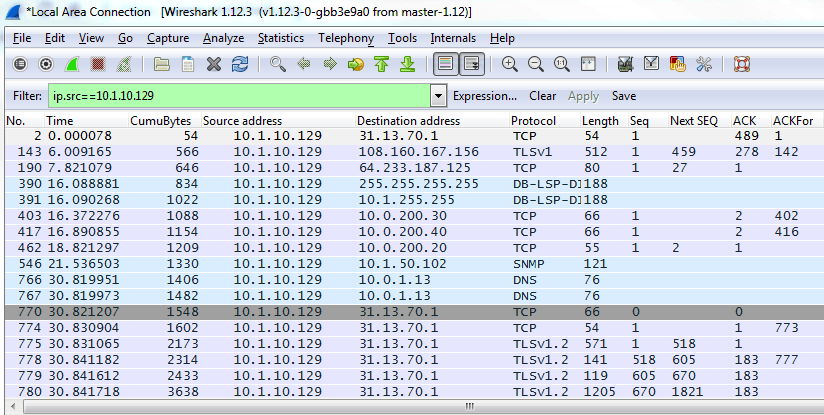
Notice I have traffic from all sorts of source IP addresses. Now to apply the filter:
Figure 8
This is a very cool way to reduce the amount of information that must be perused for a network administrator to narrow down the cause of an issue or the location of an intruder. Let the machine filter what you don’t want and closely examine the rest. As I mentioned previously, Wireshark is well-documented. I hope that visual screenshots have assisted the visual learners out there!
If you have any comments or questions, please feel free to post them….
Until next time.
Mark Jacob
Cisco and CompTIA Network + Instructor – Interface Technical Training
Phoenix, AZ
You May Also Like
A Simple Introduction to Cisco CML2
0 3901 0Mark Jacob, Cisco Instructor, presents an introduction to Cisco Modeling Labs 2.0 or CML2.0, an upgrade to Cisco’s VIRL Personal Edition. Mark demonstrates Terminal Emulator access to console, as well as console access from within the CML2.0 product. Hello, I’m Mark Jacob, a Cisco Instructor and Network Instructor at Interface Technical Training. I’ve been using … Continue reading A Simple Introduction to Cisco CML2
Creating Dynamic DNS in Network Environments
0 645 1This content is from our CompTIA Network + Video Certification Training Course. Start training today! In this video, CompTIA Network + instructor Rick Trader teaches how to create Dynamic DNS zones in Network Environments. Video Transcription: Now that we’ve installed DNS, we’ve created our DNS zones, the next step is now, how do we produce those … Continue reading Creating Dynamic DNS in Network Environments
Cable Testers and How to Use them in Network Environments
0 731 1This content is from our CompTIA Network + Video Certification Training Course. Start training today! In this video, CompTIA Network + instructor Rick Trader demonstrates how to use cable testers in network environments. Let’s look at some tools that we can use to test our different cables in our environment. Cable Testers Properly Wired Connectivity … Continue reading Cable Testers and How to Use them in Network Environments

