XML Data Source Weirdness in SharePoint Designer 2010

Using the XML File Data source is SharePoint Designer 2010 is a very handy thing indeed. In my experience it can be a bit buggy to get it to work. Sometimes it just works and many times I find myself staring at the screen waiting..and waiting..and waiting.. and nothing. Somehow I figured out a weird way to get it to work and so far it's always worked for me, although I am at a loss to understand why but here it is.
Environment Out-Of-Box Team Site
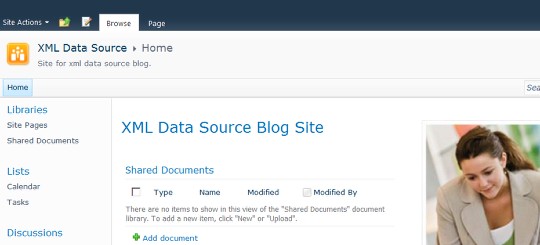
I'll start with an out of the box team site at the top level site of a new site collection. Out of the box other than the change I made to the Title, Description and some text on the front page.
Open SharePoint Designer
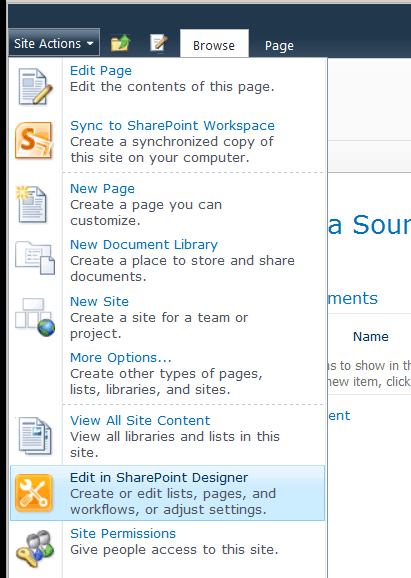
I almost always use Site Actions> Edit in SharePoint Designer so I'm in the right site.
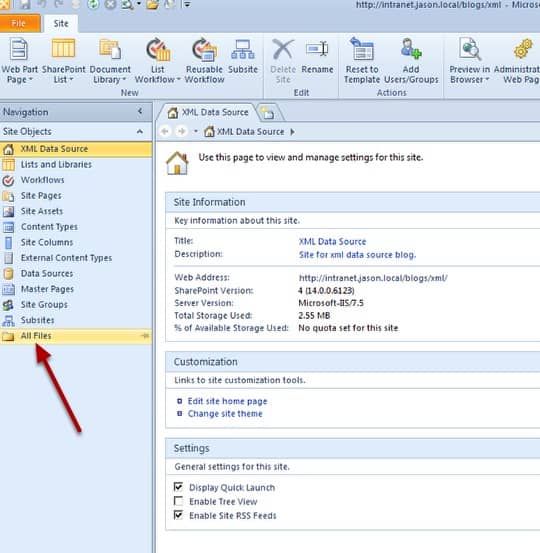
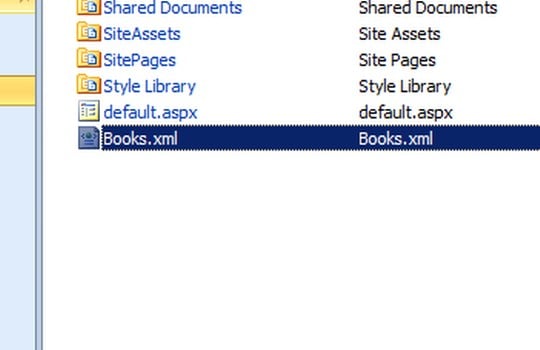
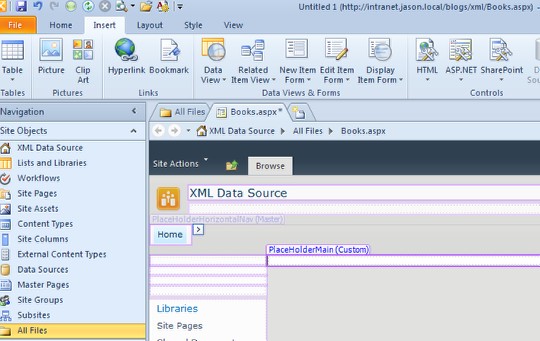
Click All Files
You can put the file in the site pages library if you like but I'll put mine here.
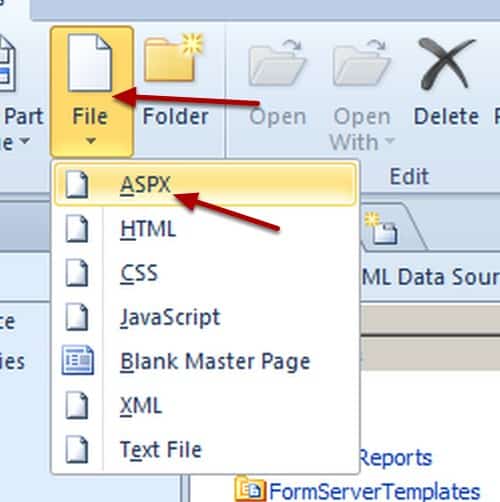
Add an XML file
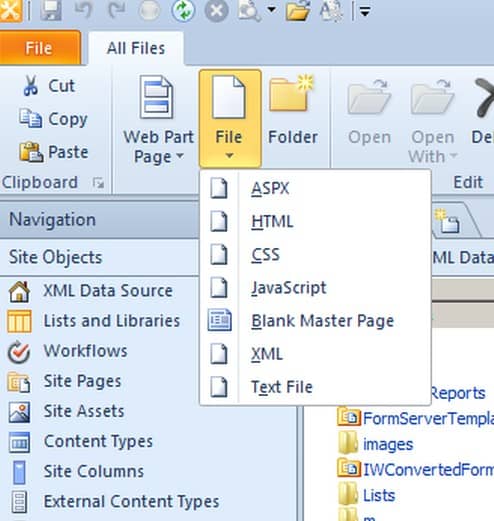
Choose File>XML
Name the file
I named mime Books.xml since the XML file I'm using is a list of books. After I name it I click the name to open the file for editing.
Paste in content
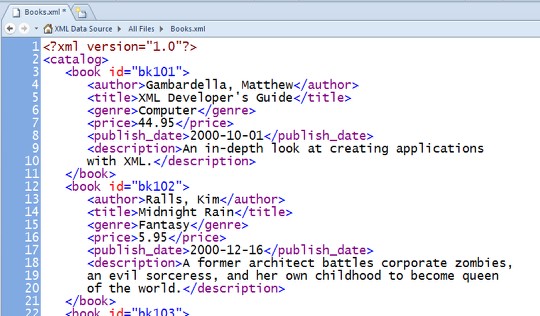
Microsoft offers a great sample XML file called books at this URL: http://msdn.microsoft.com/en-us/library/ms762271(VS.85).aspx but I could have used any well formed XML document. I just went to Microsoft.com and searched for books.xml
Verify Well Formed XML
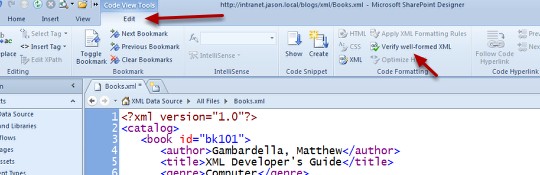
I click the edit tab in the ribbon and then click verify well formed XML which is a very handy tool to be included.
Check Message the click OK
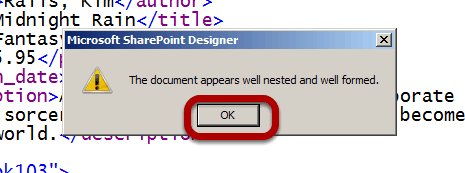
As long as the file is all right as indicated by the message I'll click OK otherwise i would have had to work with the file a bit first.
Be sure to save
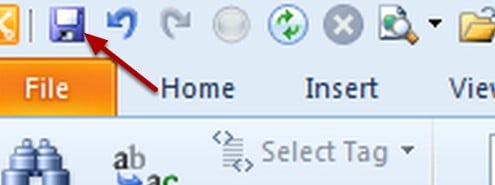
Save often in SharePoint Designer 2010.
Close Books File
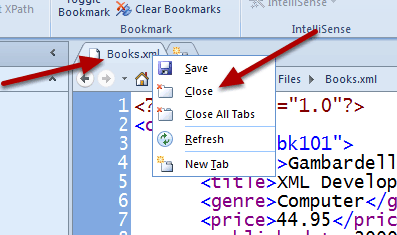
I just right click the tab, Books.xml and choose close.
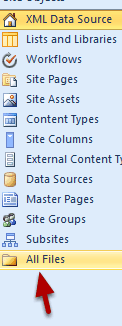
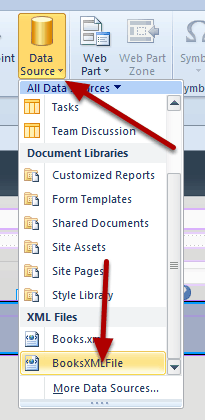
Click Data Sources in Navigation
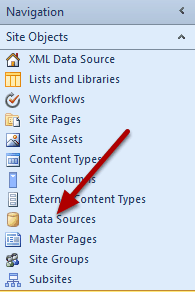
Now that I have my file I'll configure it as a data source. It might actually show up in the data sources list since it's an XML file but i want to configure security and give it a name.
Click XML File Connection icon in the ribbon
Click Browse button
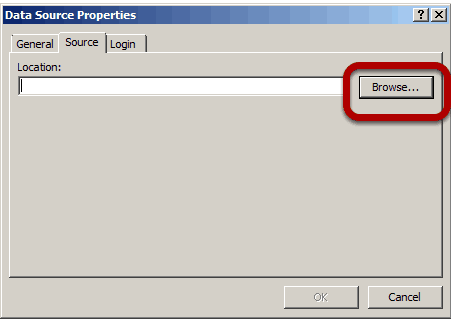
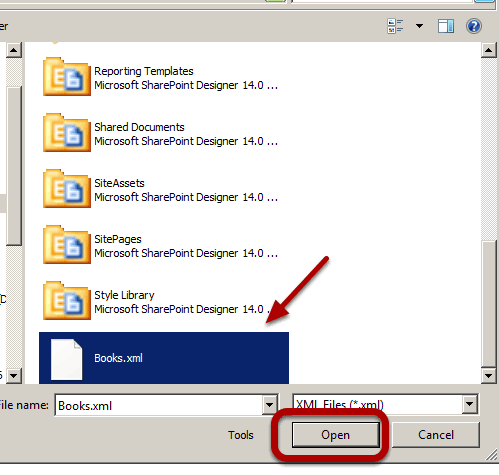
Select Books.xml file
Set Security
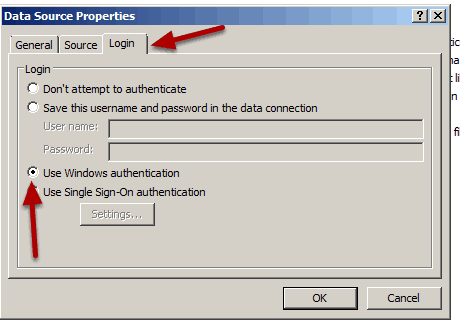
I'll be using Windows authentication so i choose the radio button as shown.
Click General Name Data Source
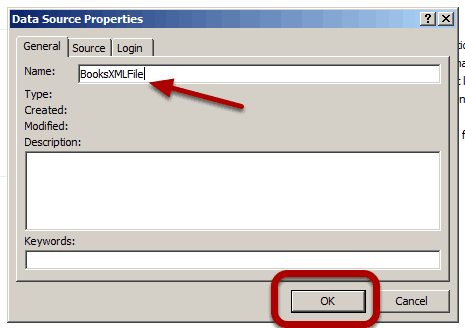
I'll name mine BooksXMLFile and be sure to choose that vs. the raw XML file when adding a Data View. When I'm done i click OK.
Click all Files
Add New ASPX page
I choose File>ASPX page.
Name file and Edit File in Advanced Mode
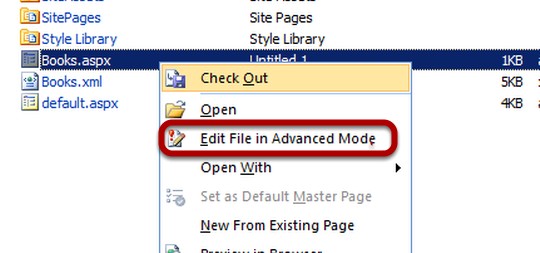
I name the file Books.aspx and then right click on it and choose Edit File in Advanced Mode.
Delete form tag
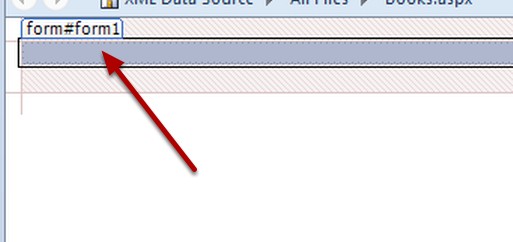
A Short cut is to hit escape and then delete when your mouse is in a white area on the page, but delete the form tag for sure.
Attach Master Page

I select the Style Tab in the ribbon, and then click Attach and Choose the Default Master Page.
Add Custom Content PlaceHolder Main
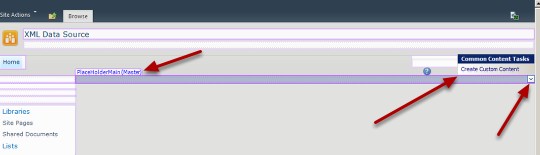
Once again i go back to the PlaceHolderMain and grab the glyph and choose Create Custom Content.
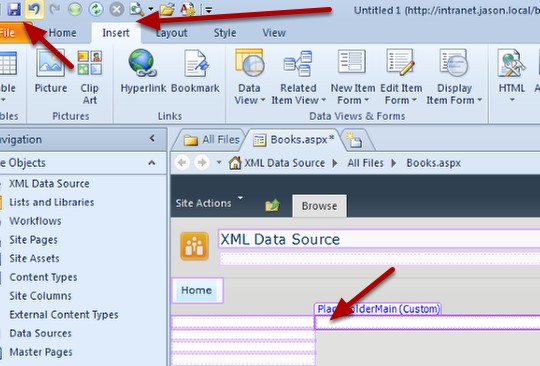
Place cursor in PlaceHolderMain then click Insert tab
I be sure to place my cursor within the now editable PlaceHolderMain and click the Insert Tab on the Ribbon.
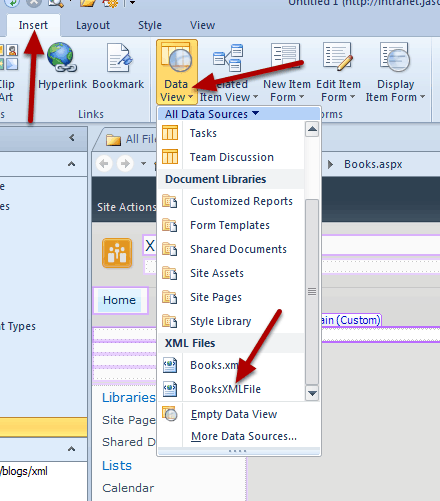
Click Data View then choose BooksXMLFile
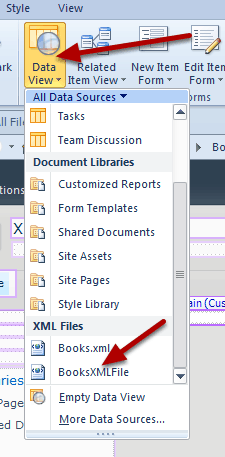
I choose DataView> BooksXMLFile (you might have to scroll down) , If it just goes in, it's cool, it does happen sometimes, but more often than not….nothing happens.
If nothing happens, click View TaskPanes Data Source Details
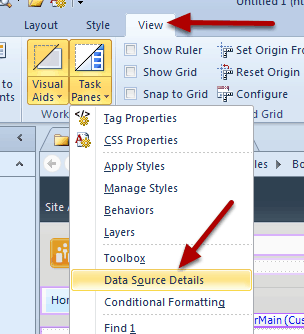
By the way if your data went in you can stop here because the rest is only for if nothing happened. But if nothing happens after completing the steps above, in other words your XML data isn't showing, then click View in the ribbon and then click Data Source Details.
Insert Web Part Zone
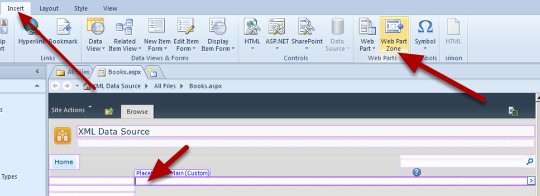
Every once in a while that does the trick, but if it doesn't you can make sure your cursor is in the PlaceHolderMain and then choose the Insert Tab and click the Web Part Zone Icon in the Ribbon, this inserts a traditional web part zone into the PlaceHolderMain.
Insert Data Source
Once the Web Part Zone is inserted you can click the Data Source Icon in the ribbon and choose BooksXMLFile, you might have to scroll down.
Save
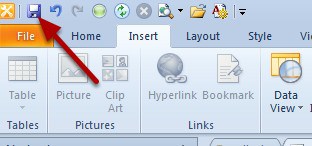
Always remember to Save often when using SharePoint Designer.
Default to Masters Content
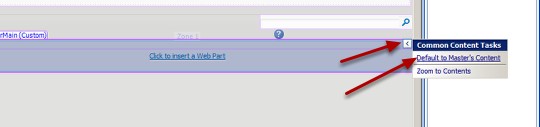
At this point even if something happens I default to Masters Content using the glyph for PlaceHolderMain I choose Default to Masters Content.
Create Custom Content

Then I try again. Using the glyph for PlaceHolderMain, select Create Custom Content.
Place cursor click Insert Tab Save Page
Place the cursor inside of the PlaceHolderMain, Click the Insert Tab in the ribbon and click save.
Click Insert Tab DataView BooksXMLFile
Just like before.
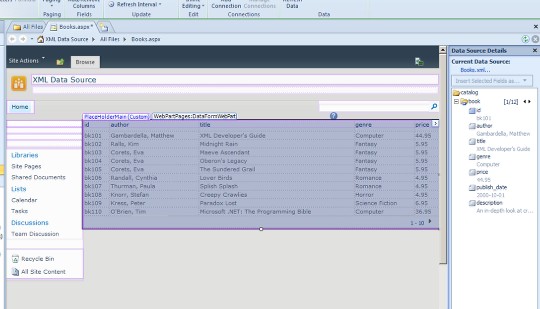
The data should now be showing
Not sure why this works but it seems to work every time i try it. I'm not even sure how i figured out to try these steps. Sometimes it's just best to know it works.
Spike Xavier
SharePoint Instructor – Interface Technical Training
Phoenix, AZ

")


A Simple Introduction to Cisco CML2
Mark Jacob, Cisco Instructor, presents an introduction to Cisco Modeling Labs 2.0 or CML2.0, an upgrade to Cisco’s VIRL Personal Edition. Mark demonstrates Terminal Emulator access to console, as well as console access from within the CML2.0 product. Hello, I’m Mark Jacob, a Cisco Instructor and Network Instructor at Interface Technical Training. I’ve been using … Continue reading A Simple Introduction to Cisco CML2
Creating Dynamic DNS in Network Environments
This content is from our CompTIA Network + Video Certification Training Course. Start training today! In this video, CompTIA Network + instructor Rick Trader teaches how to create Dynamic DNS zones in Network Environments. Video Transcription: Now that we’ve installed DNS, we’ve created our DNS zones, the next step is now, how do we produce those … Continue reading Creating Dynamic DNS in Network Environments
Cable Testers and How to Use them in Network Environments
This content is from our CompTIA Network + Video Certification Training Course. Start training today! In this video, CompTIA Network + instructor Rick Trader demonstrates how to use cable testers in network environments. Let’s look at some tools that we can use to test our different cables in our environment. Cable Testers Properly Wired Connectivity … Continue reading Cable Testers and How to Use them in Network Environments
See what people are saying...