How To Configure Versioning in SharePoint 2010

Versioning is one of the most powerful tools in one’s document management strategy with SharePoint 2010. With the proper use of versioning, organizations can avoid overwriting each other’s changes and preserve the linear history of an item. In this blog we will go through the process of setting up major and minor versioning on a Shared Documents Library of a typical out-of-the-box team site.
Shared-Documents
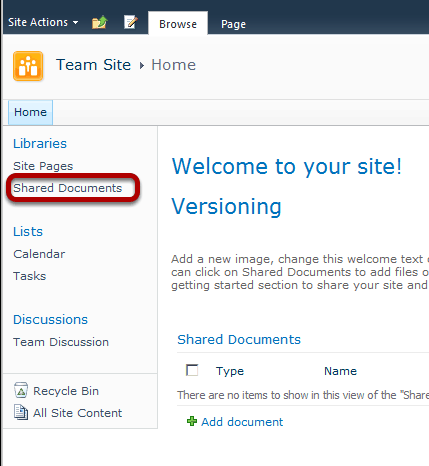
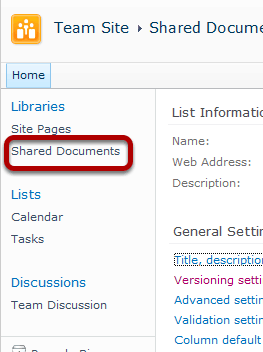
Click on the link Shared Documents in the Quick Launch Bar from the home page of a team site.
Library-Tab
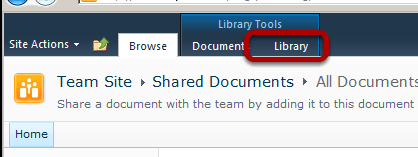
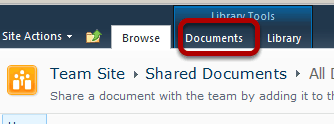
I click on the Library tab in the ribbon in order to activate the icons that correspond with managing the container (the Shared Documents Library)
Library-Settings
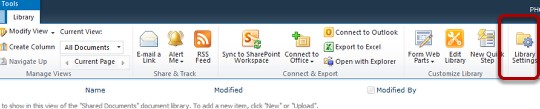
Click on the Library Settings Icon in order to get to the Shared Documents Library Settings Page
Versioning-Settings
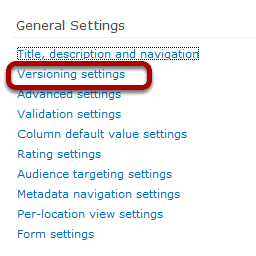
Next, choose the Versioning Settings link in the General Settings section of the Shared Documents Library Settings Page.
Major-Minor-Versioning
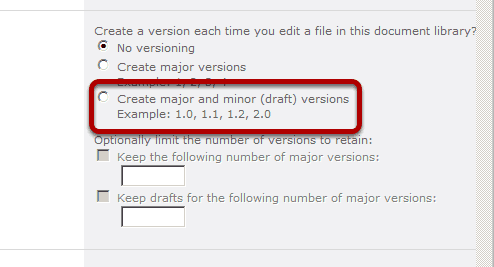
I select the radio button to create major and minor (draft) versions. In this blog we won't be setting a limit on the number of major versions or the number of major versions we will keep minor versions for. It is important to have well planned governance on these settings because of the way SharePoint stores each version. Every major and minor version is kept in its entirety in the Content Database, not just the changes so this can cause a push towards the storage quota if not monitored and planned.
Click-OK
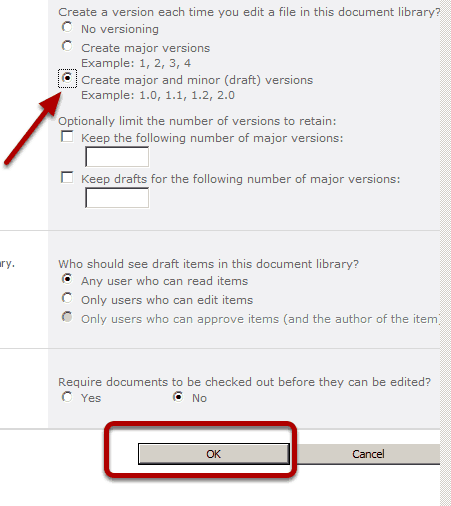
With the settings ready, click OK.
Shared-Documenets-Link
To test it, click the Shared Documents Link in the Quick Launch.
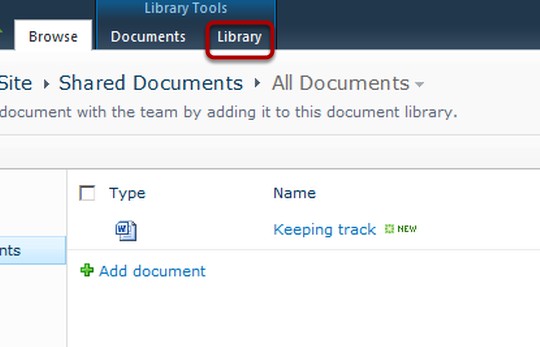
Documenets-Tab
This time I click on the Documents tab in the ribbon to activate the icons that will allow me to interact with the actual library items.
New-Document
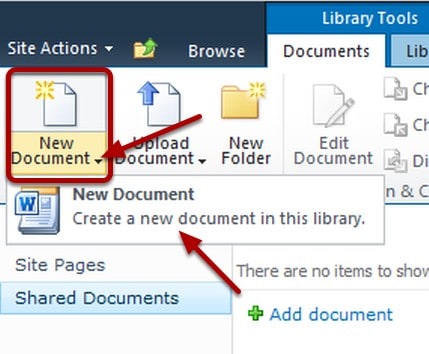
Click on the New Document Icon (I always aim for the black triangle) and choose New Document
Warning-Dialog
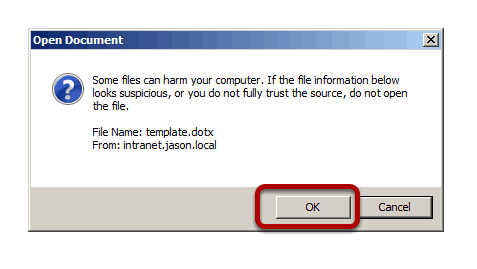
Click OK to the warning Dialog.
Enter-Some-Content
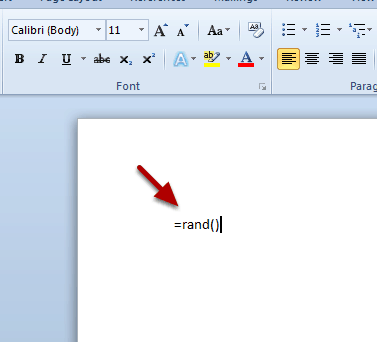
Enter some content; when Word opened, I was prompted for credentials so I logged in. Now I use the =rand() function to add some content. (I type in =rand() and hit enter.
Add-Number
Save
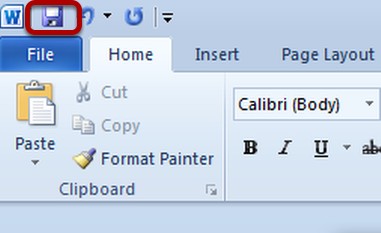
Then save the document.
Save-As-Dialog
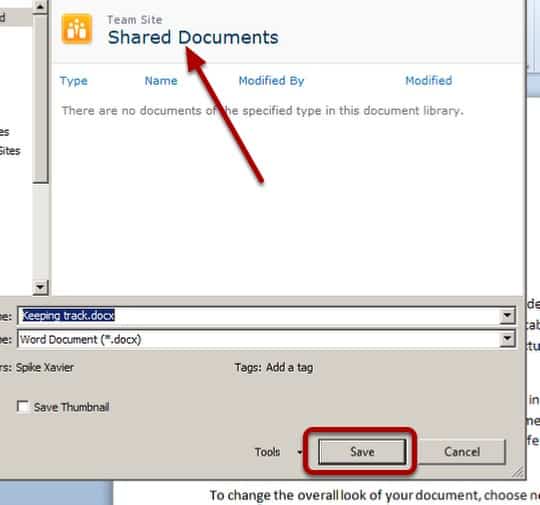
Check the location in the Save As Dialog and verify that it's saving back to the Shared Documents Library and click the Save button.
Adjust-the-View
I want to see the currently version of the document so I will click the Library tab in order to activate the ribbon to show the icons that relate to managing the container.
Modify-View
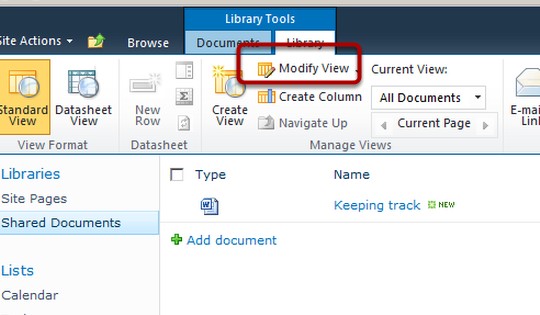
Click the Modify View Icon in order to modify the current view.
Check-Version-Checkbox
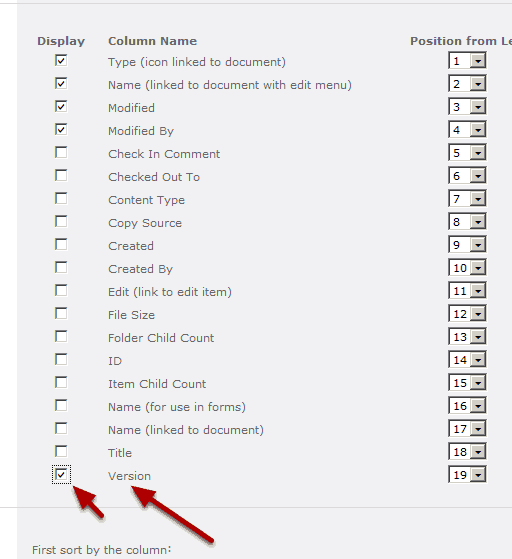
Select the box next to the Version Column Name then click OK. (click OK not shown)
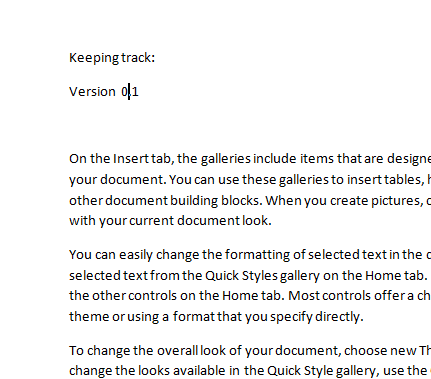
Verify-View-Change
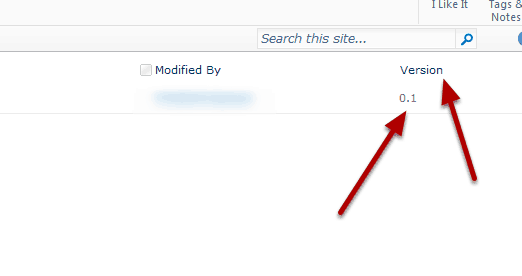
SharePoint displays that the Version is 0.1 which is expected.
Click-On-Document-Link
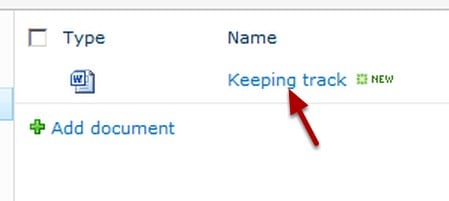
Click on the document link in order to open it up in Word for an edit.
Choose-Edit
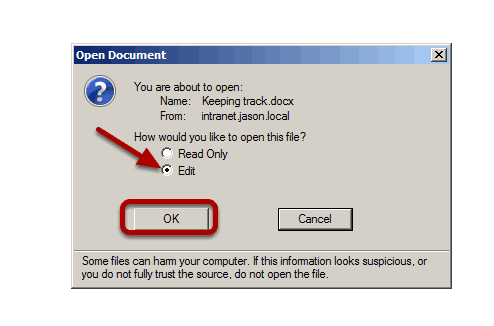
When the Open Document Modal Window opens, choose Edit and click OK.
Add-Content-Select-File
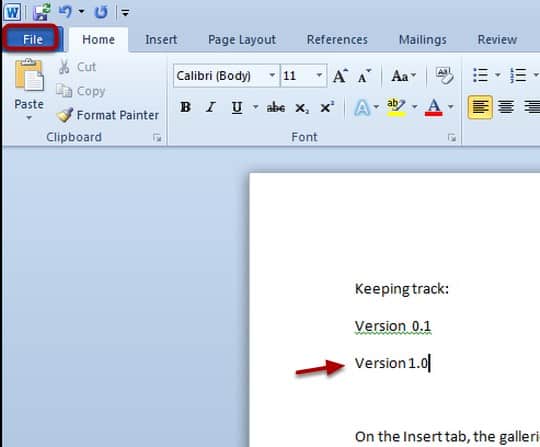
Add Version 1.0 to the document and then select the File Tab.
Notice-Manage-Versions-Tab
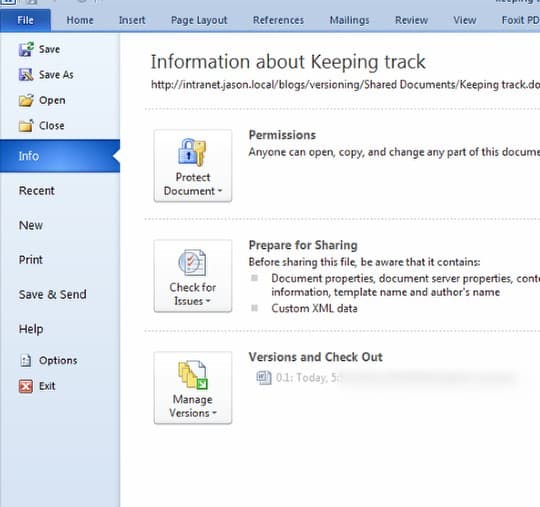
Note the Manage Versions Button in Microsoft Office 2010. This is called the backstage area where you can actually interact with many of the properties etc.. that are available when working with SharePoint 2010 and Microsoft Word 2010.
Click-Save-And-Exit
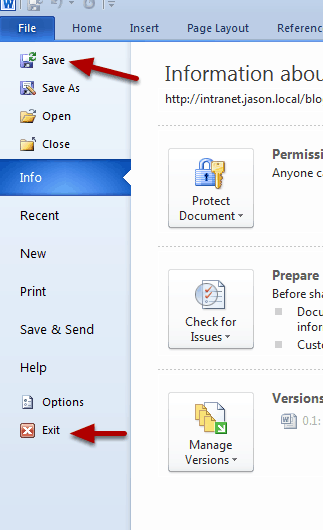
Choose Save and then Exit. If prompted, when exiting, choose Save.
Verify-Version-Change
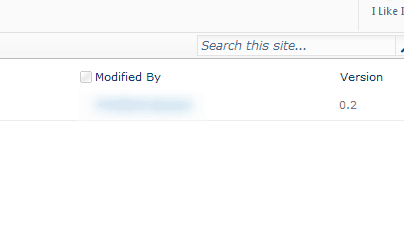
I verified that the version change to 0.2 but I want it to be a major version so I’ll choose Publish a Major Version.
Publish-A-Major-Version
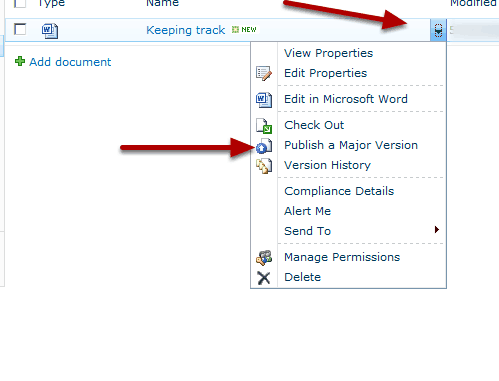
Mouse-over the document and select the drop down (ECB edit control block) menu and choose Publish a Major Version.
Enter-Comments
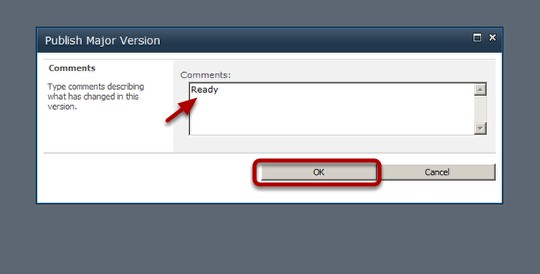
Enter some comments and then click OK.
Verify-Major-Version
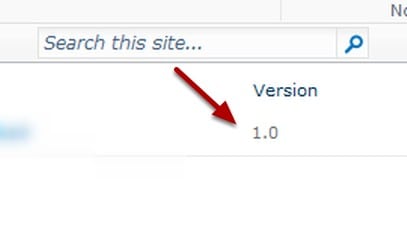
We can now verify that the document version is now 1.0. Normally, when configuring versioning, it is done in conjunction with Check In – Check Out being required. However, in this blog post, we concentrated on setting up major and minor versioning only.
Enjoy!
Spike Xavier
SharePoint Instructor – Interface Technical Training
Phoenix, AZ


A Simple Introduction to Cisco CML2
Mark Jacob, Cisco Instructor, presents an introduction to Cisco Modeling Labs 2.0 or CML2.0, an upgrade to Cisco’s VIRL Personal Edition. Mark demonstrates Terminal Emulator access to console, as well as console access from within the CML2.0 product. Hello, I’m Mark Jacob, a Cisco Instructor and Network Instructor at Interface Technical Training. I’ve been using … Continue reading A Simple Introduction to Cisco CML2
Creating Dynamic DNS in Network Environments
This content is from our CompTIA Network + Video Certification Training Course. Start training today! In this video, CompTIA Network + instructor Rick Trader teaches how to create Dynamic DNS zones in Network Environments. Video Transcription: Now that we’ve installed DNS, we’ve created our DNS zones, the next step is now, how do we produce those … Continue reading Creating Dynamic DNS in Network Environments
Cable Testers and How to Use them in Network Environments
This content is from our CompTIA Network + Video Certification Training Course. Start training today! In this video, CompTIA Network + instructor Rick Trader demonstrates how to use cable testers in network environments. Let’s look at some tools that we can use to test our different cables in our environment. Cable Testers Properly Wired Connectivity … Continue reading Cable Testers and How to Use them in Network Environments