How to install OpenWRT on a Raspberry Pi Compute Module 4

Some time ago I wrote a blog which mentioned OpenWrt.
I have also written about the joy of doing projects the various Raspberry Pi units over time, so this blog combines two of my favorite IT topics.
I now have another device which runs OpenWrt, so I thought I would share my experiences. This device along with much of the associated accoutrement was sent to me so I could check it out and provide my opinion. If you want to grab one of there for yourself, I have provided all the links at the bottom of this article. I received the board, an ABS case with an aluminum cover (for heat dissipation), along with a cooling fan. The company that sent it is called seeed. Yes, that is spelled correctly!
Figure 1 shows the actual board they sent. this pic shows the fan already attached, plus my skillfully-made hand-inked labels for LAN and WAN ports:
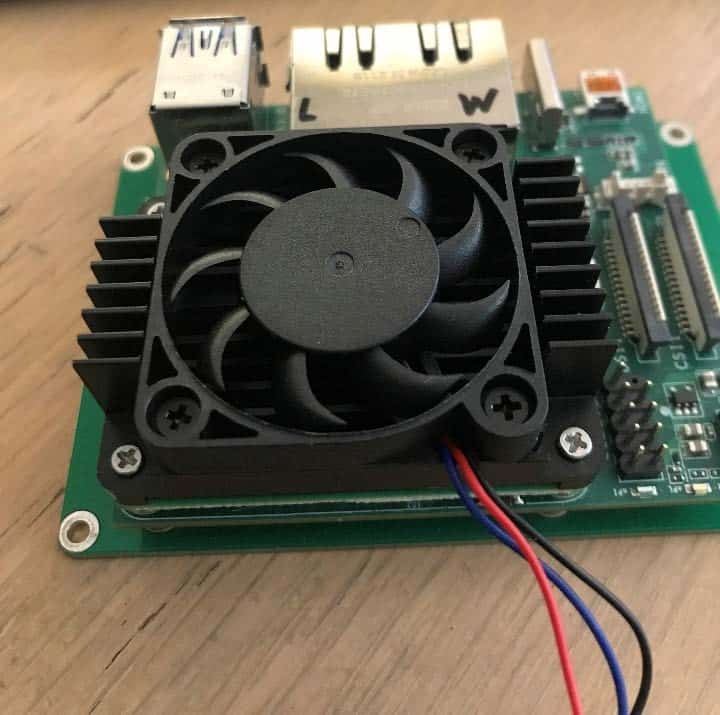
FIGURE 1
The first thing that must be done (after you rip the package open) is to get the OpenWrt software onto the device. There is an excellent set of instructions found here:
There are also instructions there if your platform is Linux or MAC – I followed the Windows instructions.
I followed the link contained in those instructions which took me here:
I grabbed the file in the red box shown in Figure 2:
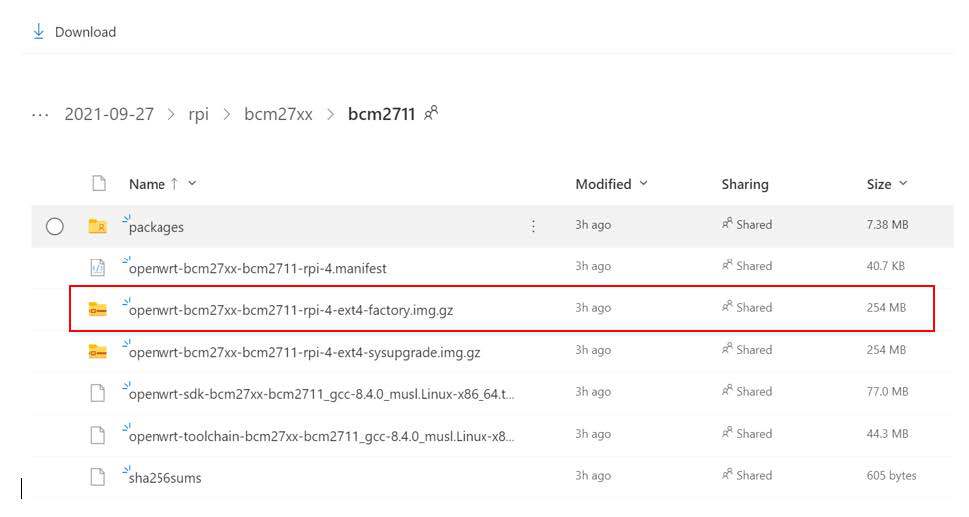
FIGURE 2
There is no need to duplicate the step-by-step instructions that are covered in the above link, so I will summarize.
Next, follow the link to install the rpiboot tool. I did so, scanned it with Windows Defender, found it was pronounced safe, and ran it.
The figures 3, 4, & 5 below show some screenshots of it running:
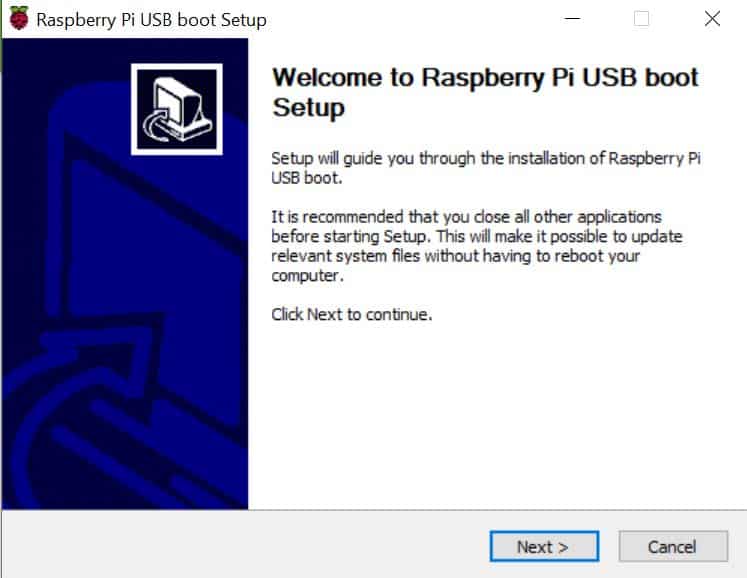
FIGURE 3
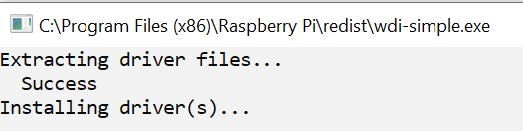
FIGURE 4
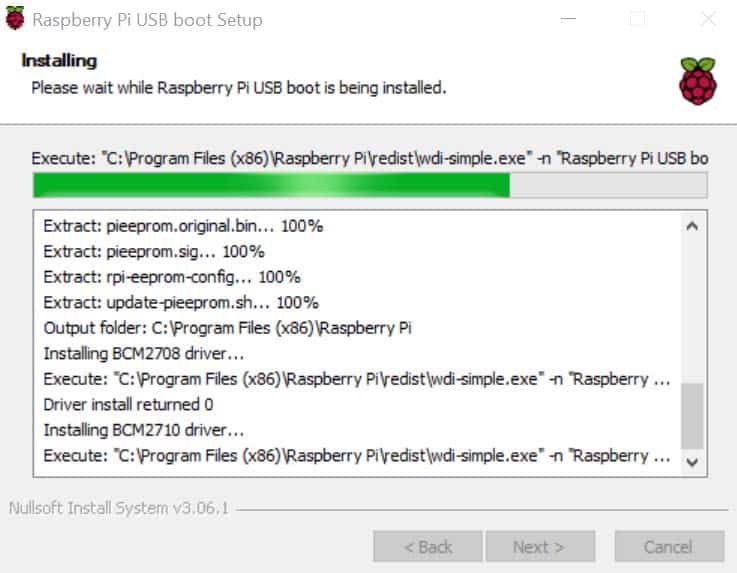
FIGURE 5
Note that a jumper wire must be connected on the board for the next step, but the instructions have a very clear pic on what to connect. I just used a jumper wire from my electronics kit. The instructions say to download balenaEtcher, but I already had that from other Raspberry Pi projects. If you need it, click here:
Follow the given instructions for pushing the software using BalenaEtcher (you may already be familiar with the process if you’ve done tother similar projects). The site even has screenshots to walk you through the flashing process, if you are unfamiliar with it.
Once this process was complete, I connected my laptop via Ethernet to the LAN connector on the device. There is a nice picture in the instructions to clarify which connector is LAN and which is WAN, so I connected my laptop to the port closest to the USB ports. The WAN port is the one closest to the power input. The default IP network for the LAN interface is given as 192.168.2.0/24. To make sure I didn’t have connectivity issues at the outset, I configured my laptop with the static IP address of 192.168.2.100/24. Fear not, DHCP is enabled on this OpenWrt box, and I tested that later, and it worked great! If you are curious, my laptop obtained the IP address 192.168.2.139/24.
To access the web GUI from my laptop, I browsed to 192.168.2.1/24 – success! The first thing I did was to set a memorable password for the root account. It’s a good idea to stay in practice on setting self-generated passwords, even for a lab device. I then let it run for a while just to “break it in.” It turns out the first time I ran it, I tried it without either the case with the passive aluminum heat dissipation option, or with the cooling fan. I wanted to see its actual heat generation. It didn’t take long to realize you don’t want to run it without additional cooling. On the purchasing webpage, one note mentions that it can run at 80°C+ and they weren’t kidding. This unit gets HOT. That is Celsius. Water boils at 100°C (depending on where you’re standing when you boil it) so this unit gets toasty. I powered it down and connected the fan – refer back to figure 1 to see it.
Keep in mind they also sent me a case. It turns out that you must make a choice. I, of course, wanted to use both the fan AND the case, but in the current state of the devices, this cannot be done. If you attach the fan, the unit won’t fit into the case. If you modify the case to force the PCB with the fan attached to fit inside the case, then the aluminum cover presses right against the top of the fan and blocks the air flow. There is also a hard reset button on the unit, which is blocked if you put it inside the case. It only takes a few moments to disassemble the unit, but I created a suggestion about this as well. I submitted my suggestions to seeed – so perhaps in the future there will be a unit available that will accommodate both the fan and the case with an opening providing access to the reset button. A man can dream…
Here is the case with the aluminum cover along with the thermal transfer patch, the blue square in the picture – it’s very nice and has a good quality heft to it:
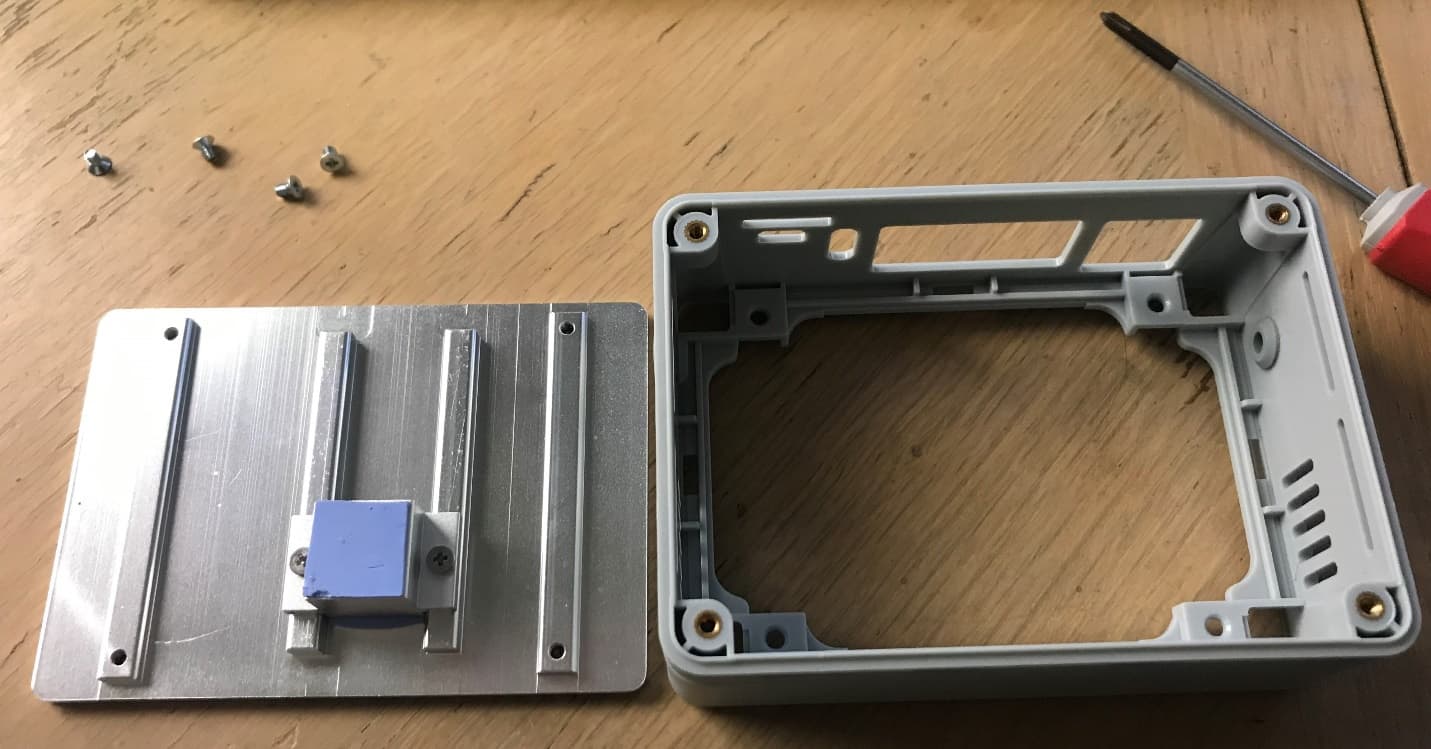
FIGURE 6
Note that the small block of aluminum topped with the blue square would have to be removed if they decide to make this all one unit – the PCB, the fan, and the case, because that aluminum block, by design, reaches down to have contact with the HOT area of the board. Like the dentist says, “That’s gonna have to come out!”
I decided to try the speed test using iperf as noted in the instructional link. Since the step-by-step instructions are already there, once again I will just summarize my experience. I installed iperf on the OpenWrt box, and grabbed the Windows version for my laptop from here:
I accessed the router using SSH to it’s IP address so I can report that this works great as well. I didn’t like the color scheme for screenshots, so I modded the terminal view using this command:
setterm -back white -fore black
Figure 7 shows a screenshot of my results (with the Command Prompt window and the SSH window side-by-side) of one of the iperf tests:
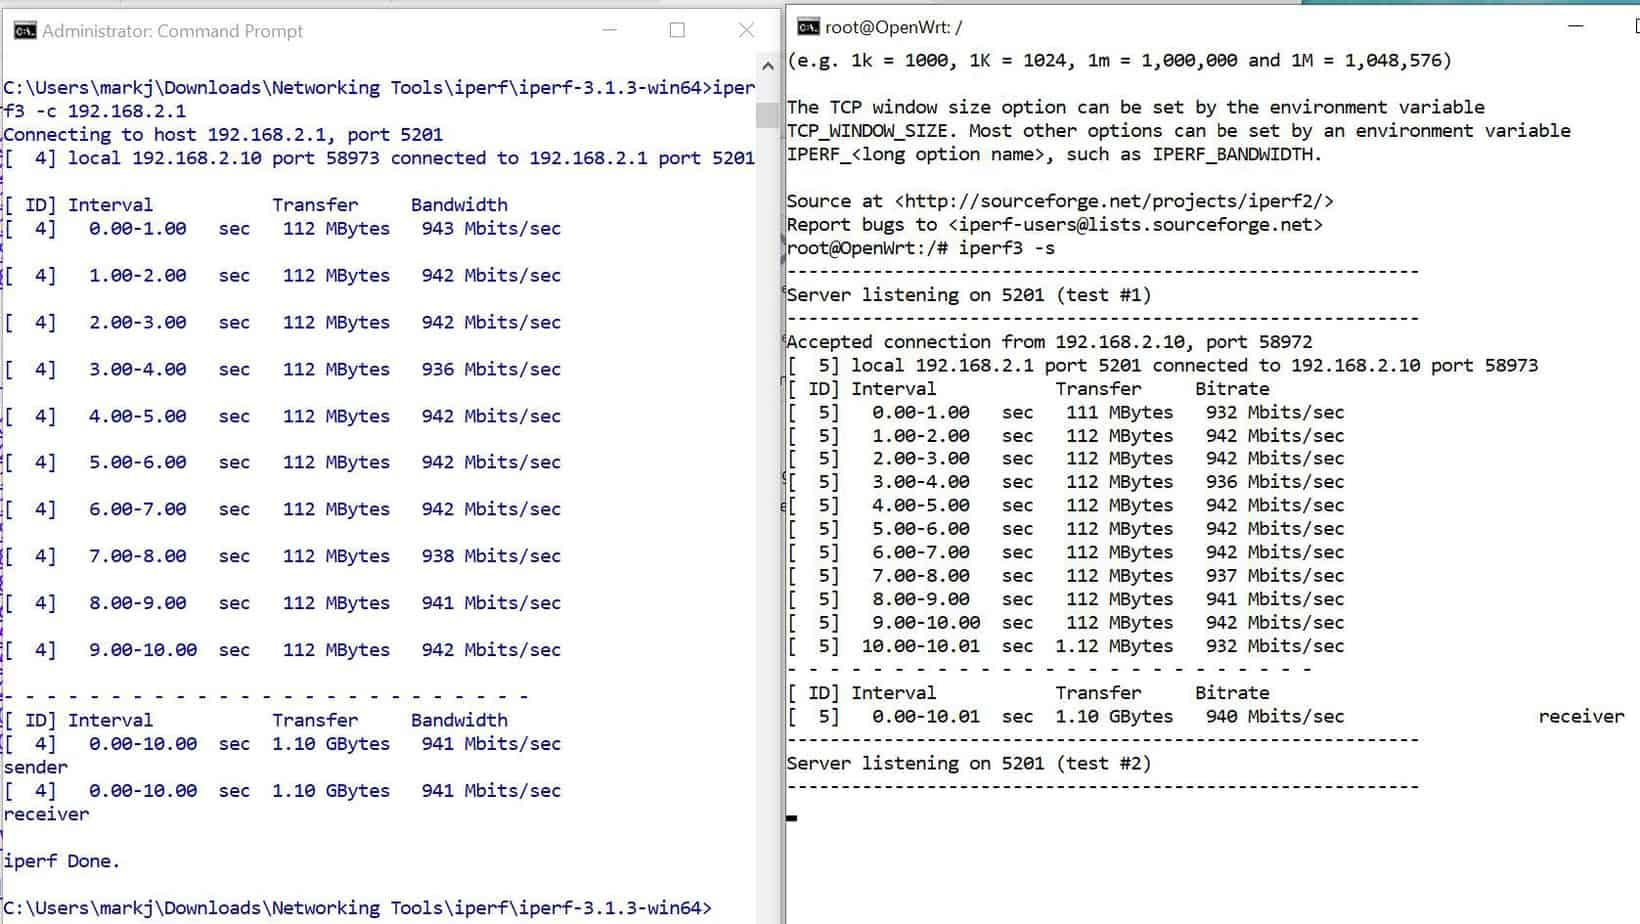
FIGURE 7
The specs on their site say it can handle 1Gbps. I was getting very close to that!
I have not had much time to play with configuring it yet, but I did put it through its paces in a “production” environment. Those of you who know me know that with the current pandemic environment encapsulating the world I have been teaching from home since it all began. I have one computer which I use to teach my classes – initially the remote instruction platform was Adobe Connect, but now it is Zoom – and I use another laptop to monitor what the student view looks like (you know, to make sure I don’t look stupid). I connected the OpenWrt router between my monitoring laptop and my Cisco 2960 switch that gives me upstream connectivity. I did not have a single instance of losing connectivity during this testing. I said “production” because it was during a live class, but it would not have impacted the class experience negatively if my monitoring laptop had lost connectivity.
Overall, I am very pleased with it. It has a small form factor, approximate measurements using a ruler: 4” x 2⅞” x 1½”
When I get more time, I will play the configuration options. Out of the box it routed between the default network of 192.168.2.0/24 for the LAN and the 192.168.0.0/24 network on the WAN interface. It easily kept up with the network load, and it didn’t crash once. I’m glad I had the chance to check it out. After all, routing is one of my hobbies! When I have more to add to the routing commands, I will be sure to share. As noted, if you scroll down, you can check out the links to the actual products covered in this blog.
As always, thanks for reading!
Until next time….
Mark Jacob
Links:
If you want to grab one:
https://www.seeedstudio.com/Rapberry-Pi-CM4-Dual-GbE-Carrier-Board-p-4874.html
Dual Gigabit Ethernet NICs Carrier Board for Raspberry Pi Compute Module 4
You will also need:
https://www.seeedstudio.com/Raspberry-Pi-Compute-Module-CM4108032-p-5220.html
Raspberry Pi Compute Module 4 – 8GB RAM, 32GB eMMC, 2.4/5.0GHz Wi-Fi & Bluetooth 5.0 (CM4108032) This is the one with the best features. There are less expensive alternatives on the same webpage.
The cooling fan is here:
https://www.seeedstudio.com/Aluminum-Alloy-CNC-Heat-Sink-with-Fan-for-Raspberry-Pi-CM4-Module-p-4923.html
The ABS case with the aluminum cover is here:
https://www.seeedstudio.com/Aluminum-Alloy-CNC-Passive-Cooling-Cover-Case-for-CM4-p-5031.html
Here is the complete unit already in the case (passive cooling, no fan):
https://www.seeedstudio.com/Dual-GbE-Carrier-Board-with-4GB-RAM-32GB-eMMC-RPi-CM4-Case-p-5029.html
I ordered a power supply unit for it using USB-C from Amazon.com. This is the one I ordered:
https://www.amazon.com/dp/B07TYQRXTK?psc=1&ref=ppx_yo2_dt_b_product_details


A Simple Introduction to Cisco CML2
Mark Jacob, Cisco Instructor, presents an introduction to Cisco Modeling Labs 2.0 or CML2.0, an upgrade to Cisco’s VIRL Personal Edition. Mark demonstrates Terminal Emulator access to console, as well as console access from within the CML2.0 product. Hello, I’m Mark Jacob, a Cisco Instructor and Network Instructor at Interface Technical Training. I’ve been using … Continue reading A Simple Introduction to Cisco CML2
Creating Dynamic DNS in Network Environments
This content is from our CompTIA Network + Video Certification Training Course. Start training today! In this video, CompTIA Network + instructor Rick Trader teaches how to create Dynamic DNS zones in Network Environments. Video Transcription: Now that we’ve installed DNS, we’ve created our DNS zones, the next step is now, how do we produce those … Continue reading Creating Dynamic DNS in Network Environments
Cable Testers and How to Use them in Network Environments
This content is from our CompTIA Network + Video Certification Training Course. Start training today! In this video, CompTIA Network + instructor Rick Trader demonstrates how to use cable testers in network environments. Let’s look at some tools that we can use to test our different cables in our environment. Cable Testers Properly Wired Connectivity … Continue reading Cable Testers and How to Use them in Network Environments