How to use Best Bets SharePoint 2010 Search

In this blog, I will set up a Best Bet and keyword in SharePoint 2010. Best Bets are a great way for Site Collection Administrators to help guide users to the content they are looking for as well as promoting some content to users on an as-needed basis.
In this blog I have created an out-of-the-box Site Collection using a Team Site as the top level site template. I have created a sub-site and used the Basic Search Center as the template and named it Search.
Here are the steps I’ll do:
1. Hook up the Search Center
2. Test a search. (I’ll use the term “Black Flag”).
3. Configure a Keyword and best bet.
4. Test the results.
(Note this will not work with SharePoint Foundation out-of-the-box, you must have Standard or Enterprise. Also, I don’t have Fast Search setup in this environment, if I did, I would use Fast Search Keyword and Best Bet, the idea is the same but the UI is a little different).
A Quick Environment Overview
I’m on the top level site where I can observe a top link navigation bar to my Search Center.
Hook up the Search Center
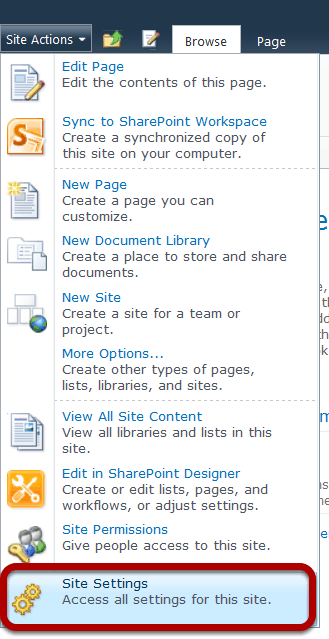
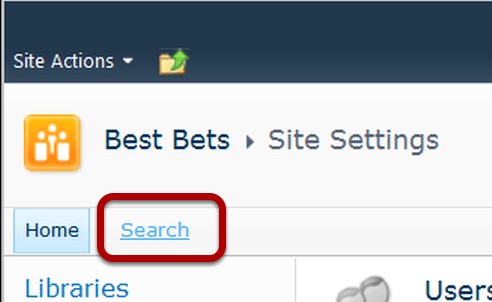
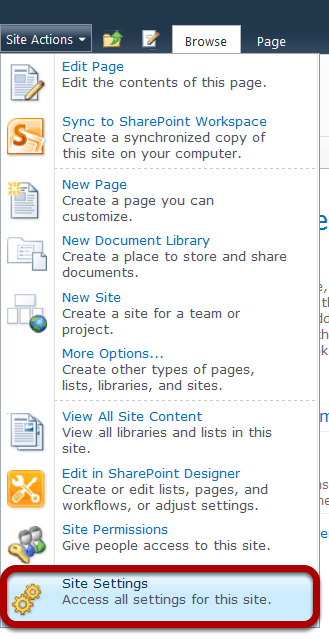
In order to use the keywords and best bets on a team site, I need to hook up the settings on the site collection. The best bets and keyword is a web part and as a result, it needs a page with the web part on it to show. The Basic Search Center results page is a web part page with this web part already on it so it’s a great choice. In order to hook it all up I go to Site Actions > Site Settings from the top level site of the site collection.
Search Settings
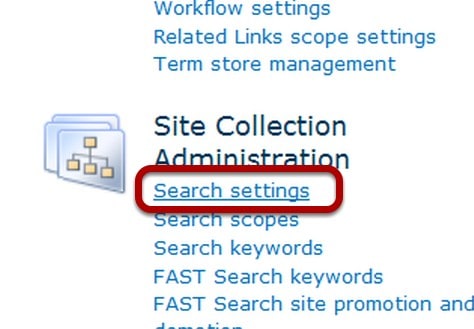
In the Site Collection Administration links section of the Site Settings page I click on Search Settings.
Enable Custom Scopes
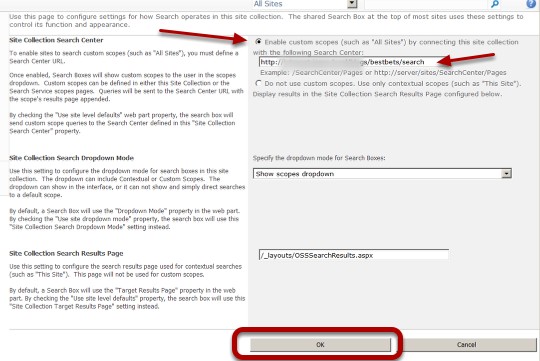
I want to click the radio button to enable custom scopes and provide the http address to my Search Center. I also change the Site Collection Search Dropdown mode in order to show Scopes while I’m here. I leave the rest as is and click OK.
Go to Search Center
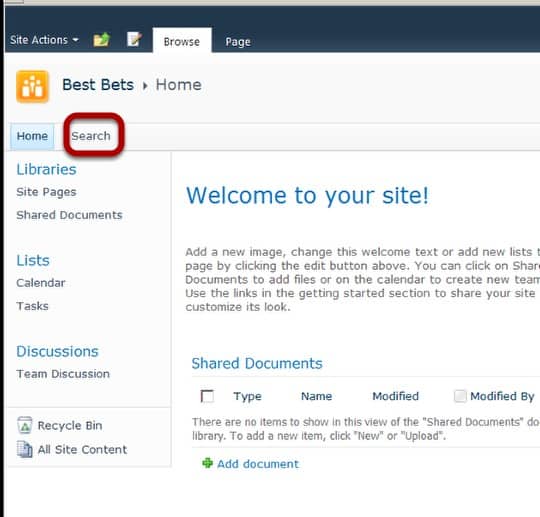
Now I’ll go to the search center by clicking the Search link in the top link navigation bar.
Test the Term
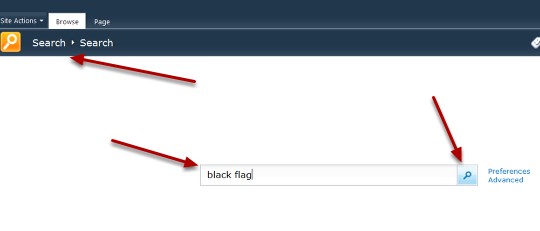
I’ll enter Black Flag as the term I’m going to test. In the case of my SharePoint deployment I get some results.
Observe the Results
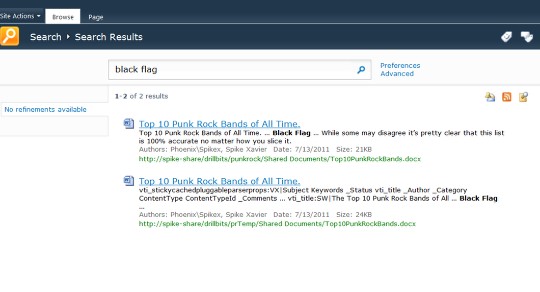
I notice that there are a couple of results, but I want to have a result at the top which will point to Interface Technical Training so I’ll set that up using a Keyword and Best Bet.
Back to Top Level Site Actions – Site Settings
I return to the home page of the top level site (not shown) and click Site Actions> Site Settings
Set up Keywords
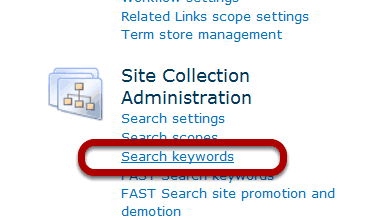
I click on the link Search Keywords in the Site Collection Administration section of the Site Settings page.
Add Keyword
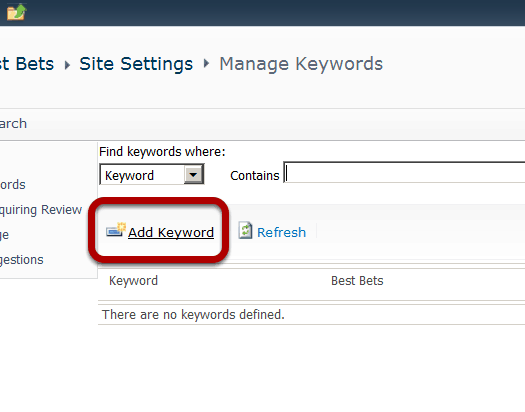
I click the Add Keyword link on the Manage Keywords page.
Add Keyword and Synonyms Click Add Best Bet
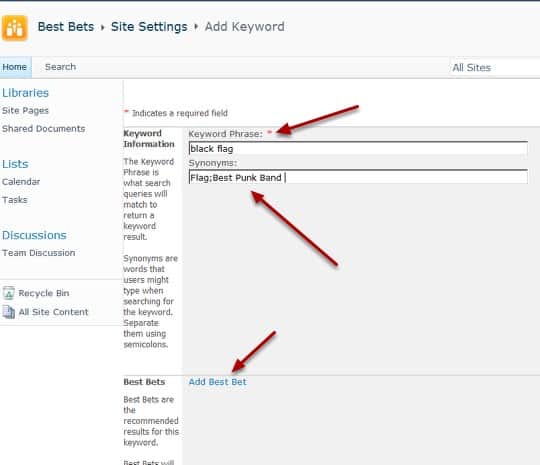
I type in the term I’m targeting (Black Flag). In the Synonyms, I add some terms that I would also like to target because it’s possible people will type these in as well. I then click the link to Add Best Bet.
Fill out Best Bet Form
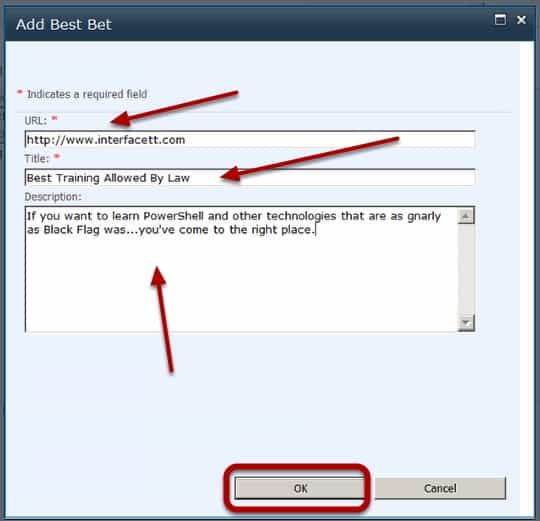
Next, I fill out the Best Bet form adding a link to Interface Technical Training as well as a Title (or tag line) and a Description, and click OK.
Add Other Information as needed. Then click OK
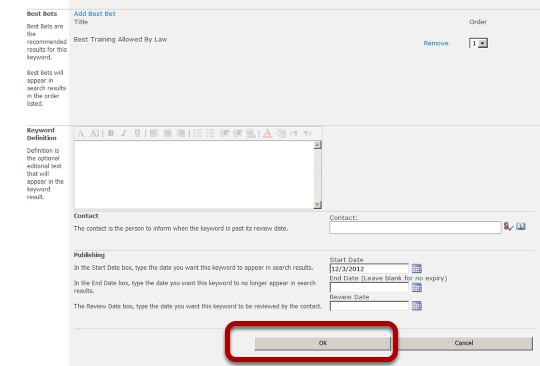
I’m going to leave the rest of the settings at their default and click OK.
Go to Search Center to test
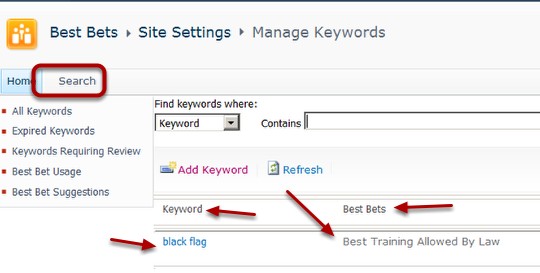
When I’m done, I can see the new Keyword and Best Bet added and I click on the Search link in the top link navigation bar to return to my Search center for testing.
Enter Keyword and Search
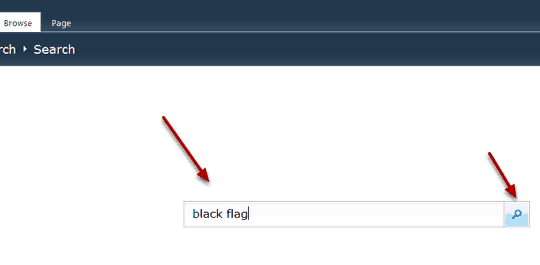
Once again I enter Black Flag and hit the search icon.
Validate Results
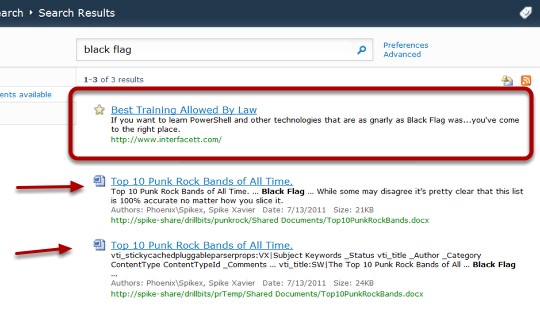
Voilà, my Keyword and Best Bbet are at the top of the Search Results. There is no waiting for any timer jobs, the effect is immediate!
That’s it.
I successfully set up a keyword and best bet in SharePoint 2010!
Spike Xavier
SharePoint Instructor – Interface Technical Training
Phoenix, AZ


A Simple Introduction to Cisco CML2
Mark Jacob, Cisco Instructor, presents an introduction to Cisco Modeling Labs 2.0 or CML2.0, an upgrade to Cisco’s VIRL Personal Edition. Mark demonstrates Terminal Emulator access to console, as well as console access from within the CML2.0 product. Hello, I’m Mark Jacob, a Cisco Instructor and Network Instructor at Interface Technical Training. I’ve been using … Continue reading A Simple Introduction to Cisco CML2
Creating Dynamic DNS in Network Environments
This content is from our CompTIA Network + Video Certification Training Course. Start training today! In this video, CompTIA Network + instructor Rick Trader teaches how to create Dynamic DNS zones in Network Environments. Video Transcription: Now that we’ve installed DNS, we’ve created our DNS zones, the next step is now, how do we produce those … Continue reading Creating Dynamic DNS in Network Environments
Cable Testers and How to Use them in Network Environments
This content is from our CompTIA Network + Video Certification Training Course. Start training today! In this video, CompTIA Network + instructor Rick Trader demonstrates how to use cable testers in network environments. Let’s look at some tools that we can use to test our different cables in our environment. Cable Testers Properly Wired Connectivity … Continue reading Cable Testers and How to Use them in Network Environments
See what people are saying...