Part 2 – How to Import a CSV Text File into SharePoint 2013 – Preparing the Excel File

SharePoint Video Training Series – Importing a CSV file into SharePoint 2013.
- Introduction
- Prepare the Excel File
- Create the List in SharePoint 2013
- Create the Views in SharePoint 2013
- Create the SharePoint Home Page Dashboard
For instructor-led SharePoint training, see our class schedule.
This is part two of a five‑part SharePoint 2013 training videos about moving data out of an Excel spreadsheet into SharePoint. Then we will leverage this using all out‑of‑the‑box functionality of SharePoint 2013. This video is Preparing the Excel file.
Download the Products.csv file.

I’m going to open it up in Notepad.
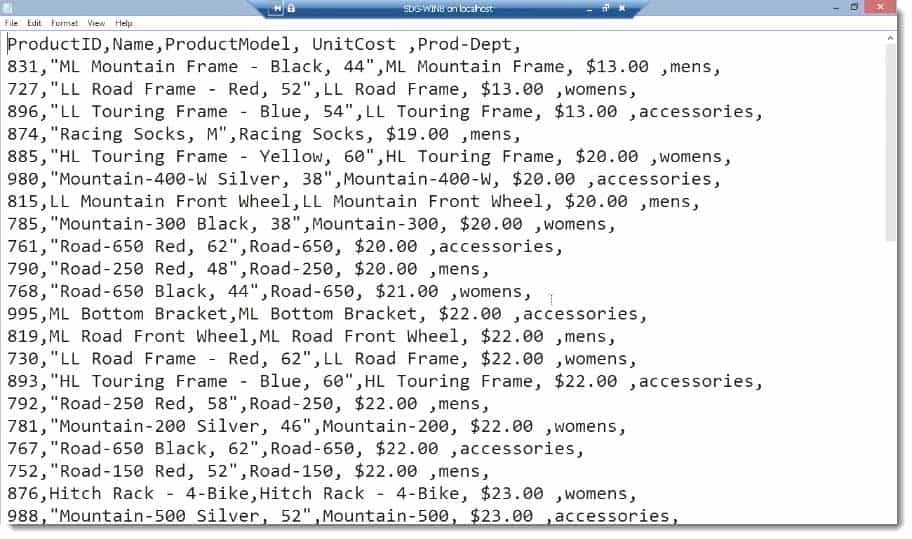
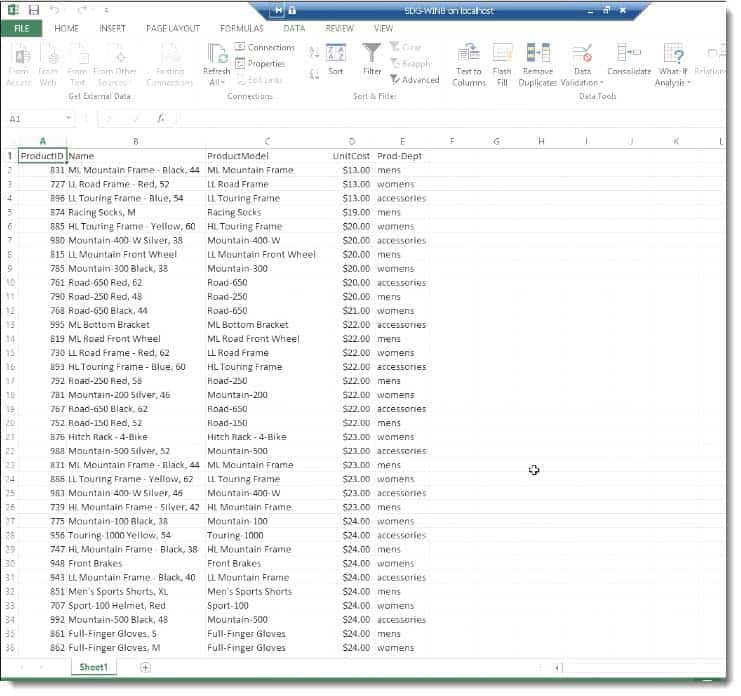
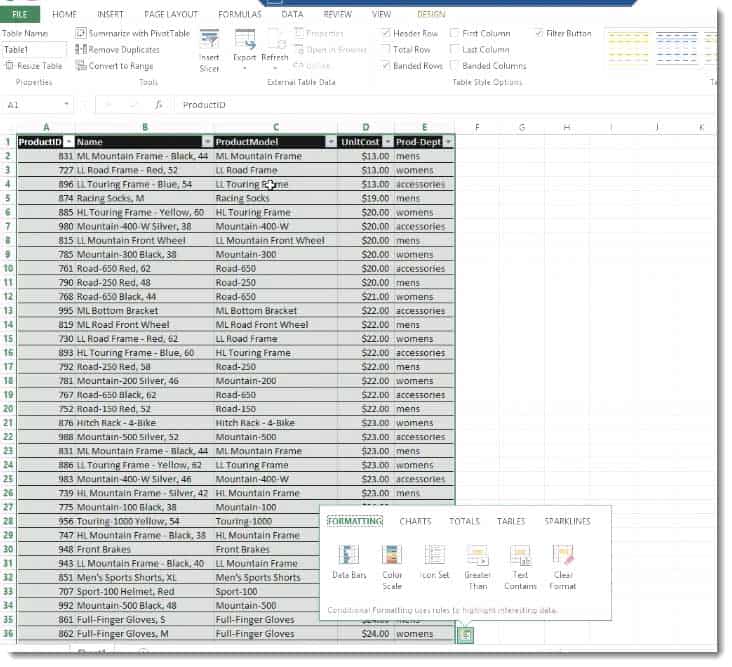
This is just a simple Comma‑Separated Values (CSV) file, and it has several headers.

We’ve have a Product ID column, Name column, Product Model column, Unit Cost, and a Product Department column.
All of these will be the individual header columns. They will become List Columns in SharePoint as we create our list. Then the data separated by commas.
First I’ll open up Excel 2013 because I’m going to go ahead and grab this into Excel first. I’m going to start a blank notebook, and then I’m going to click on the data tab, which is up in the ribbon.
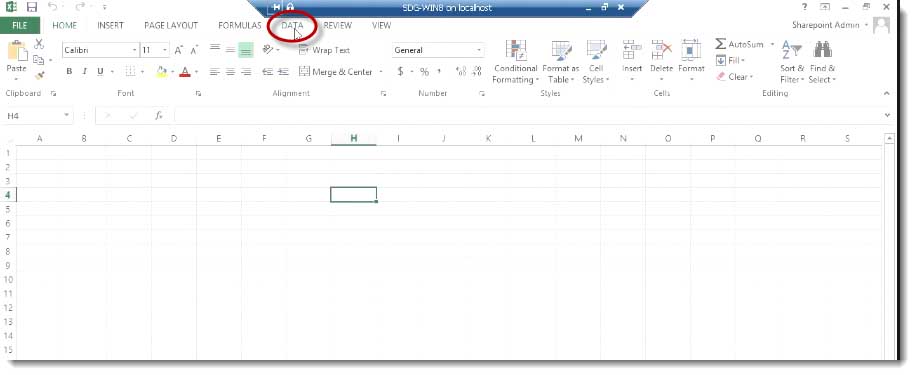
I’m going to click that Data tab to activate the icons for putting data into an Excel workbook or worksheet. I’m going to highlight cell A1, just for good measure, and then I’m going to be getting the data from text.
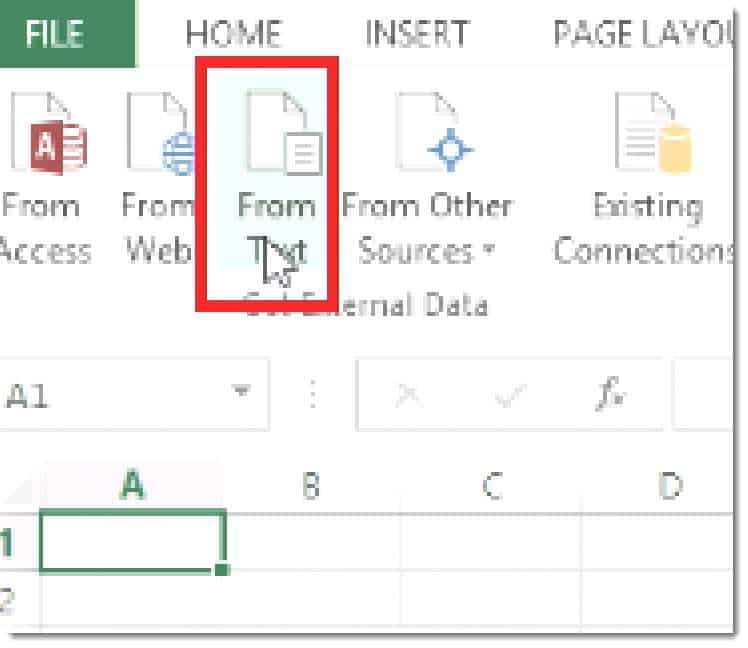
It’s a CSV file. That’s a text file, so I’m going to choose “from text” in the ribbon.
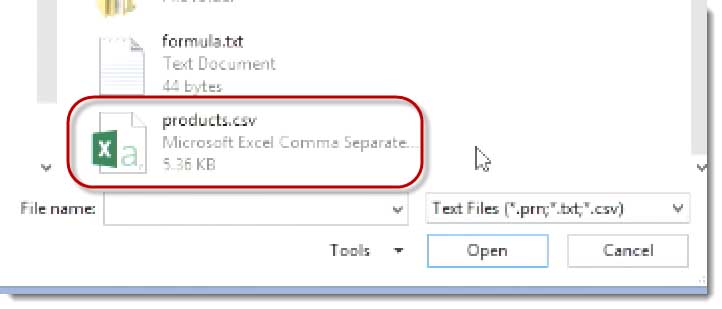
After I choose that, I’m going to have to browse for the file, which I’ve left on my desktop, and I’ve just named it products.csv.
Now Excel’s going to notifies us “that it found a file with data in it. Just want to make sure that we’re on the same page with understanding what that data is, and how you want me to bring it into Excel.”
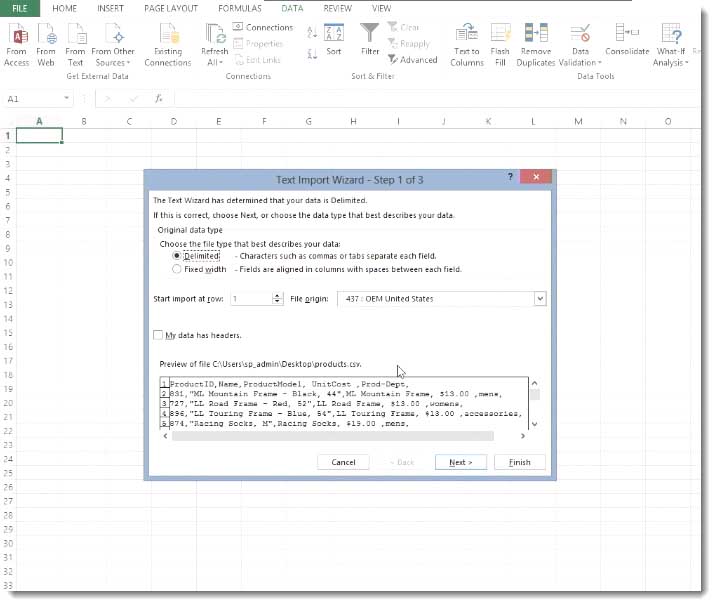
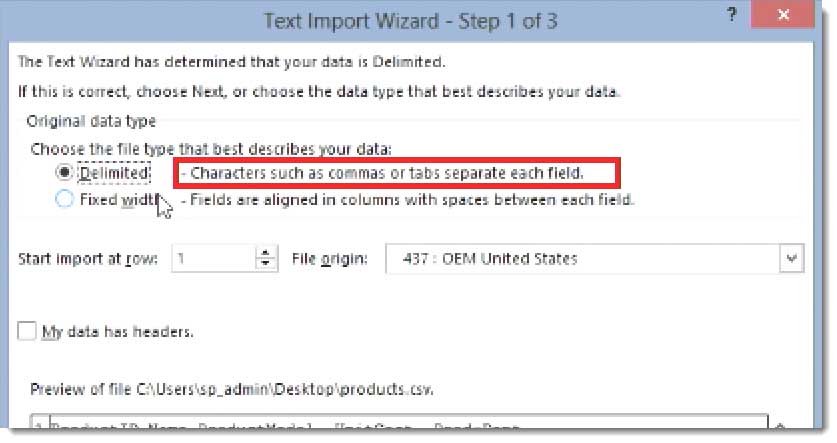
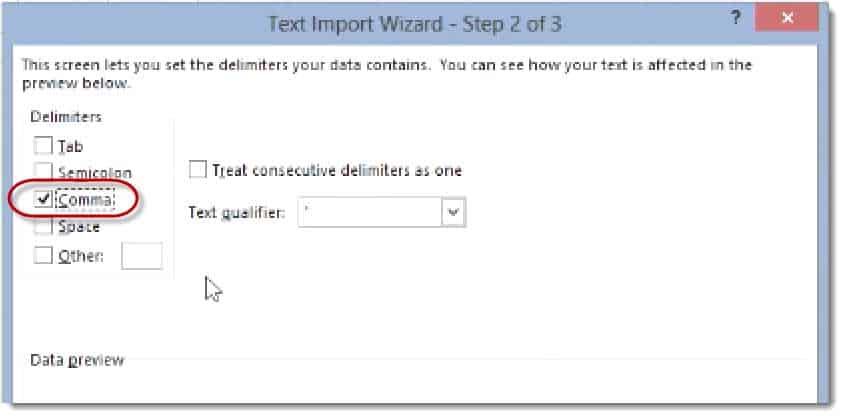
The first default says, “Is this data delimited with characters such as commas, tabs separating each field?” This is separated by commas.
The next question is, “Does your data have headers?”
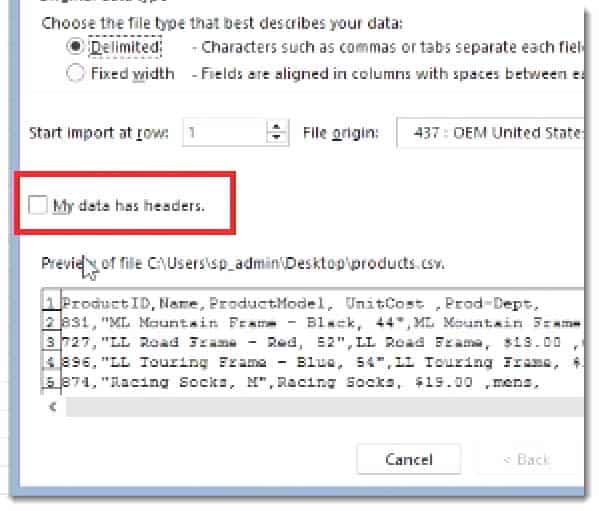
Ours does so I’m going to go ahead and select, “Yes, this data has headers.” Then I’ll click next.
That helped Excel out a lot, and right now it’s looking for a tab delimited file.
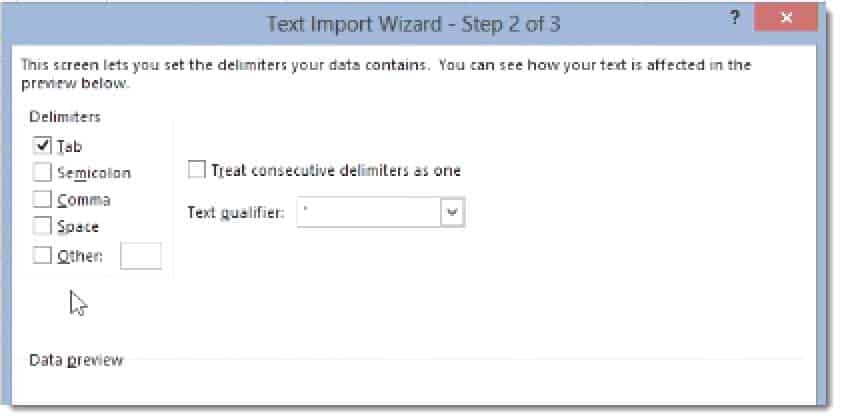
It can select every tab, every time I hit tab if I was creating the file, would see that as a new column. But actually mine is not tab delimited.
Mine is comma delimited, so I’m going to change that to comma.
In this little data preview screen, you can see that Excel has already determined that our header is Product ID, Name, Product Model, Unit Cost, and Product Description.
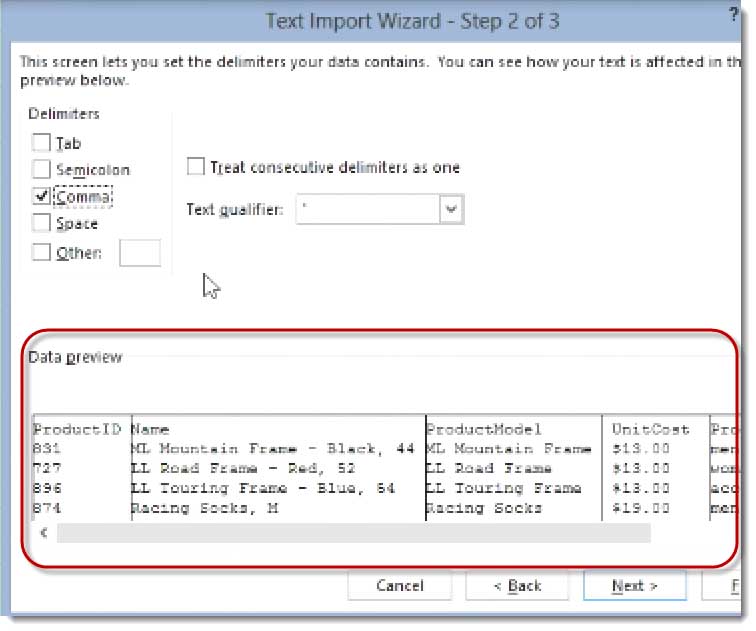
Everything looks good, so I’m going to click next.
Right now, I could go through each of these columns, and format them as I want. Everything looks good, but down here under unit cost column, I could theoretically, if I wanted to, click advanced

Then change the decimal places.
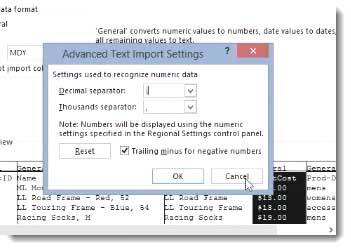
We won’t do that now. We will do it when it gets into SharePoint, because it’s nice to know how to do that in SharePoint.
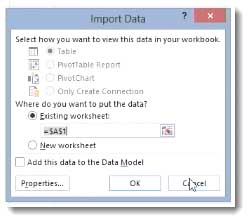
I’m done. It wants to validate the range that I want to create, and I’m going click OK.
That is the process of inserting everything into Excel. I’ve got the data in there; it’s always good to check everything.
Now, what I’m going to do is format this data in Excel as a table. A1 is already selected. I’m just going to scroll down here. I’m using the mouse wheel. There’s several ways to do this, but I’m using the mouse wheel.
I’m going to find the last piece of data, which is in E87 in my case. I’m going to hold the shift key down, and click the right mouse key, and that will select that entire range.
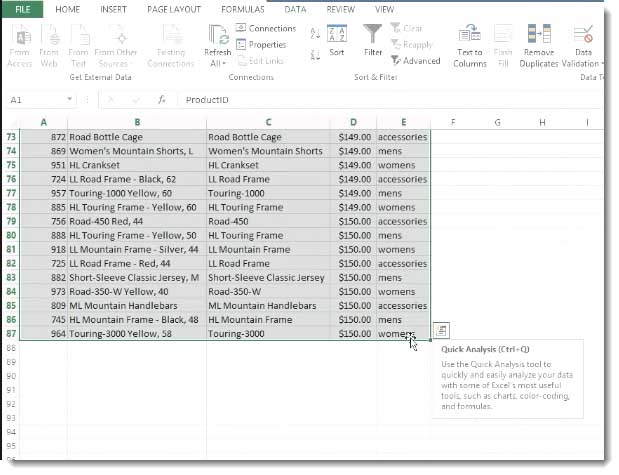
Then what I can do is click the home tab, and there’s an option up here in the ribbon to Format as Tables.
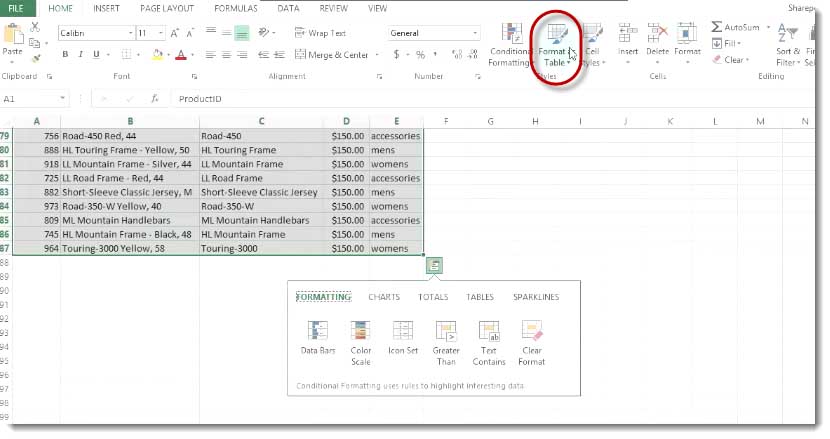
I’m going to click that drop‑down.
You can pick any style that you like. I’m going to go with the really simple one, where the top row is dark black as a background, and white text. I’m going to go ahead and click “OK.”
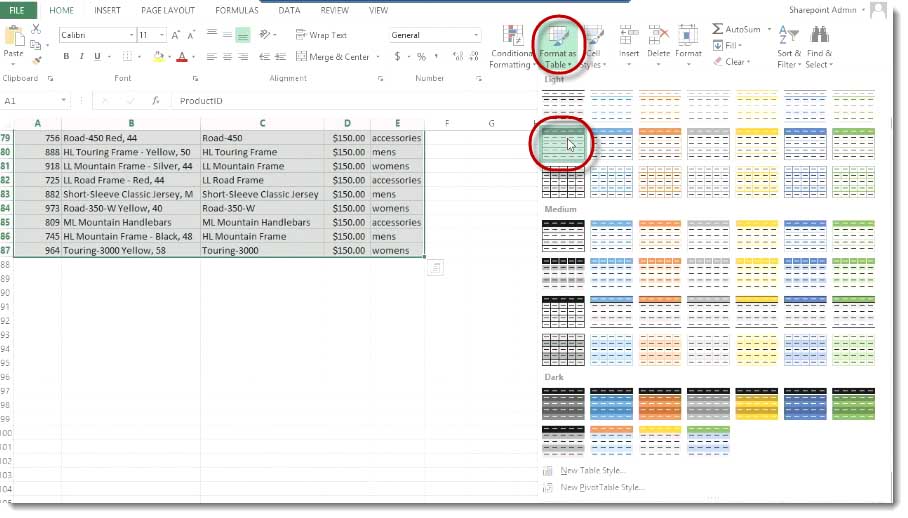
Now, the data is formatted as a table.
This gives me functionality. Excel tables are awesome, but one thing that I want to do is I want to go ahead to the design tab and I’m going to change the table name.
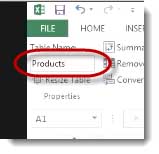
I’ll name is “Products” because, as I import this into SharePoint, it’s going to open the Excel file and go, “Which object in Excel do you want me to import and use as the data source for this list?” as I’m creating it. I want to go ahead and be able to say “table range,” and the table range is named table.
That’s about it, there. I’m going to now save this to my desktop. I’m going to actually call this file Products.xlsx, so it’s an XLSX workbook.
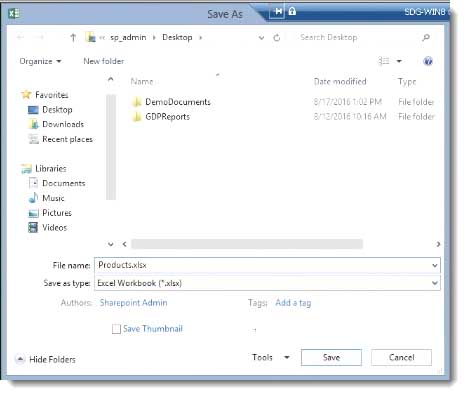
I’ve now got my file ready to go. I’ve imported it into Excel. I’ve formatted it as a table, named the table as products, and save that to my desktop.
In the next video, we’ll get this data into SharePoint. That’s preparing the Excel file.
Spike Xavier
SharePoint Instructor – Interface Technical Training
Phoenix, AZ
5 Part SharePoint Video Training Series – Importing a CSV file into SharePoint 2013.
- Introduction
- Prepare the Excel File
- Create the List in SharePoint 2013
- Create the Views in SharePoint 2013
- Create the SharePoint Home Page Dashboard


A Simple Introduction to Cisco CML2
Mark Jacob, Cisco Instructor, presents an introduction to Cisco Modeling Labs 2.0 or CML2.0, an upgrade to Cisco’s VIRL Personal Edition. Mark demonstrates Terminal Emulator access to console, as well as console access from within the CML2.0 product. Hello, I’m Mark Jacob, a Cisco Instructor and Network Instructor at Interface Technical Training. I’ve been using … Continue reading A Simple Introduction to Cisco CML2
Creating Dynamic DNS in Network Environments
This content is from our CompTIA Network + Video Certification Training Course. Start training today! In this video, CompTIA Network + instructor Rick Trader teaches how to create Dynamic DNS zones in Network Environments. Video Transcription: Now that we’ve installed DNS, we’ve created our DNS zones, the next step is now, how do we produce those … Continue reading Creating Dynamic DNS in Network Environments
Cable Testers and How to Use them in Network Environments
This content is from our CompTIA Network + Video Certification Training Course. Start training today! In this video, CompTIA Network + instructor Rick Trader demonstrates how to use cable testers in network environments. Let’s look at some tools that we can use to test our different cables in our environment. Cable Testers Properly Wired Connectivity … Continue reading Cable Testers and How to Use them in Network Environments
Pingback: Importing a CSV file into SharePoint 2013. Part 1: Introduction