Part 3 How to Import a CSV Text File into SharePoint 2013 – Creating the list in SharePoint

SharePoint Video Training Series – Importing a CSV file into SharePoint 2013.
- Introduction
- Prepare the Excel File
- Create the List in SharePoint 2013
- Create the Views in SharePoint 2013
- Create the SharePoint Home Page Dashboard
For instructor-led SharePoint training, see our class schedule.
This is part three of a five part SharePoint 2013 training videos series on moving a Comma Separated Values (CSV) text file list into Excel, then getting that data into SharePoint and manipulating the data. We will do this with out-of-the-box SharePoint techniques with no special programming required.
Download the Products.csv file.
This one segment Creating the Lists in SharePoint. Now, I’m going to go ahead and start with a brand new fresh site.
I don’t have to start with a fresh site, I could certainly do it here, but I want to keep my navigation nice and clean, to focus on the stuff we’re going to do in this training video.
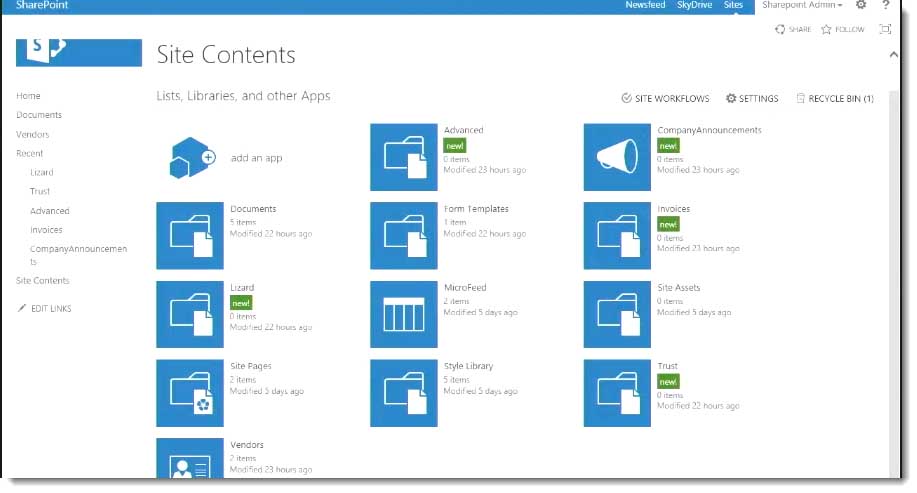
I’m going to go to site contents.
Just for reference, I’m on the top level site, a Site Collection, where the top level side was based on the Team Site Template with the Publishing feature not on. If you don’t know what that is, don’t worry about it, but it you do, you’ll understand what I mean. It’s just to let you know, I’m in a collaboration scenario.
I’m going to create a new subsite, and I’m actually going to call this subsite, “Products”. It’s going to be a products site. I will put it at the URL products.
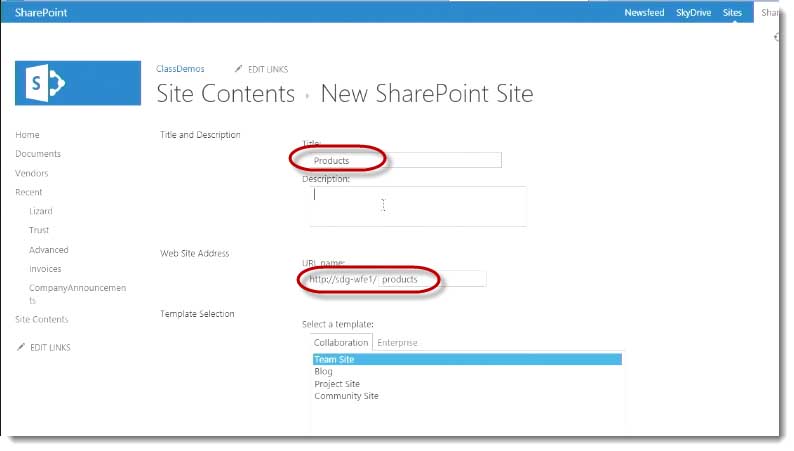
It’s going to be whatever the URL is to the top level site /products, and I’m going to say, “Site for our company Products.” Of course, it’s a fictitious company, it’s not really what it is. I’ll base the subsite on the teams site template.
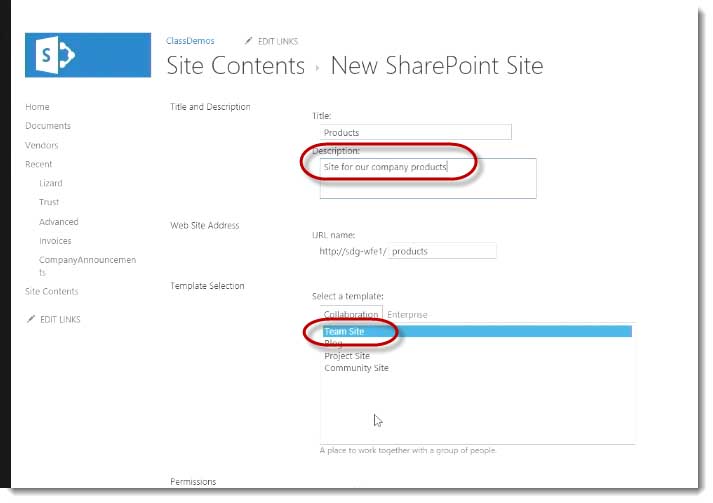
That is appropriate choice and I’ll leave all the settings default, except I’m going to select yes for the option of “Use the top link bar from the parent site?”.
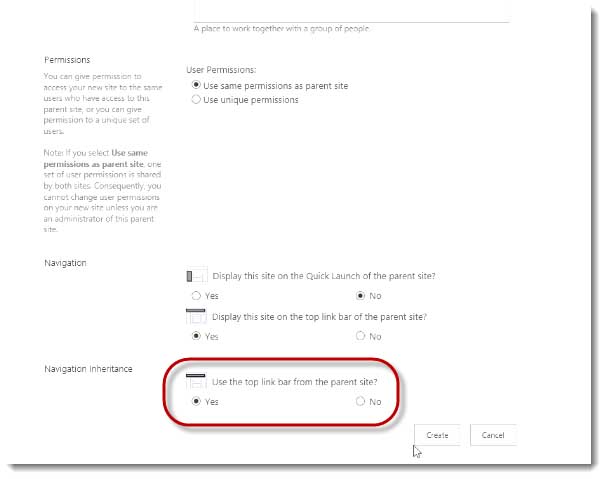
I’m asking it to display this site on the top link bar of the Parent Site, and then I’m saying, use the top link bar on the parent site, and that gives a nice effect, because what it does is it unifies the navigation experience on the top link bar between the site above it and this site here. Its Parent Site and its site will have the same navigation, so it’ll be a nice, fluid navigation.
If I quickly want to get from one to the other, I can do that simply by clicking the top link bar, If I make changes to the top link bar of the top link site, it’ll push down to this side as well.
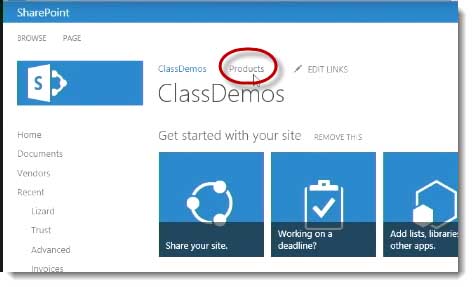
You can see I’m on the Home page of my Products sub site, but I still have that top link bar. There’s the Class Demo’s site, and there is the link to my Product’s site.
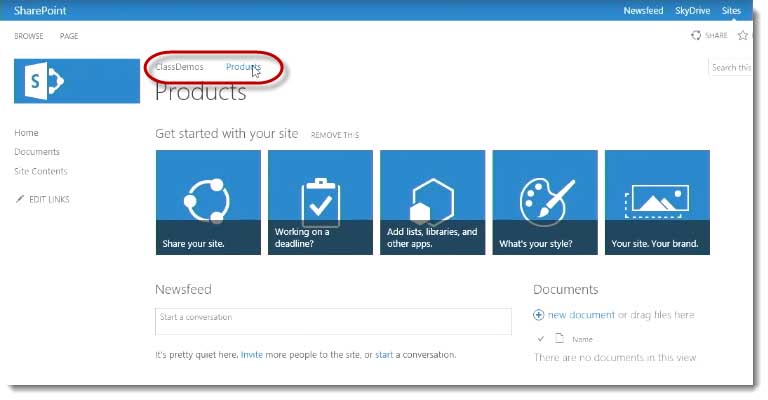
If I go back to the class demo’s site, because I ask this to appear, I can still see a link quickly to get back to my product subsite, where I’m going to do all my work for this particular video.
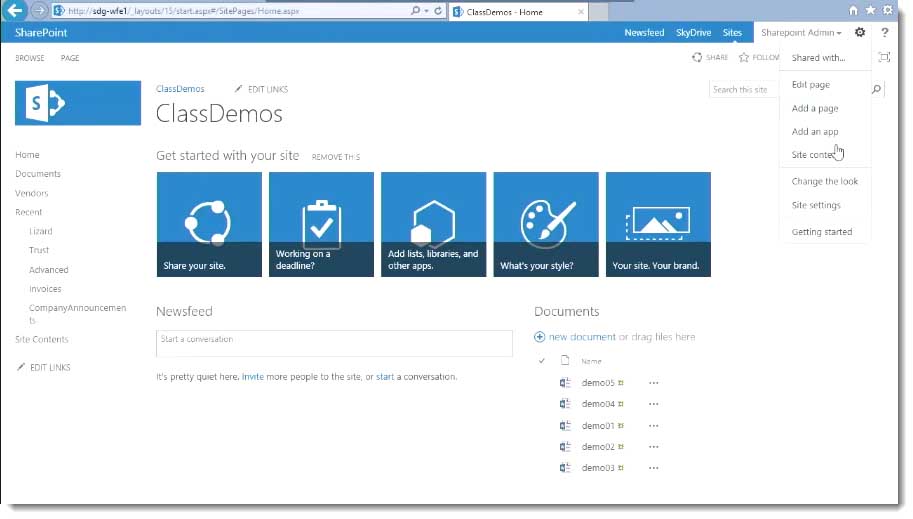
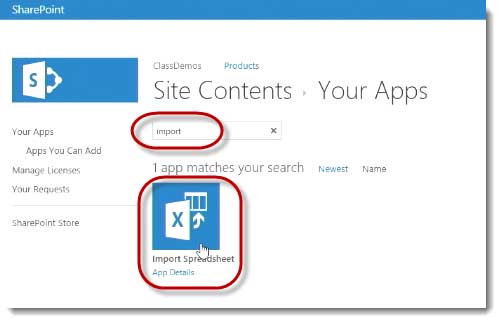
The focus of this video is Creating a List in SharePoint. To do this, by importing a spreadsheet, I’m going to click Site Actions, the Site Actions gear in the upper right hand side.
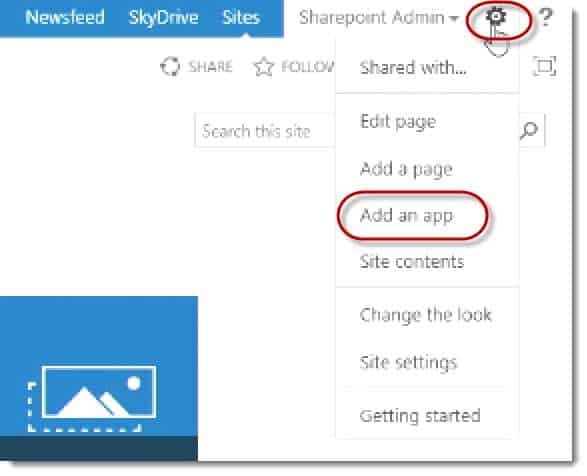
There’s other ways to do it too, but what I’m looking for is something that says Add an App so I’ll choose Add an App.
Then there are several different templates that appear.

I’m looking for one that says Import Spreadsheets. Since I don’t see it right away, I’m just going to type the word “Import” and use that awesome search functionality on the app’s page of SharePoint 2013.
I’m going to fill out some information. I’m going to call this Products. That means that this is going to be called the Products List. I’ll add a description, “Imported from products.xlsx,” on whatever the date is.
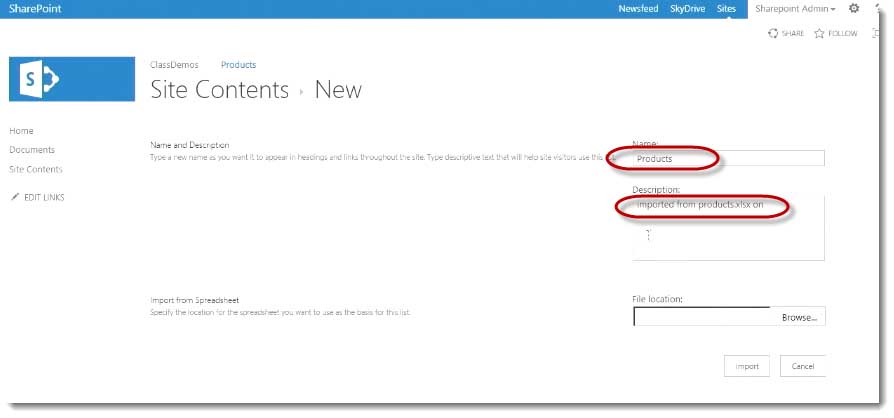
You don’t have to put that there, but I find it handy, especially for migrating data from one location into SharePoint, and it used to be somewhere else. I find that to be useful information.
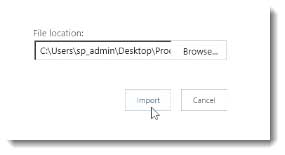
Then I’m going to browse. In this case it’s on my desktop, and it is called products.xlsx.
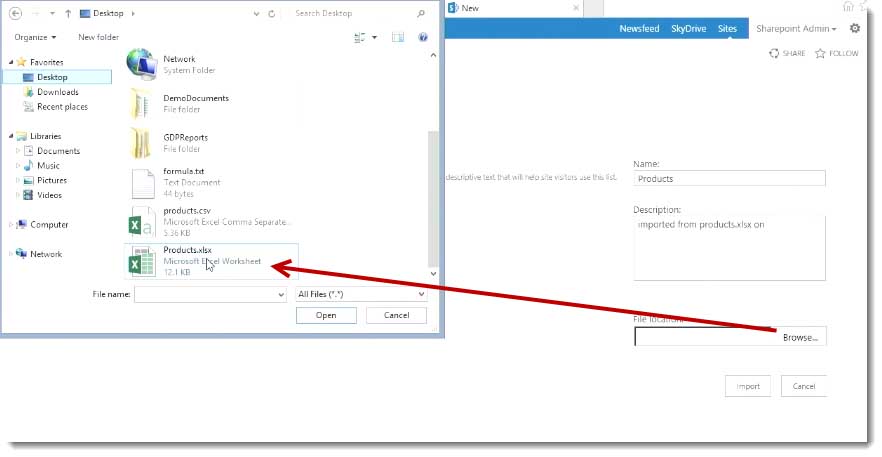
This is the Excel file we prepared last time, on the last video [url] , which you can see in this series. Then I’ll click Import.
It’s really nice to have some sample documents that you can have to really work with views, and understand some of the out of the box functionality of SharePoint. Again, that plain CSV file, which we show you how to get into Excel and prepare, is available for downloading on any of these five video blog posts.
This is a Table Range, because we format it as a table. On the top drop down, then I’m going to click here and find my table range, which is my Sheet1Product
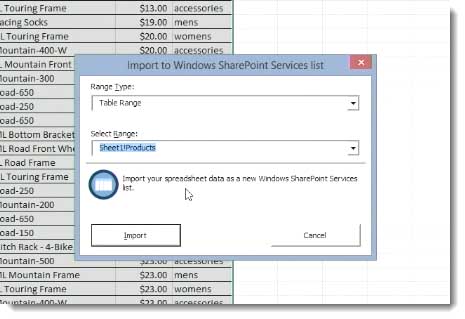
Then find named Table Range, so I’m going to click Import.
SharePoint’s will analyze the file. It’s going to go ahead and process the data, and then it’s going to create a new list in SharePoint, then import all that date into the list.
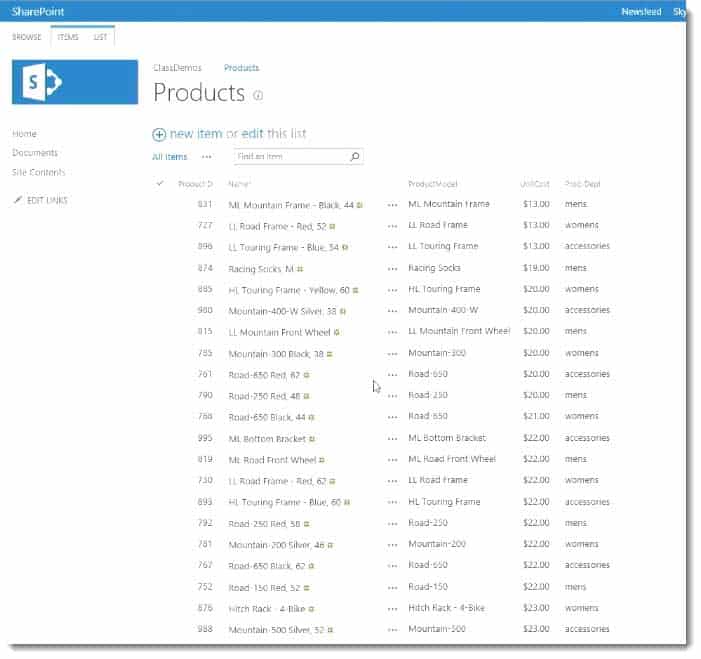
It’s showing me 30 items at a time.
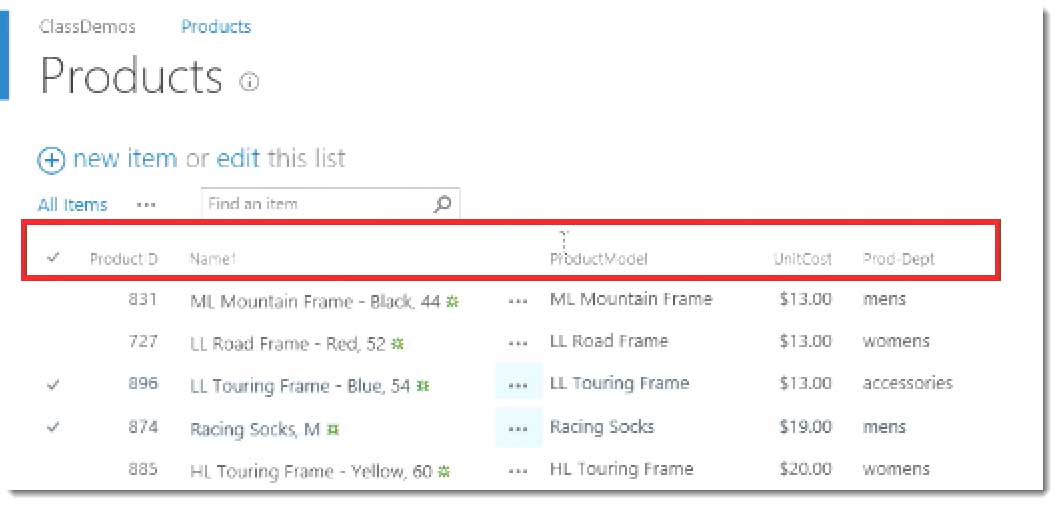
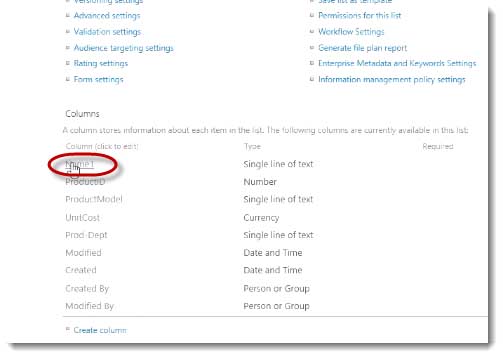
What I’m going to be checking here is these column names. I’ve got Product ID. One came in as Name One. One came in as Product Model. Unit Cost and Prod‑Dept.
I will change the column to Name One to Product or Prod Description, just to make it easier, so to do that. I’m going to go to the List tab, and I’m going to go to List Settings.
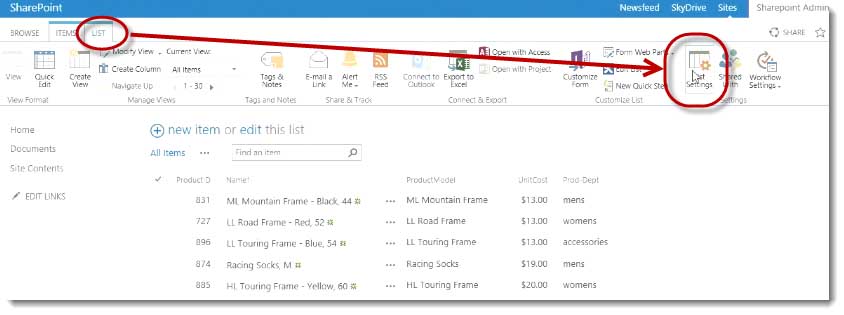
I’m going to click on Name One, which is a single line of text.
And I’m going to change that to Prod‑Desc, for Product Description.
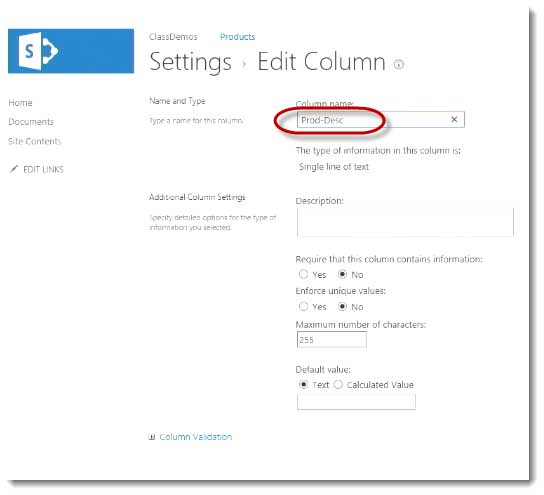
I’m not going to change the data type, it’s fine. I just want to have it a little bit more friendly with what I’m working with.
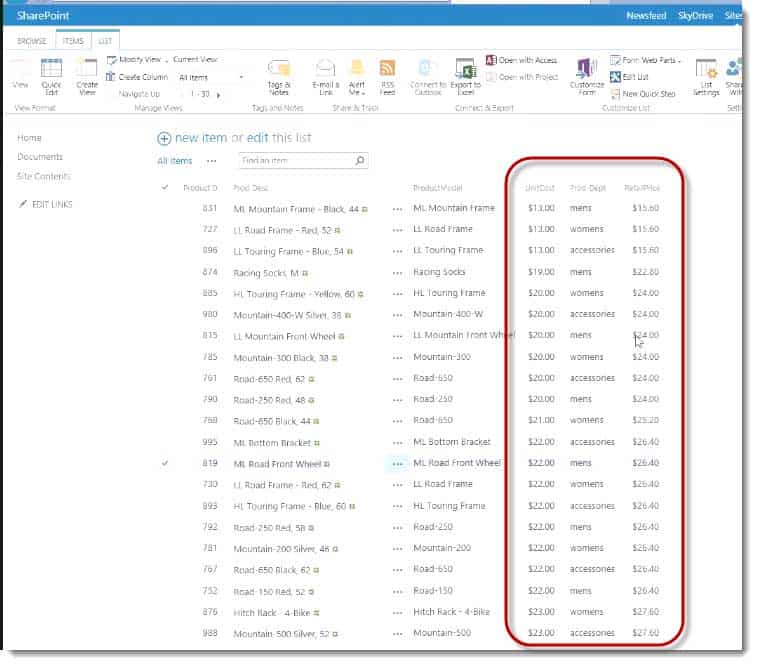
Now I’ve got my column names as I want them, Product ID, Prod‑Desc, Prod‑Model, Unit Cost, etc., things like that, and then Department.
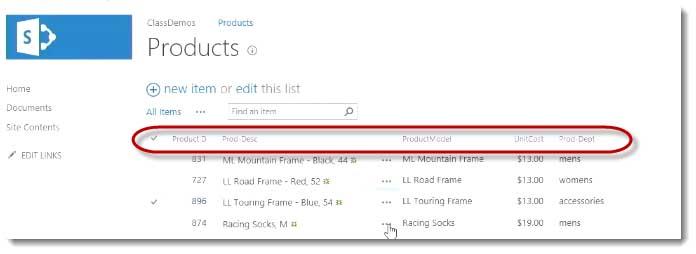
Now, looks like these are coming sorted by price, but just to make sure, I’m going to sort the default view. I’m going to say Modify View.
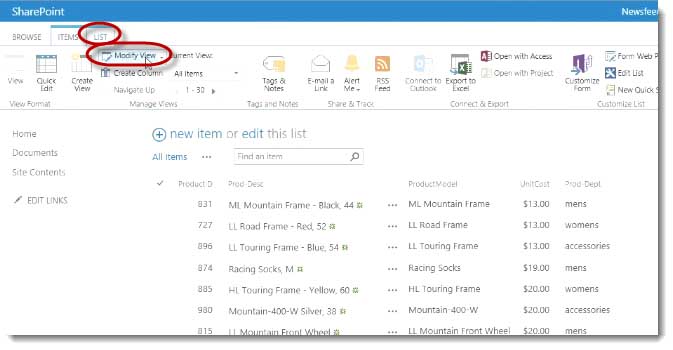
I’m just going to make sure that that default view is sorted by price.
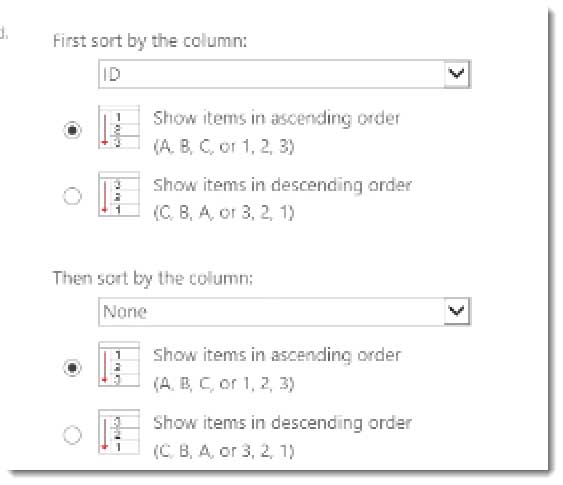
Well as it turns out, they happened to be sorted in Excel by price originally, but just in case, I’m going to go ahead and change the sorting from the ID column to the Unit Cost.
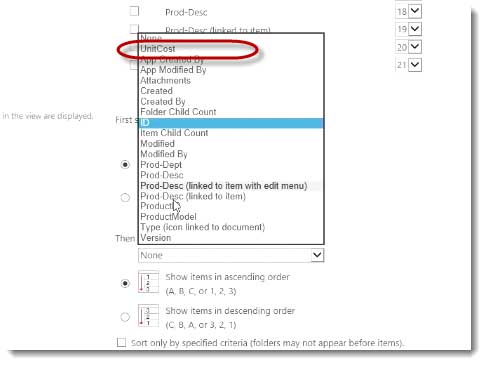
I’m going to create a column called, Retail Price, but right now Unit Cost will be fine.
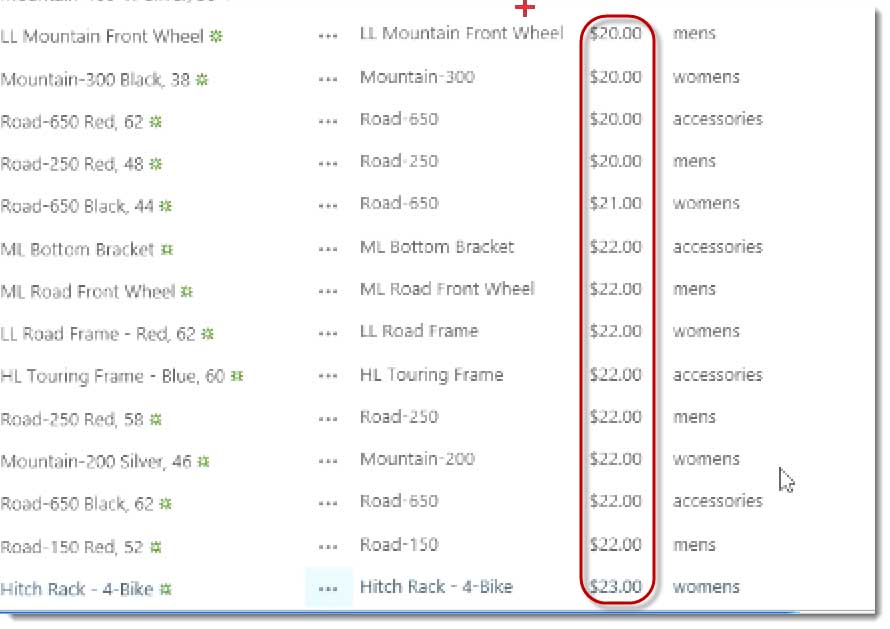
I want the least expensive products in the default view to be at the top, and the most expensive to be at the bottom. If I take a glance I can see that these seem to be obeying that just fine.
I’ve got that ready to go. The data’s inside of SharePoint. Everything is good. I’ve even modified the column name, and I’ve modified the default view to be sorted by price. The next thing I want to do is add a column and I want it to be the Retail Price, and that’s going to be a Calculated Column. It’s actually going to use a calculation.
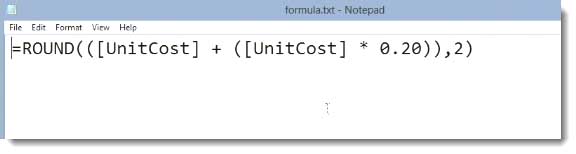
It’s going to take the unit cost, whatever that value is, and it’s going to add that unit’s cost times 0.20, so the unit cost plus 20 percent.
1 | =ROUND(([UnitCost} + ([UnitCost] * 0.20)),2) |
Just as a safety precaution, I’m going to pass that to a round function { ,2 } into SharePoint, just to make sure that I don’t have any unexpected rounding issues.
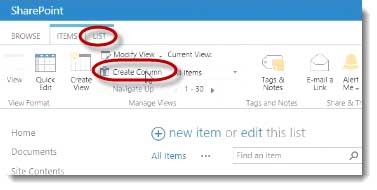
To do that, I’m going to click on the List tab, and I’m going to click Create Column.
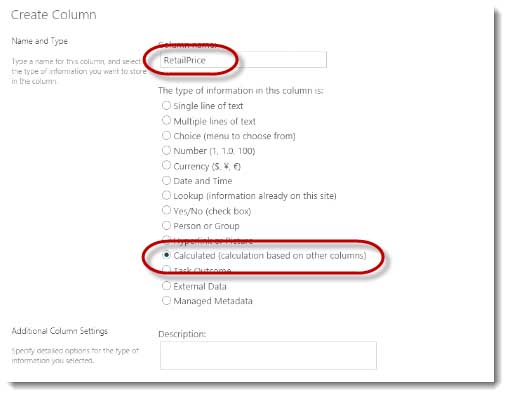
This will be a list column. I’m going to call this Retail Price. The data type for this is going to be calculated column, so I’m going to go ahead and click Calculated Column.
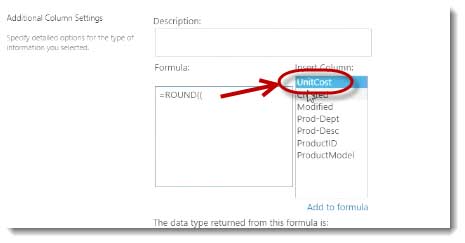
Then I’m going to add my formula in there.
It’s really a good idea to put your formulas, at least what you type in, into Notepad or some text file. When you’re done, you’ll see what I mean here, because it’s easy to make a mistake here.
I’m going to say equals, and I’m going to say round. Let me round. It’s easy to make a mistake with your parens, so I’m going to put two parentheses here. Then I’m going to double click Unit Cost.
Then I’m going to put a plus sign. Then I’m going to open another parentheses, and I’m going to double click Unit Cost, and I’m going to put a plus sign, and I’m going to put times 0.20.
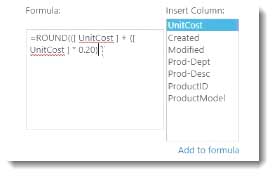
I’m going to close the parens for Unit Cost times 0.20. Close the parens for Unit Cost plus that. Put a comma, put a two, to round it to two decimal places, and then close that parens. Again, the formula is here.

Now, what I would normally do is I’d copy that, paste it into Notepad or a text editor, just in case what I typed in is incorrect, which it does happen more often than not, for me, because I’m not perfect. The problem is it doesn’t let you start from where you left off, and you can have some fairly sophisticated formulas, so that’s something that I tend to do.
I want to return this as currency, so I’m going to select that.
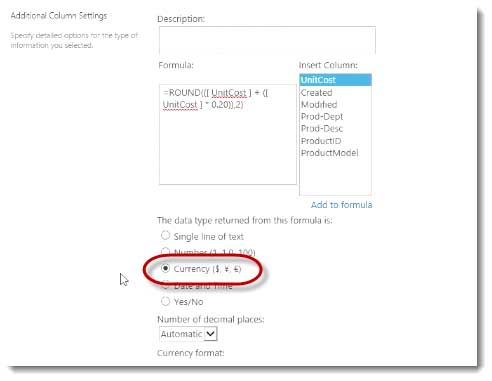
Even though I’ve passed it to the round function of two decimal places, I’m also going to choose Return the Number of Decimal Places to two, and I’m going to click OK.
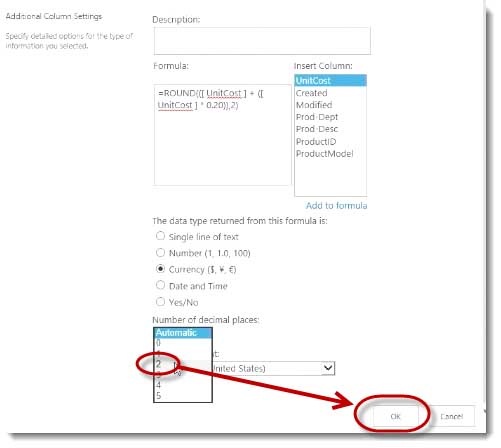
If I typed my formula in correctly, or at least syntactically correctly, I’ll get some results, and then usually in production I like to do some cursory calculator checks, just to make sure that I’m getting what I’m expecting to get. This looks like it’s coming out right. $20 + 20 percent should be $24, so that looks good.
Now, it’s ready to go. The next video we’re going to go ahead and create the views and then in the last video, we’ll create the dashboards.
Spike Xavier
SharePoint Instructor – Interface Technical Training
Phoenix, AZ
5 Part SharePoint Video Training Series – Importing a CSV file into SharePoint 2013.


A Simple Introduction to Cisco CML2
Mark Jacob, Cisco Instructor, presents an introduction to Cisco Modeling Labs 2.0 or CML2.0, an upgrade to Cisco’s VIRL Personal Edition. Mark demonstrates Terminal Emulator access to console, as well as console access from within the CML2.0 product. Hello, I’m Mark Jacob, a Cisco Instructor and Network Instructor at Interface Technical Training. I’ve been using … Continue reading A Simple Introduction to Cisco CML2
Creating Dynamic DNS in Network Environments
This content is from our CompTIA Network + Video Certification Training Course. Start training today! In this video, CompTIA Network + instructor Rick Trader teaches how to create Dynamic DNS zones in Network Environments. Video Transcription: Now that we’ve installed DNS, we’ve created our DNS zones, the next step is now, how do we produce those … Continue reading Creating Dynamic DNS in Network Environments
Cable Testers and How to Use them in Network Environments
This content is from our CompTIA Network + Video Certification Training Course. Start training today! In this video, CompTIA Network + instructor Rick Trader demonstrates how to use cable testers in network environments. Let’s look at some tools that we can use to test our different cables in our environment. Cable Testers Properly Wired Connectivity … Continue reading Cable Testers and How to Use them in Network Environments
Pingback: Importing a CSV file into SharePoint 2013. Part 1: Introduction
Pingback: Video - How to Import a CSV Text File into SharePoint 2013 - Part 2 Preparing the Excel File