Loop Through Documents with SharePoint Designer 2010 Workflow
Loop Through Documents with SharePoint Designer 2010 Workflow
This is a technique I use to emulate the idea of looping through a bunch of documents in a document library in order to execute a workflow on them when they already exist in a document library. I call it the poor man's foreach!
To start, I have a normal SharePoint 2010 Team Site with the Shared Documents Library open. I have created 15 sample documents and adjusted the default view so that I can see the Type – Name – and Title columns. I will write a SharePoint Designer Workflow that sets the Title to the same value as Name with a prefix of Health Record. Going forward, I will set this to happen when a new item is created. However, in order to 'loop through' the existing documents, I will use my poor man's foreach trick.
The Library
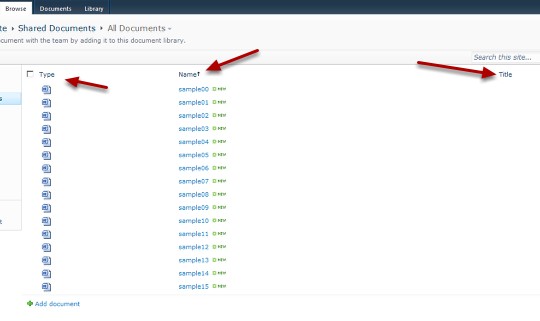
Here is my Library as stated in the scenario above.
SharePoint Designer 2010
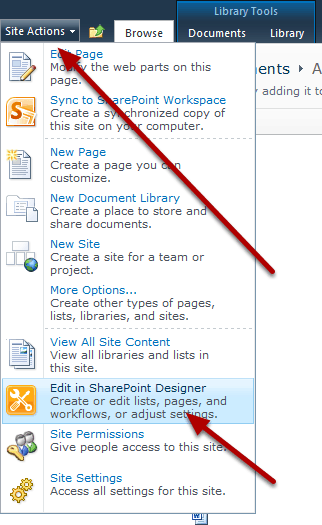
I use the Site Actions > Edit in SharePoint Designer link to open SharePoint Designer 2010 connected to the site (SPWEB).
List Workflow
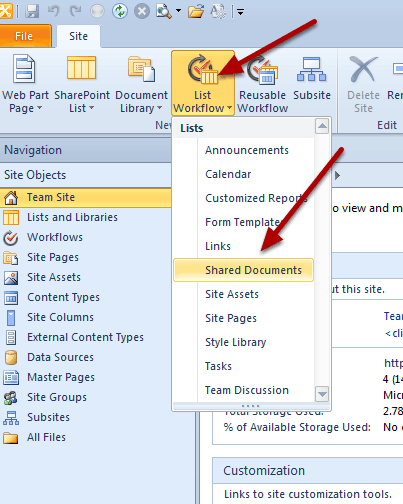
Choose List Workflow in the Ribbon and select Shared Documents.
Name The Workflow
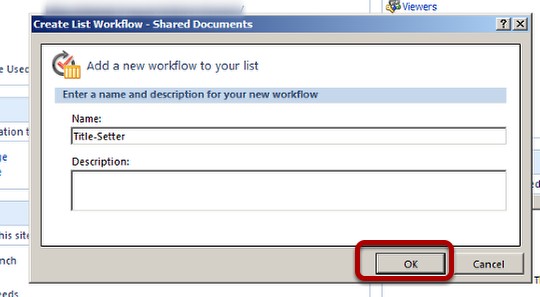
I give the workflow a name. In this case it's: Title-Setter. In production, I always give a pretty solid description, but for this, I'll leave that out and hit OK.
Set Field in current item

I begin by typing set f and then hit enter. This injects Set field to value.
Click Field
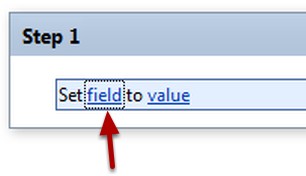
Click on field.
Choose Title
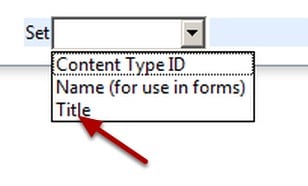
Choose Title.
Click Value
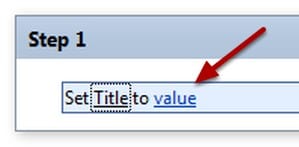
Click value.
Select String Builder
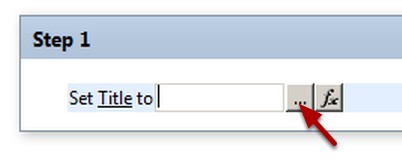
I select the string builder button which is the one with several dots (….)
Health Record
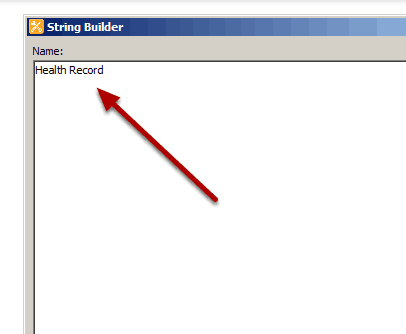
Begin by typing Health Record
Add or Change Lookup
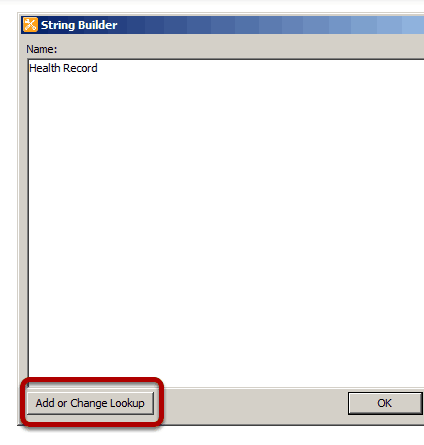
I add a space after Health Record and then click Add or Change Lookup
Name
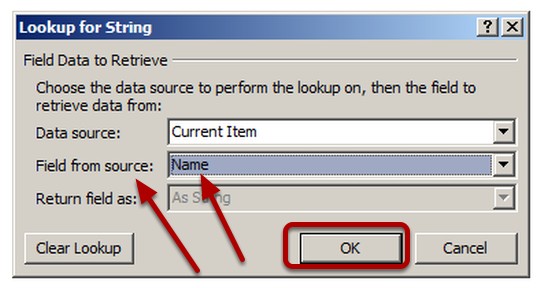
I leave the Data Source: it's default of Current Item and choose Name from the drop down menu next to Field from source: then I click OK.
Click OK
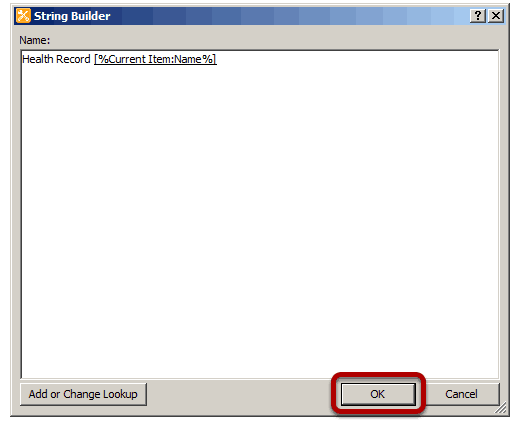
I then click OK.
Save
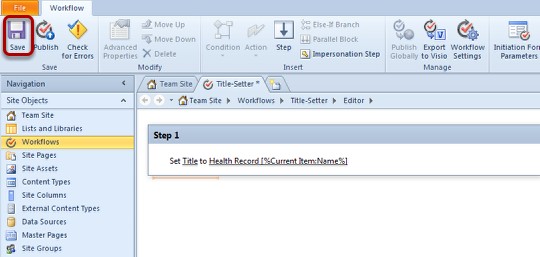
I click the save icon in the ribbon. This places a link to the Workflow in the Navigation Window so I can adjust the ways the workflow will kick off.
Workflow Settings
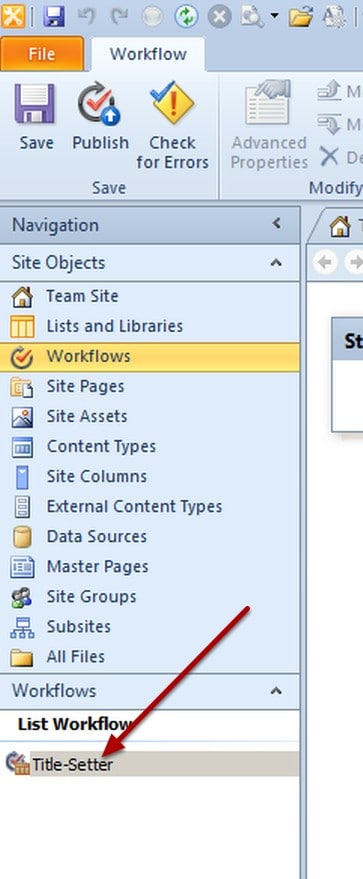
Click the Title-Setter link in the Navigation window.
Adjust Start Options
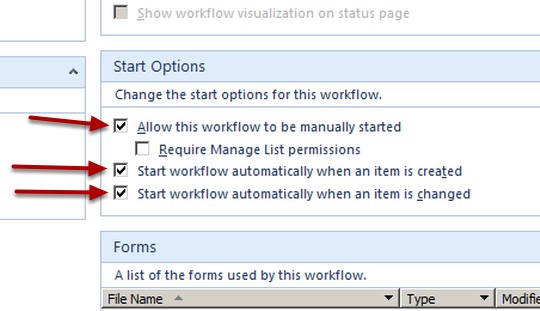
The Allow this workflow to be manually started is checked. I also check the Start workflow automatically when an item is created and Start workflow automatically when an item is changed.
Save and Publish
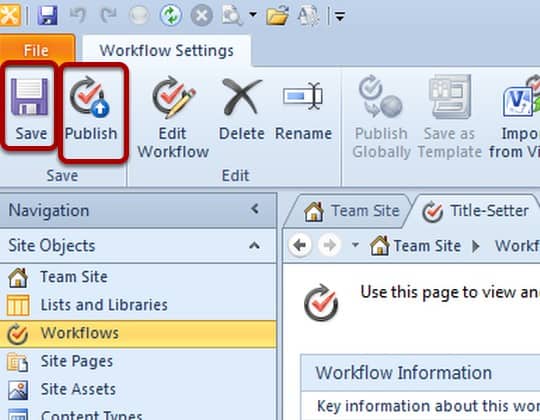
Choose the Save icon and when it's done saving I click the Publish Icon.
Verify Presence.
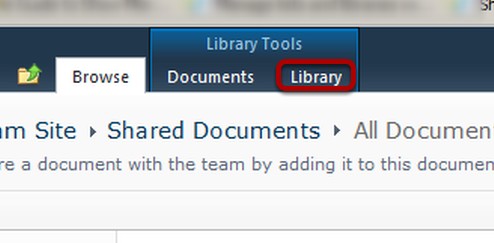
I switch back to the browser and click the Library Tab.
Workflow Settings
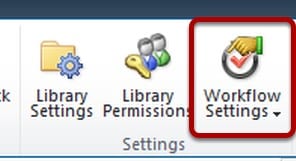
Click the Workflow Settings icon in the right side of the ribbon.
Validate presence

I always like to check to make sure everything is in place before I begin testing the Workflow.
Shared Documents
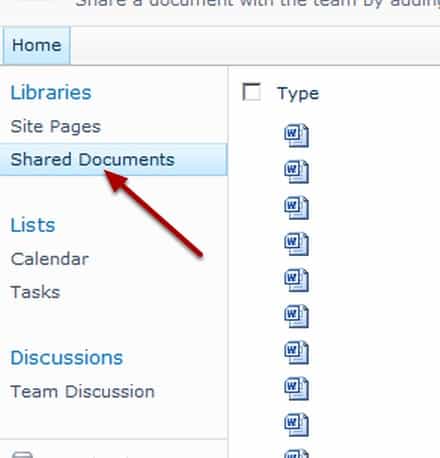
Click the Shared Documents link in the quick launch to return to the Shared Documents Library.
Select All
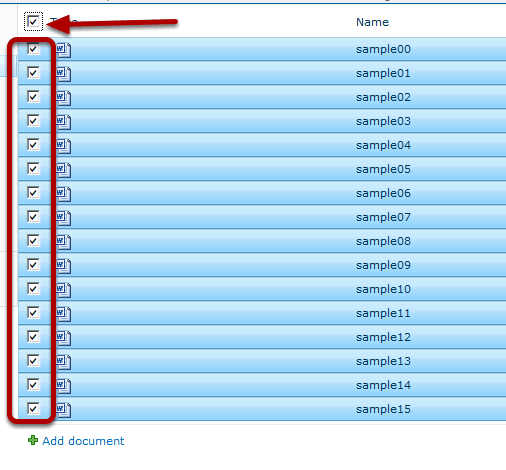
This is how we do the poor man's foreach. If we add a document the workflow, it will do it's thing. But I need it to run on existing documents. I could go through each one which might not be so bad here because I only have 15. But if I had 150 or more, it would be more of a pain. Remember the workflow start settings included when an item is changed, so we'll just select them all , check them out and check them back in. This should kick off the workflow on each item and set the Title accordingly.
Check Out
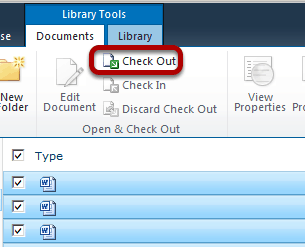
With the Documents all selected, I click on the Check Out icon in the Ribbon. I click OK on the alert window that says "You are about to check out the selected file(s)". (not shown)
Select all again
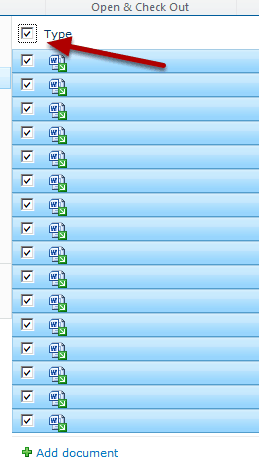
With the documents all checked out (you can see the green arrow in the icon), I click the Select all checkbox next to Type to select them all again.
Check In
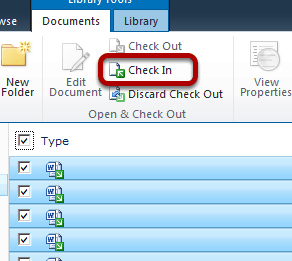
With the documents all checked out, I click the Check In icon in the ribbon.
Do not Retain Checkout
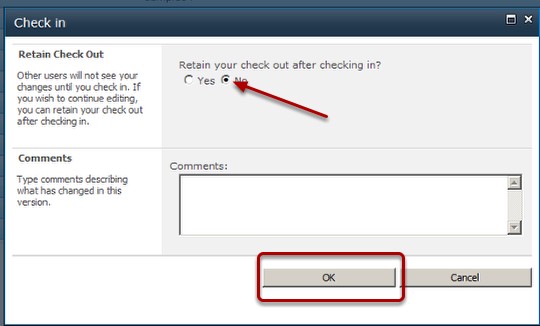
I do not retain checkout at this time so I click OK with the default setting in the Modal Window that pops up.
Validate Workflow Kickoff
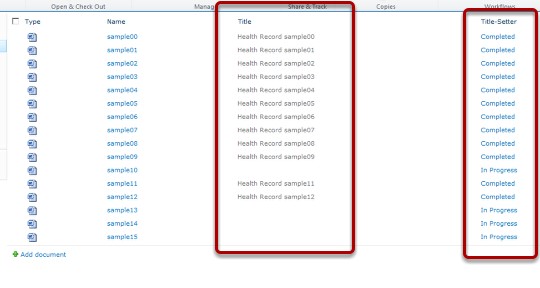
Success!!! – Well almost. The status of a couple of items is still In Progress, however we can see that the ones that have completed have set the Title to Health Record plus the Name.
This is a way get the same results as a foreach loop without code. Pretty cool. When I hit refresh, all the items are done.
Hit Refresh
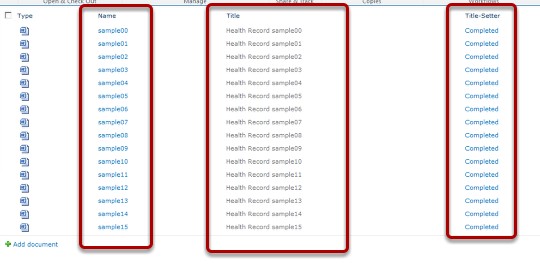
I hit refresh after a few seconds and verified that it all ran correctly. AWESOME!
Enjoy!
Spike Xavier
SharePoint Instructor – Interface Technical Training
Phoenix, AZ
You May Also Like
A Simple Introduction to Cisco CML2
0 3901 0Mark Jacob, Cisco Instructor, presents an introduction to Cisco Modeling Labs 2.0 or CML2.0, an upgrade to Cisco’s VIRL Personal Edition. Mark demonstrates Terminal Emulator access to console, as well as console access from within the CML2.0 product. Hello, I’m Mark Jacob, a Cisco Instructor and Network Instructor at Interface Technical Training. I’ve been using … Continue reading A Simple Introduction to Cisco CML2
Creating Dynamic DNS in Network Environments
0 645 1This content is from our CompTIA Network + Video Certification Training Course. Start training today! In this video, CompTIA Network + instructor Rick Trader teaches how to create Dynamic DNS zones in Network Environments. Video Transcription: Now that we’ve installed DNS, we’ve created our DNS zones, the next step is now, how do we produce those … Continue reading Creating Dynamic DNS in Network Environments
Cable Testers and How to Use them in Network Environments
0 731 1This content is from our CompTIA Network + Video Certification Training Course. Start training today! In this video, CompTIA Network + instructor Rick Trader demonstrates how to use cable testers in network environments. Let’s look at some tools that we can use to test our different cables in our environment. Cable Testers Properly Wired Connectivity … Continue reading Cable Testers and How to Use them in Network Environments



See what people are saying...