Finding Rogue Wireless Access Points with Kali Linux

Many Wi-Fi network administrators have trouble dealing with unauthorized Wi-Fi access points on their networks. Users bring in their own APs so they can connect their iPad, their phone, their gaming device, even their non-approved laptops to the corporate network. These rogue APs can be difficult to physically locate.
Several companies sell specialized hardware and software designed for the specific purpose of locating APs and other signal sources. Many of these tools are superb and well worth the money. But they’re often quite expensive and difficult to learn.
In this article I’m demonstrating one easy method to find rogue access points. The cost of hardware is extremely low, the software is free, and the skills required are not super-advanced. The accuracy of the results, however, is not as exact as the specialized tools. So fair warning, if you need instant pinpoint accuracy, this approach probably isn’t what you’re looking for.
Hardware and Software Required
I’ll use Kali Linux as the software in this example. Kali is currently the single best penetration testing and security tool available, as it contains most every tool I could want in a minimalist operating system. It also includes several wireless network analysis tools that are useful for rogue AP detection. In this example I’m running Kali Linux with Debian kernel 3.18.0.
For hardware I start with a laptop. Almost any laptop will do. I’m using a Lenovo X230 laptop. Kali has very minimal system requirements, so any laptop with 1GB or more of memory and at least 32GB of free disk space is sufficient.
The built-in WNIC in most laptops are probably not effective enough for wireless analysis. I prefer to use a USB-connected external WNIC. This time I’m using an Alfa Networks AWUS036NHA adapter powered by an Atheros AR9271 Wi-Fi chipset. This Alfa WNIC is supported by Kali Linux by default, has a sensitive and efficient wireless radio, and is equipped with an external antenna jack. The portability allows me to move it around both attached to the laptop and by hand.
I prefer panel antennas to either rubber-ducky or highly directional “rifle” antennas. The panel antenna design is highly sensitive to signal on one side and ignores most signal on the other. That allows me to get a good idea which direction the AP is in simply by pointing it, yet still yields some data when I’m not pointing directly at the target. Alfa and other companies sell good panel antennas, but in this example I’m using one I purchased at the DEFCON conference from Simple Wi-Fi.
Here’s my entire setup:
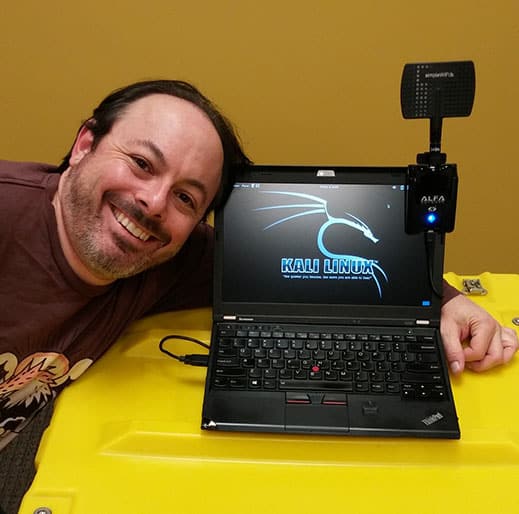
Figure 1. A match made in heaven.
Now that the hardware is covered, here’s how to use it.
Using Kali Linux to Find a Rogue Access Point
The first part is just three commands to launch the tool. First I’ll use ifconfig to identify the Alfa WNIC:
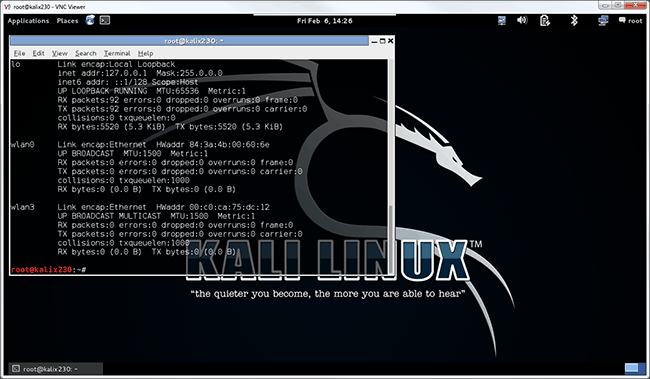
Figure 2. There it is, ready to get started.
This output shows wlan0 as my built-in WNIC and WLAN3 as the Alfa. This will be confirmed when I start monitor mode by typing airmon-ng start wlan3:
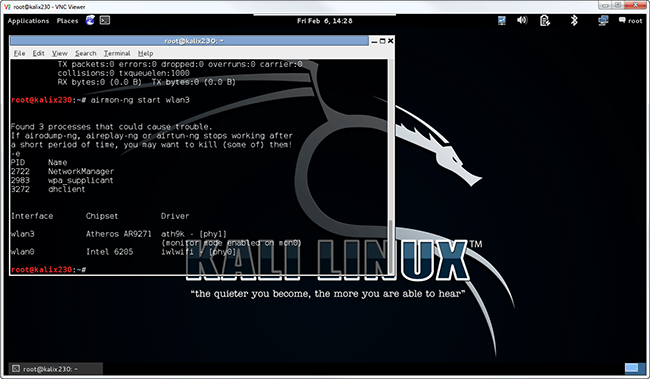
Figure 3. The Alfa WNIC is ready to rumble!
I can safely ignore the warning about process interference for this example. If I wanted wireless networking to work consistently, I might have to kill those processes. But they usually don’t interfere with scanning for hidden networks. The result of this command is that I have a new interface, mon0, assigned as a monitor mode port for wlan3 (the WNIC).
Before the next step I usually scan to determine the Wi-Fi channel my target is using. This is a purely optional step, as I can scan all channels until I succeed. Identifying the channel can be done with a variety of tools, including the tool I use next, and will be the topic of a future blog. For this example, my target access point is on channel 11 (2.462 GHz).
Now I fire off the process by executing airodump-ng –c 11 mon0 as shown:
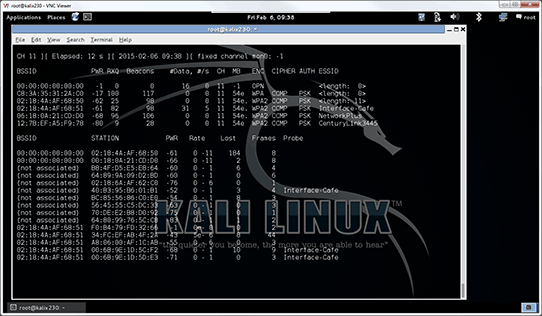
Figure 4. Bright antennae bristle with the energy.
Once this is running, I will see the rogue AP in the list. This might take a moment to appear.
Once the target shows up in the list, I begin slowly creeping around the office, watching signal strength. This is listed in the PWR column. Lower PWR numbers are better and indicate that I’m closer, as this indicates the amount of signal dropoff from sender to receiver.
Happily for me, airodump-ng defaults to sorting based on signal strength, with the highest signal at the top!
Creeping up on the AP requires a few techniques that I can summarize as:
- Walk slowly. The signal strength may take a few seconds to change.
- Move the antenna or the laptop or both. That’s why I recommend an external WNIC.
- Remember that signal reflects. If you’re getting strange readings (e.g. the AP seems to be inside a concrete wall), move a few feet and start again.
While this probably isn’t the same technique that a true wireless professional would use, it can be highly effective. Eventually I’ll find an office or cubicle that appears to be the strongest source for signal and then just look for the AP.
Figure 5. Busted!
Once the rogue AP is found as shown, you should take whatever action is appropriate based on your organization’s policies and compliance regulations.
Enjoy!
Mike Danseglio -CISSP / MCSE / CEH
Interface Technical Training – Technical Director and Instructor
Mike Danseglio teaches Security classes at Interface Technical Training. His classes can be attended in Phoenix, Arizona or online from anywhere in the world with RemoteLive.


A Simple Introduction to Cisco CML2
Mark Jacob, Cisco Instructor, presents an introduction to Cisco Modeling Labs 2.0 or CML2.0, an upgrade to Cisco’s VIRL Personal Edition. Mark demonstrates Terminal Emulator access to console, as well as console access from within the CML2.0 product. Hello, I’m Mark Jacob, a Cisco Instructor and Network Instructor at Interface Technical Training. I’ve been using … Continue reading A Simple Introduction to Cisco CML2
Creating Dynamic DNS in Network Environments
This content is from our CompTIA Network + Video Certification Training Course. Start training today! In this video, CompTIA Network + instructor Rick Trader teaches how to create Dynamic DNS zones in Network Environments. Video Transcription: Now that we’ve installed DNS, we’ve created our DNS zones, the next step is now, how do we produce those … Continue reading Creating Dynamic DNS in Network Environments
Cable Testers and How to Use them in Network Environments
This content is from our CompTIA Network + Video Certification Training Course. Start training today! In this video, CompTIA Network + instructor Rick Trader demonstrates how to use cable testers in network environments. Let’s look at some tools that we can use to test our different cables in our environment. Cable Testers Properly Wired Connectivity … Continue reading Cable Testers and How to Use them in Network Environments
See what people are saying...