How to Configure Navigation in SharePoint Publishing Sites

For more SharePoint training videos in this series, see:
Part 1 – Using Navigation Controls in a Collaboration Site in SharePoint
Part 2 – Using Navigation Controls in a Publishing Site in SharePoint
Part 3 – Configuring SharePoint Navigation in a Publishing Site – Activating the Publishing Feature
Part 4 – » How to Configure Navigation in SharePoint Publishing Sites «
Part 5 – Managing Lists and Libraries in SharePoint – An Overview
Part 6 – Creating Lists and Libraries in SharePoint
Video Transcription
Configuring Navigation in a Publishing Site in a SharePoint Site that’s in the Site Collection where the Publishing Feature has been activated, changes dramatically from that in a Collaboration Site.
For Instructor-Led SharePoint Training, see our SharePoint Course Schedule
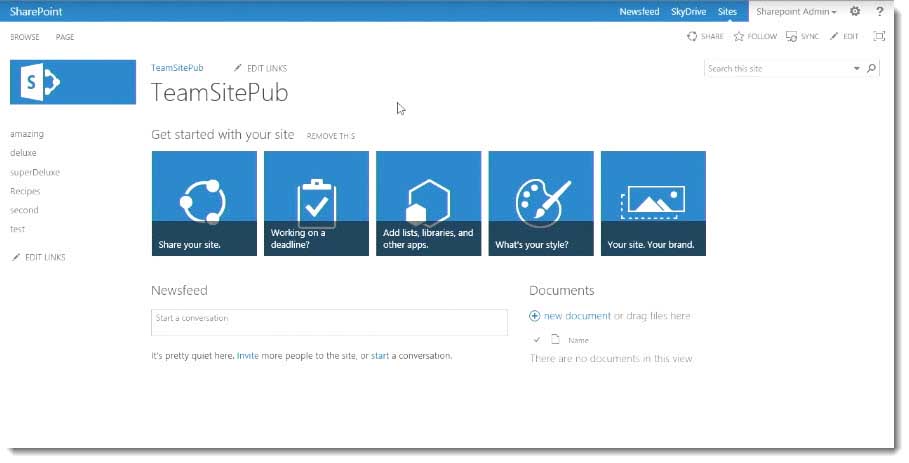
Now, what I’ve got here is two different Site Collections. One, the top‑level site, was based on a Team Site Template.
That’s the one here titled Team SitePub.
The other the top‑level site, was based on a Publishing Portal Template. The Publishing Portal Template comes out-of-the-box with the features activated.

I had to go after-the-fact on my Collaboration‑based Site Template and activate the Publishing Feature. I went to Site Actions > Site Settings.
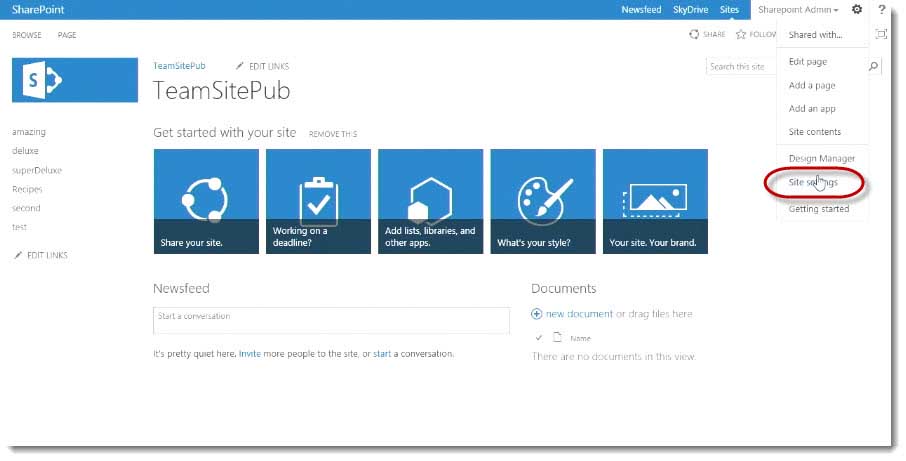
I was a Site Collection Administrator, so I was able to get to the Site Collection administrator links.
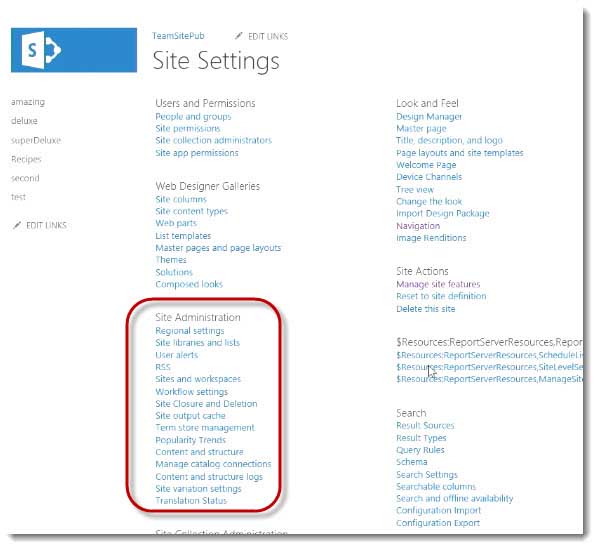
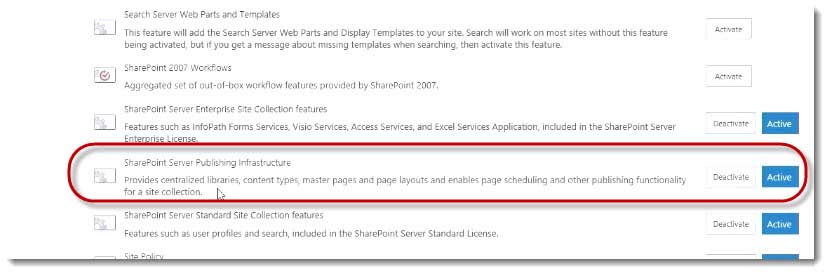
What I was looking for was this link, Site Collection Features.
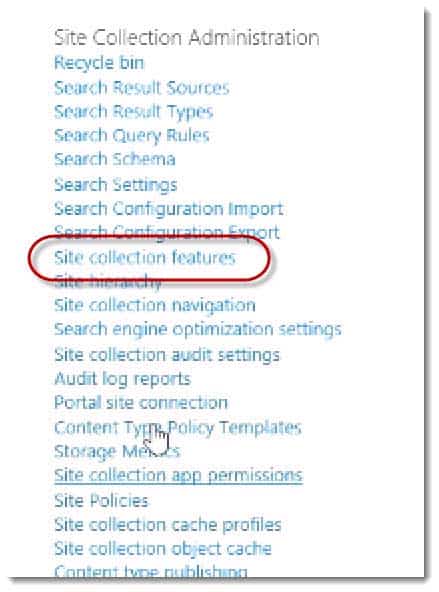
Step one was going to the Site Collection Features link, finding the SharePoint Server Publishing Infrastructure feature and activating it.
Once I had it activated at the Site Collection level, I had to go back at the actual Site level.
I went to Site Actions > Site Settings, and this time I went to Manage Site Features.
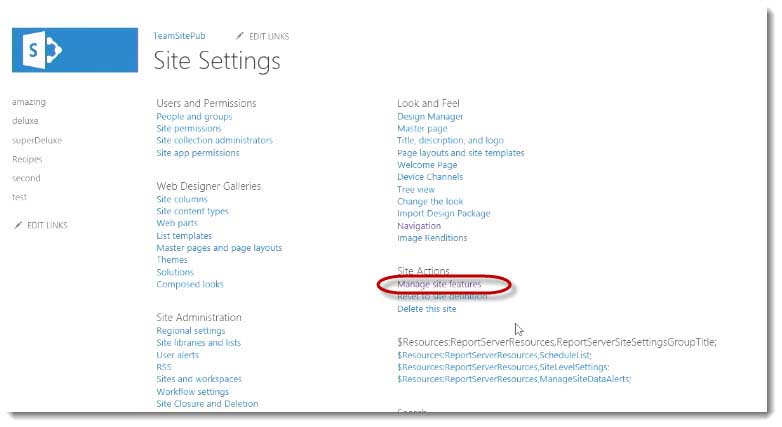
Then I again, found the SharePoint Server Publishing Infrastructure Feature and I activated it.
Once I did that I was good to go to use the Navigation controls and all of its functionality, including connecting one of the Navigation controls to the Manage Metadata Service Application.

Once the Publishing Feature is activated, if you do it after-the-fact like I did here on a Collaboration Site using the Site Settings menu, you can find yourself running into a bit of a quandary.
On a team site, if I use the Site Actions menu to add a page, which is frequently what someone will use.
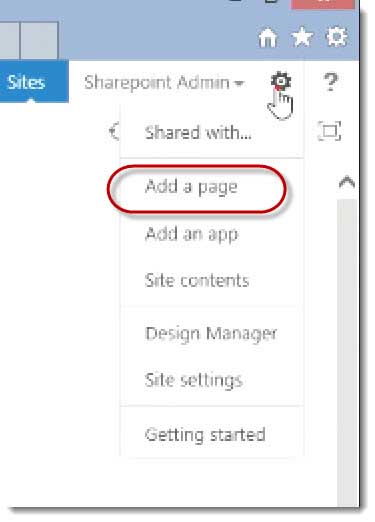
I don’t have the Publishing Feature involved when I click Add a page it’s going to add a page to the Site Pages Library.
For Instructor-Led SharePoint Training, see our SharePoint Course Schedule
That’s just default behavior. It’s great. It’s awesome.
If I have the Publishing Feature activated, and I haven’t activated the Site Collection in the site level, what I’m really looking for if I go to Site Contents here.
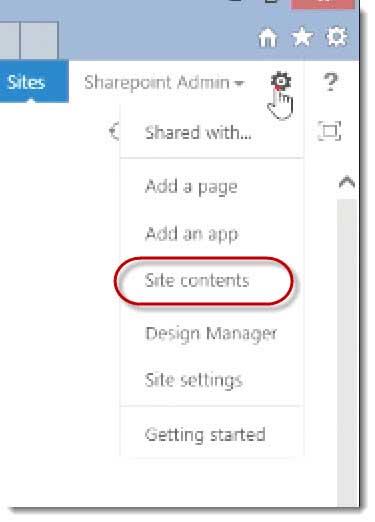
It’s creating pages in the special pages library that gets created when I activate the Publishing Feature at the site level.
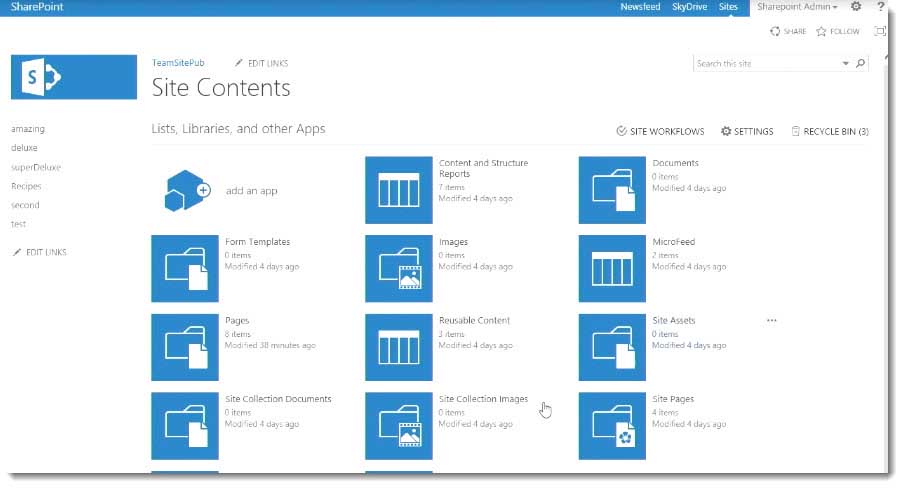
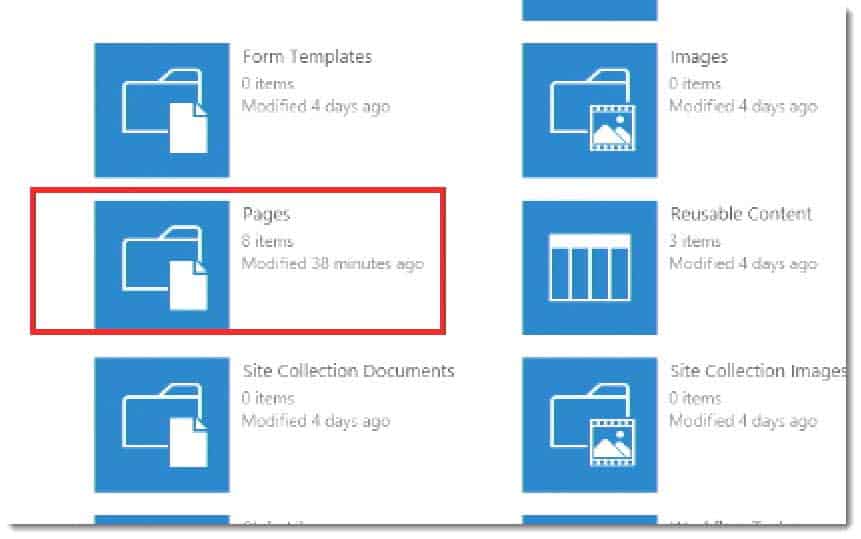
What can happen is if I’ve already started with the Team Site, the Site Pages Library is there.
And I have this Pages Library and you can get into a quandary.
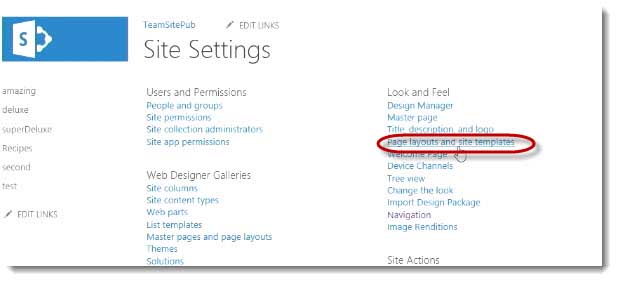
What I found is if I do this, I like to go to Site Action > Site Setting, so I’m after the fact. It’s one of the reasons I prefer to use a template that’s already configured the user Publishing Feature. I go into Page Layout and Site Templates to I make sure and choose and set a default page layout.
When I click site actions at a page what I’m looking for is I just want to see the path to my actual site.
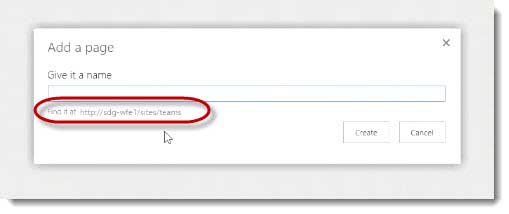
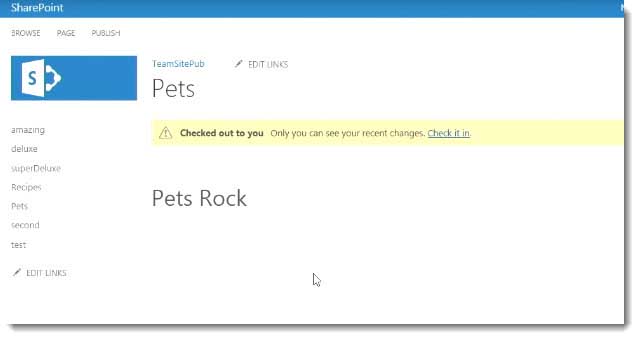
Then, when I give it a name ‑‑ I’m going to call this Pets and click create, it should create that in the pages library.
If that’s working, if I’ve hooked my Quick Launch Bar which is now called the Current Navigation up to what we call the Managed Metadata Service Application, it’s going to automatically add a term to the term set.
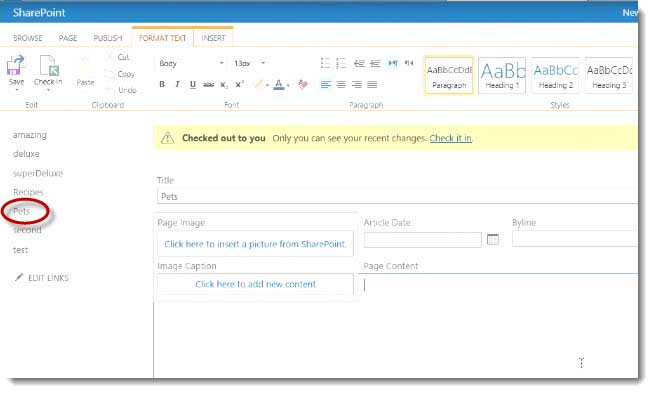
It’s going to hook that up to my Navigation control to this page. I don’t have to do any specific configuration. I’ll say, “Pets rock.”
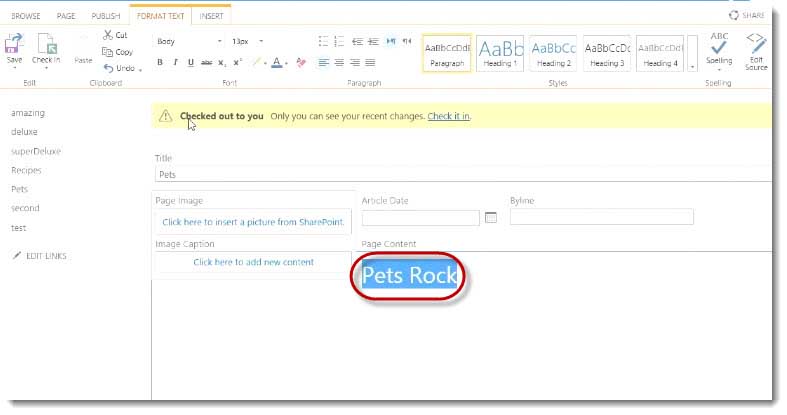
In other words, I’m using the Publishing Feature.
I’m leveraging the fact that I’ve hooked everything up, and it’s automatically generating the Navigation for me. I don’t have to go add things and this is a page. It’s not a sub site. It’s not a list. It’s not a library. I’m just adding pages and it’s putting it over there.
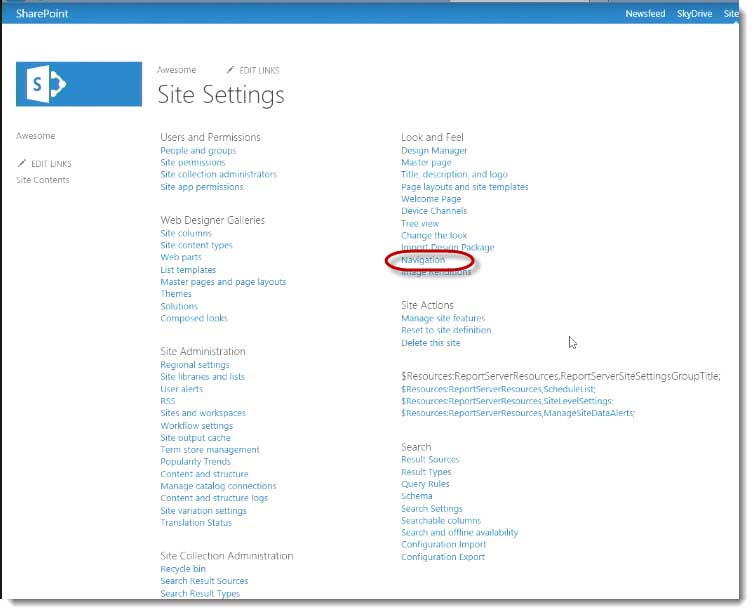
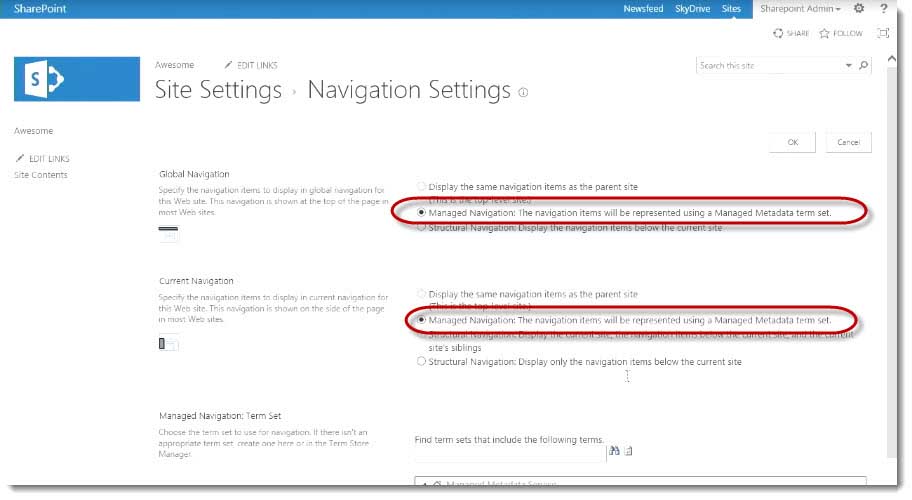
The way this happens is in a Publishing Site you configure the Navigation how it’s going to work by going to Site Actions > Site Settings.
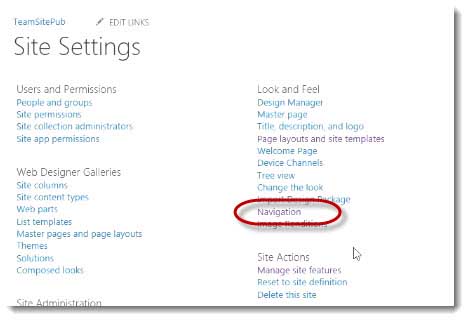
Then you do not see a link for the Quick Launch Bar. You don’t see a link for the Top Link Bar like we did in Collaboration Sites. That is now been replaced with the word Navigation.
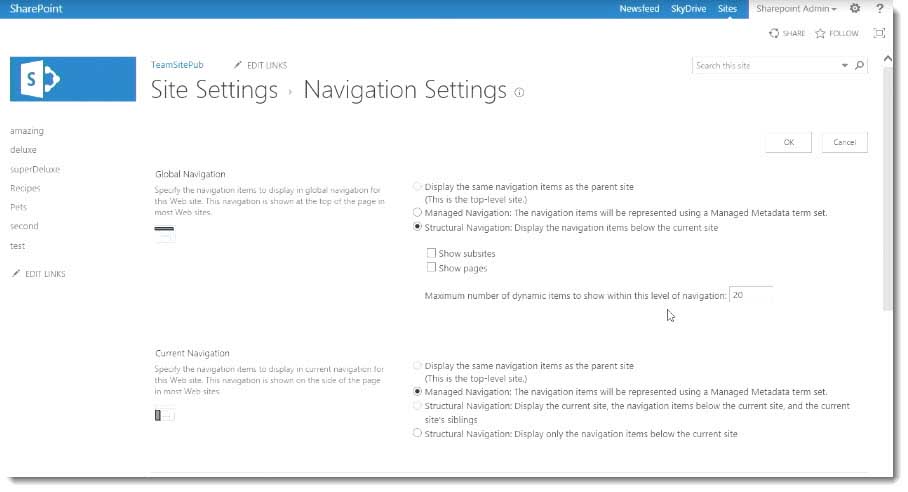
When you click on Navigation, instead of setting things by dragging links or using that control or you change order that was we saw in the other movie {video post], here you drive the Navigation choices by a series of radio buttons and check boxes.
I’m at the Top‑Level Site, so I don’t have or wouldn’t make sense to choose the option display the Navigation of the side above it, because I am the top‑level site.
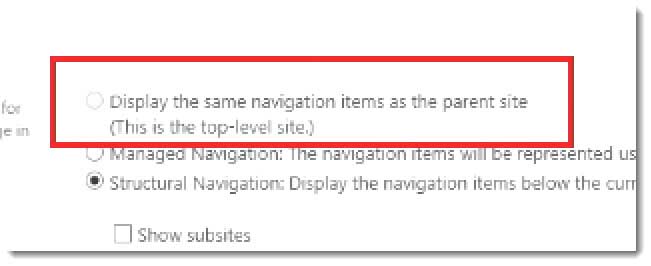
This setup here is no longer called the Top Link Bar, it’s now called Global Navigation.
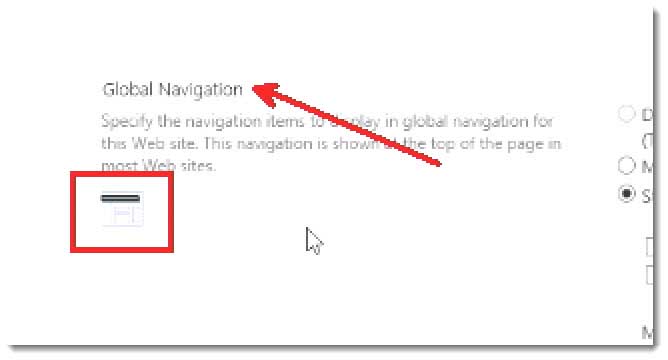
In case one of the Publishing Features on it refers to these Navigation components differently.
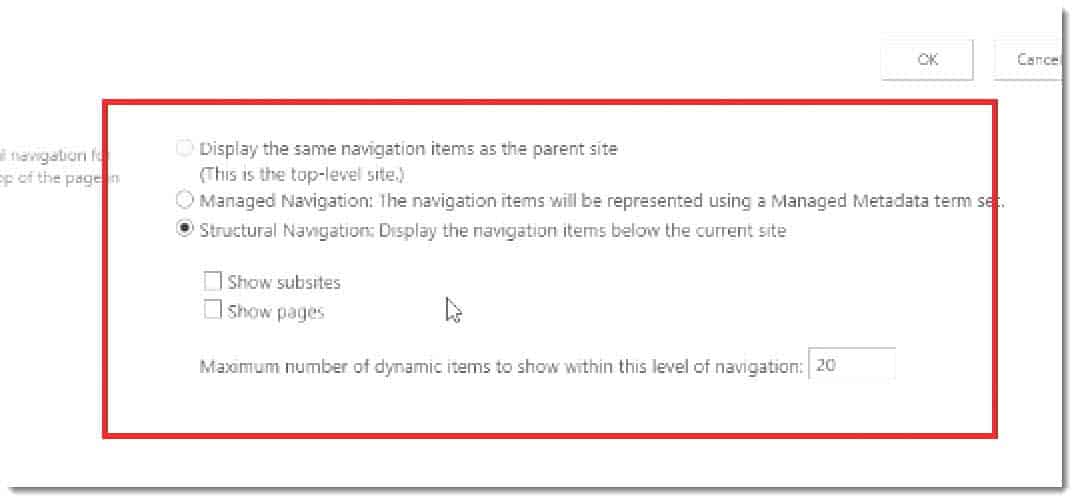
I have several options.
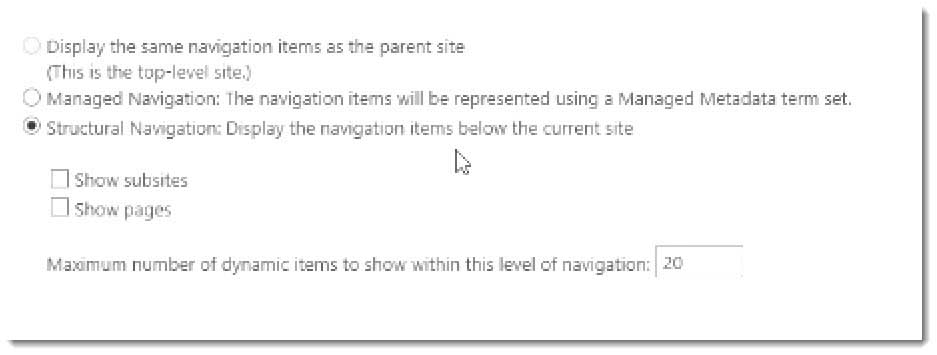
One of them is structural which basically will show whatever the hierarchy of sites is. This site being the root, and anything I create below it will show those in the top link bar or the global Navigation control according to what I chose here.
If I choose show sub sites, it will show sub sites. If I choose to show pages it will show pages, and it even gives me how many deep do you want to go. It will automatically create these fly‑out menus, depending on what I’m doing.
You can see I’m on a site that has several pages on it. If I click OK, then it should all of a sudden show links to all of the different sub‑sites and pages across that Global Navigation.
That tends to not be desirable in most cases in my experience, I’ll generally leave the Navigation to just be structural and just show sub‑sites. It’s completely up to your situation.
Now down here.
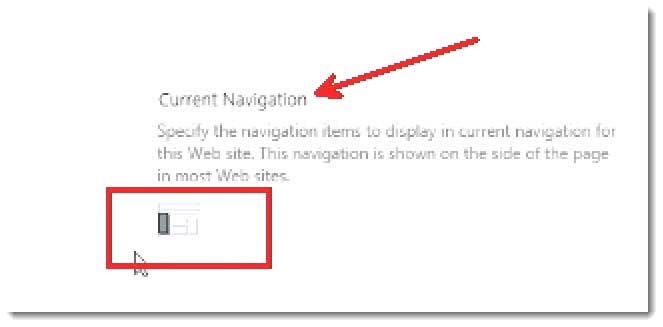
What we call the Quick Launch Bar in Collaboration Sites when the Publishing Feature is at play, we call it Current Navigation.
For Instructor-Led SharePoint Training, see our SharePoint Course Schedule
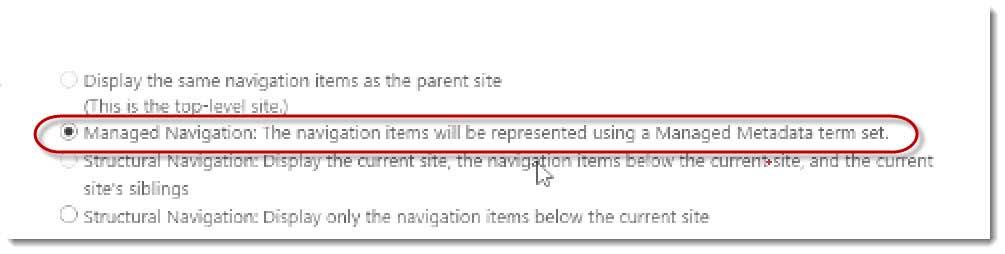
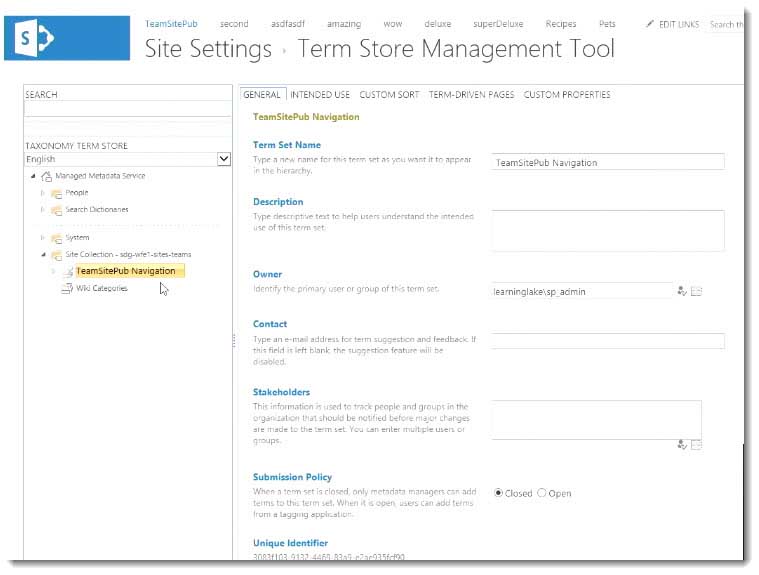
Once again you control this with a series of radio buttons. Really, this is the one that we want to focus on. If I choose ‑‑ which I did here ‑‑ Managed Navigation, then what I can do is come down to this section and click Create Term Set.
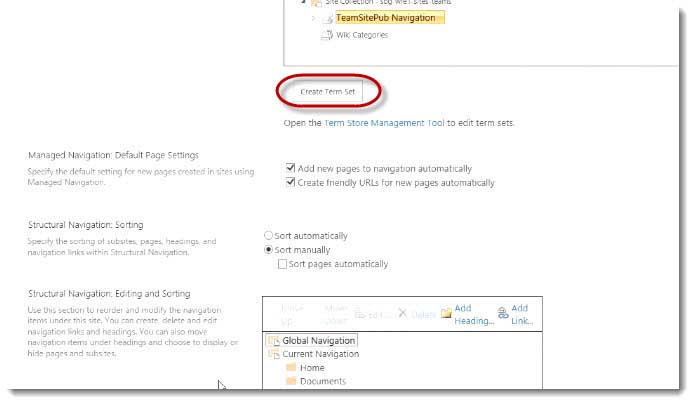
That is going to open and create a Managed Metadata Term set just for the specific purpose of managing Navigation to the Pages Library in this particular site.
In fact, if I click Term Store Management tool.
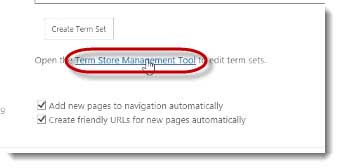
I’ll see that it will take me to the screen to manage my terms.
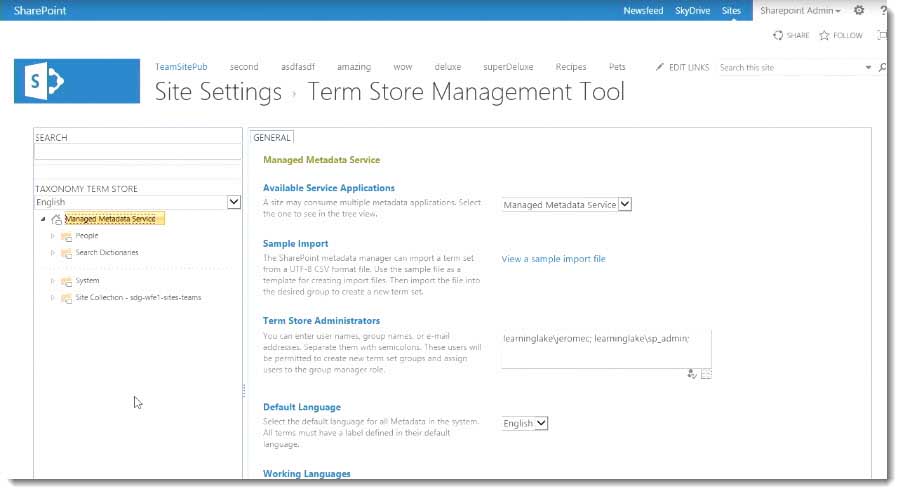
This is something we’re going to cover fairly in‑depth in the movie about our managed metadata.
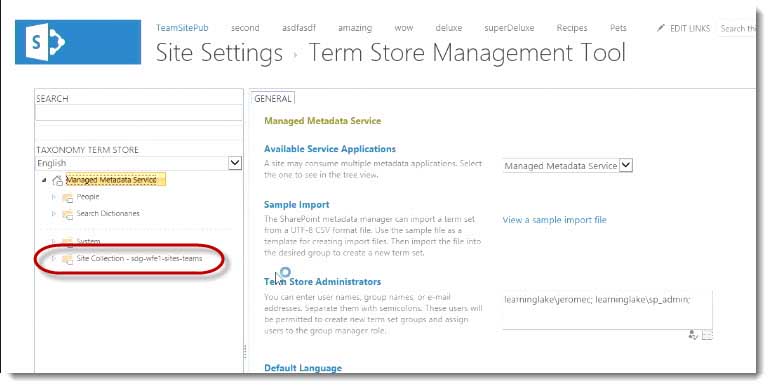
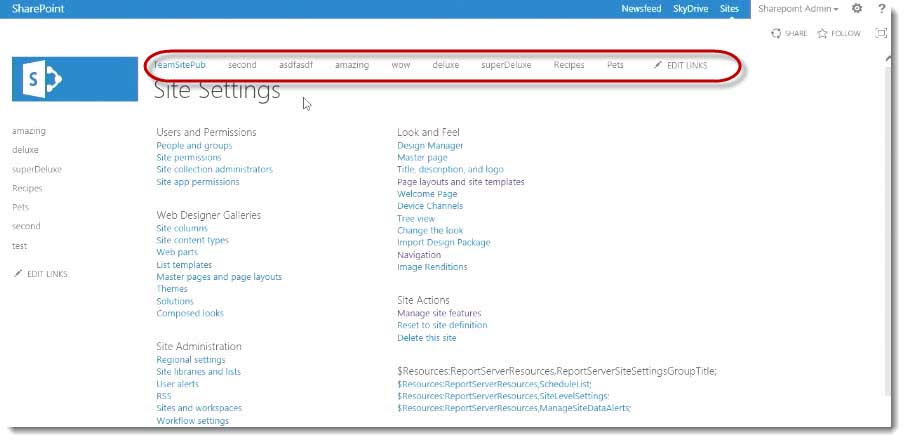
It is created a term set for this Site Collection and it’s created my team site pub Navigation terms.
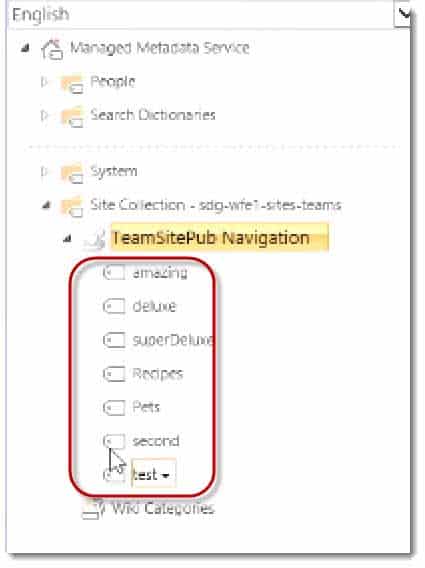
If I expand those as I’m adding pages to this site, it’s adding them to the Pages Library. It’s automatically adding a term to the Term Set and then linking that term to that page in the Navigation control.
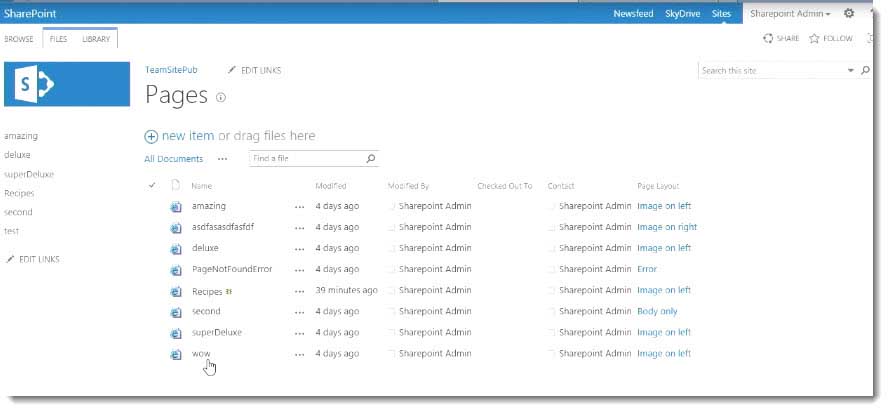
As you can see, as I’ve been adding pages, it has been adding a term for each page and it’s created them automatically as a link in the control.
There’s a whole bunch of things you can do.
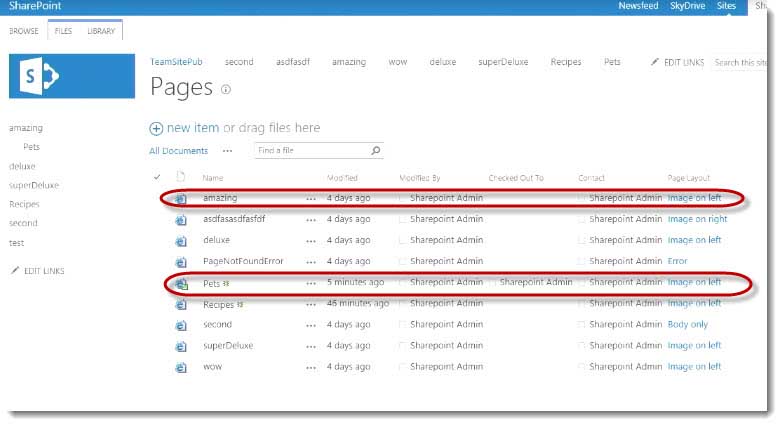
If I look at the Pages Library, I’m just going to see a flap list of files, the page names, they’re not nested in folders.
What I can do is I can abstract the Navigation control away from the hierarchy in the Library. Let me show you. I’m going to take my Pets page here and I am going to move this term.
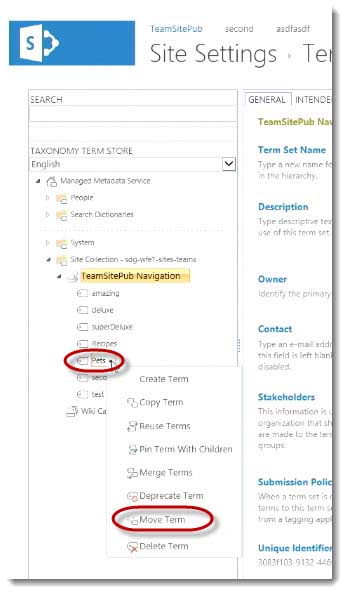
I’m going to say move term. Then what I’m going to do is I’m going to move this term underneath amazing.

I’m going to click Amazing and then I’m going to click OK.
Now, even though in the Pages Library which we’ll see in a second, it’s just Amazing and Pets
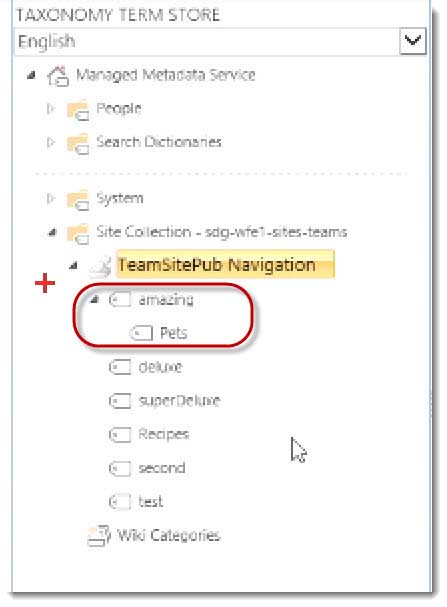
At the same level, I’m able to abstract that away from each other and I’m able to leverage and present it however I want.
Let me go back to the site. When I go back to the site, I’m going to look in the site contents.

If I was looking at this I might think, “Oh that pets page must be in the folder of the amazing section or something like that.”
You can create your own Navigation abstracted away from the actual hierarchy as it’s held in the library. If I go to Site Actions > Site Contents
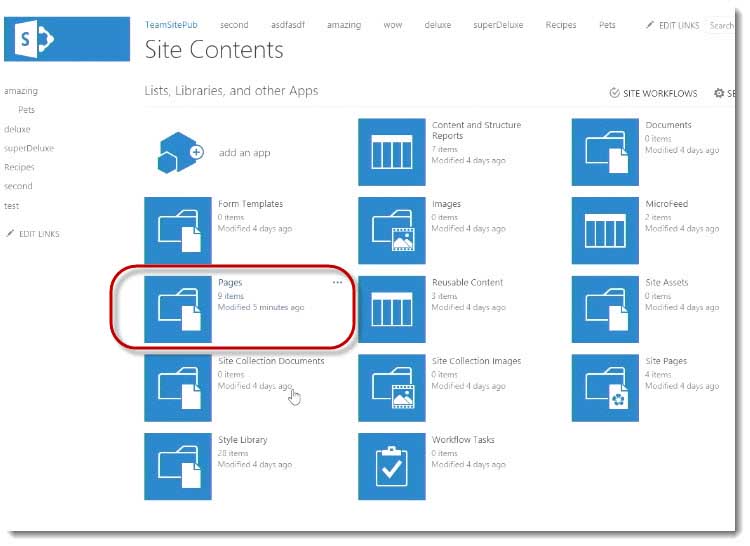
What you’ll see is the Pets page is hierarchically the same as Amazing.
I’ve given it the illusion as if it was underneath it. That’s a huge benefit for managing Navigation in a Publishing Site.
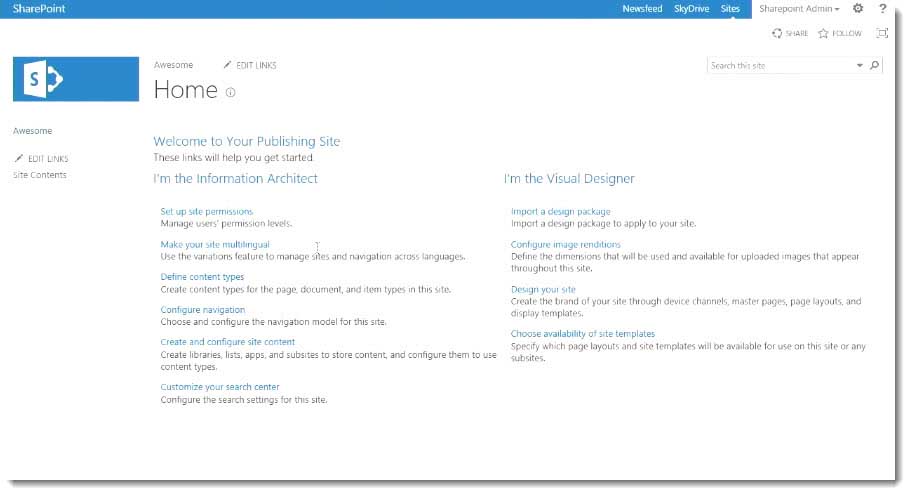
I mentioned that I was going to show you an Out of the Box Publishing Site.
This is a totally different Site Collection. In fact, I’m going to close the tabs on the other Site Collection just to keep it clear. Totally different Site Collection, but the Top Level Site used a Publishing Portal, another template in SharePoint, as a Top Level Site Template.

I’ll click Site Actions > Add a Page
I’ll name it “Awesome.
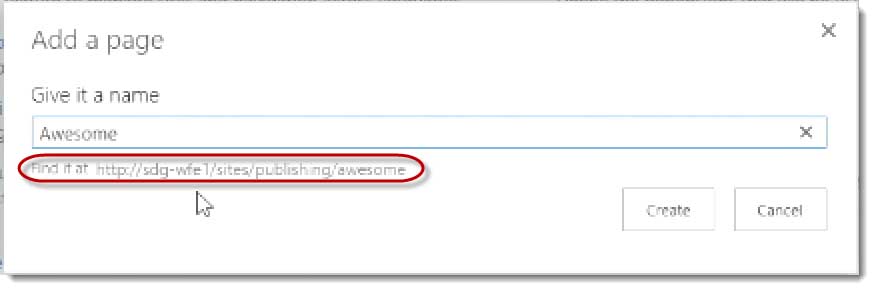
First off, you can see that you don’t see the word “Site Pages”, because actually there are no site pages in this particular template, it doesn’t create a site pages library.
Just out-of-the-Box creates a Pages Library.
SharePoint choose a default page layout so I’ll type “Rad!” and make it a little bit bigger.
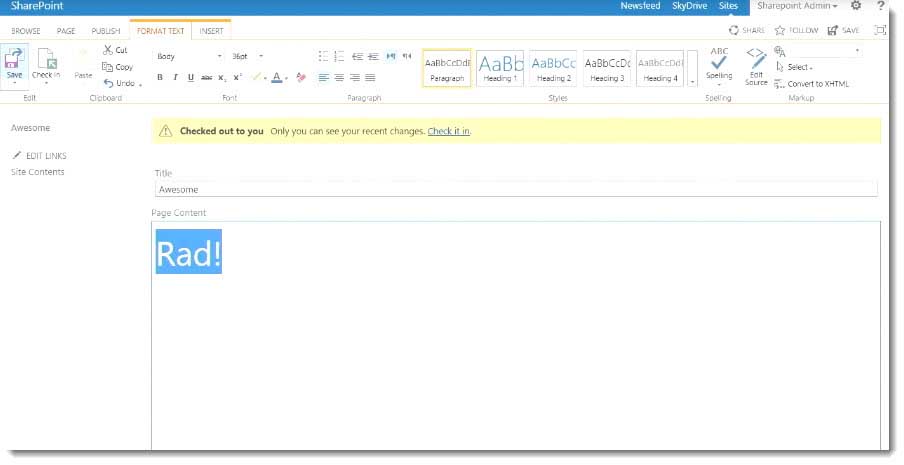
Some of the awesome things available in SharePoint with just like Inline editing. That’s probably pretty ugly in seeing. I’ll click save.
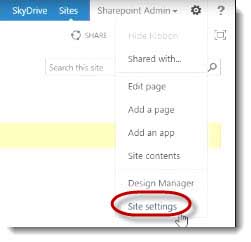
Right out-of-the-Box it’s added it to the current Navigation. If I look behind the scenes, if I click Site Actions > Site Settings.
I don’t have to do any further configuration.
If I click Navigation, this is Navigation in a Publishing Site Out of the Box, it’s configured to use managed Navigation.
It’s using it for both the Global Navigation which is the Top Link Bar in a Collaboration Site, and the Current Navigation which is a Quick Launch Bar in a Collaboration Site.
Automatically using those is already created a term set. I don’t have to do any further configuration. I just have to start in creating content which is awesome.
I do tend to like to use templates that come Out of the Box being configured to use the publishing Navigation, but you don’t have to.
You can start with the Collaboration Site > Activate the Publishing Feature at the Site Collection, then at the Site Level, and you can use the full functionality of Navigation. That’s configuring Navigation in SharePoint in Publishing Sites.
For Instructor-Led SharePoint Training, see our SharePoint Course Schedule


A Simple Introduction to Cisco CML2
Mark Jacob, Cisco Instructor, presents an introduction to Cisco Modeling Labs 2.0 or CML2.0, an upgrade to Cisco’s VIRL Personal Edition. Mark demonstrates Terminal Emulator access to console, as well as console access from within the CML2.0 product. Hello, I’m Mark Jacob, a Cisco Instructor and Network Instructor at Interface Technical Training. I’ve been using … Continue reading A Simple Introduction to Cisco CML2
Creating Dynamic DNS in Network Environments
This content is from our CompTIA Network + Video Certification Training Course. Start training today! In this video, CompTIA Network + instructor Rick Trader teaches how to create Dynamic DNS zones in Network Environments. Video Transcription: Now that we’ve installed DNS, we’ve created our DNS zones, the next step is now, how do we produce those … Continue reading Creating Dynamic DNS in Network Environments
Cable Testers and How to Use them in Network Environments
This content is from our CompTIA Network + Video Certification Training Course. Start training today! In this video, CompTIA Network + instructor Rick Trader demonstrates how to use cable testers in network environments. Let’s look at some tools that we can use to test our different cables in our environment. Cable Testers Properly Wired Connectivity … Continue reading Cable Testers and How to Use them in Network Environments