This is part 5 and the last in a series of posts on manipulating the Windows 7 Boot Configuration Database (BCD).
Part 1: How to install Windows 7 or Server 2008R2 from a Virtual Hard Disk
Part 2: How to install Windows 7 or Server 2008R2 from a Virtual Hard Disk (VHD)
Part 3: What happened to my BOOT.INI file?
Part 4: How to use BCDEDIT to add menu items to the selection screen in Windows Server & Windows 7
Part 5: How to dual boot Windows 7 and Windows XP using BCD
To start off with if you boot into the current Windows XP operating system and begin the Windows 7 installation you will not need to modify the BCD to dual boot the operating systems. If boot the installation from the Windows 7 DVD you will need to modify the BCD to add the Windows XP Operating System to the boot selection using the following steps.
Note: Ensure when modifying the BCD you have opened the Command Prompt with elevated privileges.
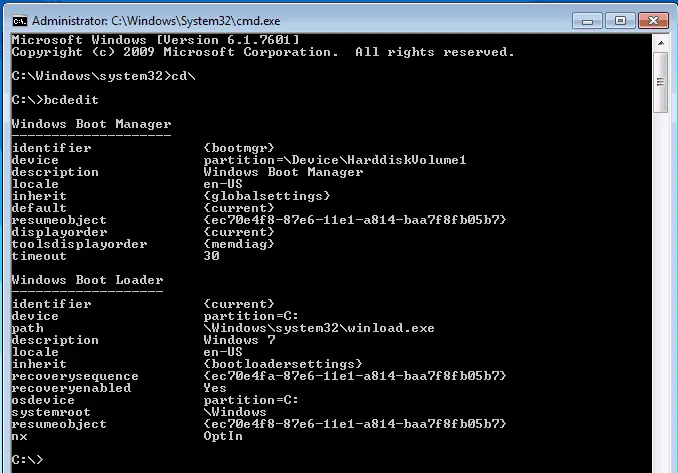
Use BCDEDIT.exe to view the current BCD.

Using BCDEDIT /create
Used BCDEDIT /create to add XP to the BCD.

Using BCDEDIT /set
Use BCDEDIT /set command to configure specific boot entry elements.

Device – identifies the partition to load Windows XP Professional from.
Path – identifies the path to load Windows XP Professional from.
Using BCDEDIT /displayorder
Use BCDEDIT /displayorder sets the display order in be used by the boot manager.
![]()
A legacy operating system loader has now been added to the Boot Configuration Database.

Reboot the computer and Window XP Professional will be available during the boot up process.
Note:
The same steps above will work to dual boot Window 2000 Professional with Windows 7. Also dual boot Windows Server 2008 or Server 2008 R2 with Windows 2000 or Windows 2003 Server.
Next we will take a look at the new Microsoft’s Security Compliance Manager (SCM) tool. Until then ride safe!
Rick Trader
Windows Server Instructor – Interface Technical Training